When it comes to your Mini Cooper, it’s essential to keep an eye out for any potential issues, such as parking lamp malfunctions. This problem can occur in various Mini Cooper models and is often signaled by a warning on your dashboard.
Fortunately, there are solutions available for you to diagnose and fix this malfunction. We’ll explore the possible causes and guide you through the troubleshooting process, ensuring your Mini Cooper’s parking lights return to their optimal functionality in no time.
What is the Mini Cooper Parking Lamp Malfunction
Experiencing a parking lamp malfunction in your Mini Cooper can be quite a headache, but don’t worry. It is common for many car owners, and there are ways to address this issue. In this section, you’ll learn about the possible reasons behind a parking lamp malfunction in various Mini Cooper model years, the warning light on the dashboard, and potential solutions to get your car’s lights working correctly again.
A malfunction in the parking lamp system of a Mini Cooper can occur for various reasons. One common issue is a bulb that has burnt out or is not correctly installed. In some cases, there have been instances where the connectors were melted, causing high amps to be pulled. It’s essential to inspect your bulb and its connections to ensure they are in good condition.
Another potential cause of a parking lamp malfunction in a Mini Cooper is a problem with the side lights or LED lights. If your car has a side light issue, the LED lights between the main xenon lights and the fog lights might be remaining on. This issue could be an electrical problem, or it may require replacing the LED lights themselves.
When a parking lamp malfunction occurs, a dashboard warning light usually alerts you. This warning light could vary in appearance, but typically it will look like a light bulb with an exclamation mark inside. If you see this warning light, take the time to inspect your car’s exterior lights, including parking lights, to identify any malfunctioning components.
If you’re unsure about how to address the issue yourself, it’s best to consult with a professional or your nearest MINI center. In the meantime, you can try simple solutions like pushing the bulb in a bit to see if the warning light clears. Just remember to be gentle to avoid causing any further damage to your vehicle.
So, the next time your Mini Cooper experiences a parking lamp malfunction, keep these tips in mind, and you’ll have a better understanding of the issue and how to tackle it. As always, seeking professional help is recommended when in doubt. Good luck, and happy driving!
Common Causes of Mini Cooper Parking Lamp Malfunction
Bulb Malfunction
Sometimes, the issue with your Mini Cooper’s parking lamp malfunction could be as simple as a faulty bulb. To check, turn on your parking lights and observe if any bulbs aren’t illuminating. It’s important to inspect your 2011-2016 Mini Cooper model bulbs regularly to ensure they are functioning correctly. If you find a non-functional bulb, you can easily replace it. To learn how to replace a Mini Cooper parking light bulb, follow this video tutorial.
Electrical Issues
Electrical problems are another common reason for Mini Cooper parking lamp malfunctions. One example is a loose connection with the lamp’s wiring or housing. This issue has been reported by owners of a 2015 Mini Cooper F56, who experienced intermittent parking light failure. If you gently tap or kick the bumper and the light turns on, this could indicate an electrical connection issue with your Mini Cooper. In such cases, it’s best to consult with a professional mechanic or an authorized Mini service center to diagnose and correct the problem.
Fuse and Battery Problems
If you are still facing issues after checking the bulbs and electrical connections, it could be related to your Mini’s fuse or battery. When a fuse related to your parking lights is blown, it can cause a malfunction warning on your dashboard. You should refer to your owner’s manual to identify the correct fuse for the parking lights and inspect it for damage or wear. If necessary, replace the damaged fuse with a new one.
Similarly, weak battery voltage might trigger the warning light in some cases. To rule this out as a possible cause, ensure that your battery is in good health and functioning properly. You can either check the battery voltage using a multimeter or seek assistance from a mechanic or service center.
By considering these common issues, you should be able to identify the source of your Mini Cooper parking light malfunction in most situations. Remember, it’s important to address any warning lights promptly to keep your vehicle functioning safely and efficiently.
Getting Started with the Repair
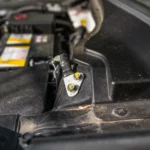
Opening the Hood
First things first, you’re going to need to open the hood of your Mini Cooper. To do this, locate the hood release lever on the inside of your car and pull it up. Once the hood is released, walk around to the front of the car, locate the secondary latch under the hood, and lift it open. Remember, it’s always a good idea to wear gloves while working with your car.
Removing the Parking Light Bulb
Now that you’ve got the hood open, you can start working on removing the parking light bulb. Locate the parking light housing on the side of the headlight assembly. Gently twist the bulb socket counterclockwise and pull it out. You should see the w5w bulb attached to the socket. Using gloves or a paper towel, grasp the bulb and gently wiggle it to remove it from the socket.
Checking the Brake Light and Turn Signal
Before replacing the parking light bulb, it’s a smart idea to check the brake light and turn signal as well. These lights are usually found in the same housing as the parking light and can also be accessed by removing the corresponding bulb socket. If you find that any of these bulbs are burnt out or malfunctioning, consider replacing them at the same time.
While performing these tasks, remember that your safety is important. If you feel unsure about any part of the process, it’s always best to consult a maintenance and light repair technician or an ASE certified professional. They can provide guidance in ensuring that your Mini Cooper’s lights are functioning correctly and keeping you safe on the road.
Replacement Options and Installation
Switching to LED
When you experience a Mini Cooper parking lamp malfunction, one great option to consider is upgrading to LED bulbs. LED headlights offer brighter light output, longer lifespan, and lower energy consumption compared to traditional halogen bulbs. Replacing your Mini Cooper Countryman parking light bulb with an LED variant is a convenient and energy-efficient choice. To install, simply remove the old bulb by turning it counter-clockwise, then insert the new LED bulb into the socket.
Understanding HID Style
Another option for a replacement bulb is the High-Intensity Discharge (HID) style. HID headlights emit a brighter and cooler-toned light compared to halogen and may provide improved visibility. However, it’s important to check your vehicle’s compatibility before opting for HID bulbs since some Mini Cooper models may require additional wiring or modifications for proper installation.
After installing the new bulb, test your parking lights to ensure they are functioning correctly. With these straightforward steps, you’ll restore your Mini Cooper’s parking lights to optimal performance in no time.
Conclusion
Nice job on learning about Mini Cooper parking lamp malfunctions! You’ve discovered some potential causes, such as melted connectors and intermittent errors. Remember to check your lamps and possibly consult a technician if the issue persists. Now you can confidently handle these issues and keep your Mini Cooper shining bright!