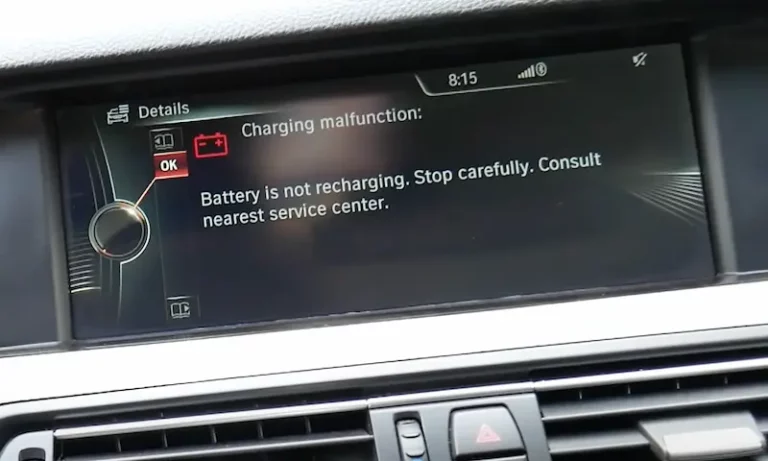
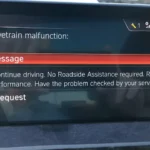
Mini Cooper vehicles may sometimes experience a charging malfunction, leaving you with a dying battery or overworked engine. This issue can be caused by a variety of factors, from simple fixes like corroded battery terminals to more complex problems related to the charging system.
Understanding the reasons behind a charging malfunction in your Mini Cooper can help you effectively troubleshoot and find the right solutions. Let’s dive into the topic and explore some of the most common causes that might be affecting your vehicle’s charging system.
Common Causes of Charging Malfunction
Battery-Related Issues
One possible cause of a charging malfunction in your Mini Cooper could be an issue with the battery itself. If your battery is old or not holding a charge, it’s time to consider getting a new battery. Keep an eye on the voltage and ensure it’s within the appropriate range. Additionally, check the condition of the battery cables and make sure they’re securely connected. A bad ground connection or corroded cables can also lead to charging issues.
Alternator Faults
Another common cause of charging malfunctions in Mini Coopers is a faulty alternator. The alternator is responsible for charging your battery while the engine is running. If it fails to provide the proper voltage, this can lead to the battery not charging. To diagnose this issue, use a multimeter to check for voltage output from the alternator. If it’s below the expected range, you may need to have the alternator repaired or replaced.
Issues with Electrical Components
Electrical components play a vital role in your Mini Cooper’s charging system. If any of these components are damaged or malfunctioning, it can cause issues with the charging process. Key components to check include the voltage regulator, fuses, and wiring connections to the alternator and battery. If you find any damaged or loose connections, make sure to address them promptly to restore the charging functionality of your Mini Cooper.
By taking the time to inspect and maintain the various components of your vehicle’s charging system, you can help prevent charging malfunctions and keep your Mini Cooper running efficiently.
How to Diagnose Mini Cooper Charging Issues
Using a Multimeter
To diagnose Mini Cooper charging issues, start by using a multimeter to test the electrical system’s voltage. Set your multimeter to the DC voltage setting and place the probes on the positive and negative battery terminals. A fully charged battery should read around 12.6 volts. If you see a voltage much lower than this, it’s an indication of a possible charging issue.
Identifying corroded and ground connection problems
Inspect the battery terminals for signs of corrosion. Corrosion appears as a white, powdery substance and can lead to poor electrical connections, resulting in charging issues. Clean the terminals using a wire brush and baking soda solution.
Furthermore, check for any loose or corroded connections within the entire electrical system. Make sure all cables and connectors are securely tightened and replace any corroded wires as needed.
Detecting an alternator fault
An alternator fault can prevent the battery from charging correctly. While the engine is running, use your multimeter to measure the voltage between the alternator’s positive and negative terminals. A properly functioning alternator should output around 13.8 to 14.2 volts. A lower reading suggests a problem with the alternator, which may need to be repaired or replaced.
Checking the battery state of charge
To determine the battery’s state of charge, perform a load test using your multimeter. Turn off the vehicle and load the battery by turning on the headlights for two minutes. After the two minutes, turn off the headlights and wait a minute before measuring the voltage again. A healthy battery should maintain a voltage above 12.2 volts. If the voltage drops significantly during or after the load test, the battery itself could be the cause of the charging issue and may need to be replaced.
By following these steps, you can diagnose and address your Mini Cooper’s charging problems effectively and help maintain your vehicle’s overall health.
Step-By-Step Guide to Fixing the Problem
In this section, we will discuss how to address the common issue of a Mini Cooper battery not charging. We will explore three solutions: replacing the battery, cleaning the battery terminals, and dealing with a faulty alternator.
Replacing the Battery
The first step in addressing the issue is to determine whether your battery is faulty or not. If your battery is old or has been showing signs of wear and tear, it’s time to consider a replacement. To replace the battery:
- Turn off your Mini Cooper and remove the key from the ignition.
- Open the hood and locate the battery.
- Using a wrench, loosen the bolts holding the battery terminals in place.
- Carefully remove the battery terminals, starting with the negative (-) terminal, followed by the positive (+) terminal.
- Lift the old battery out of the car and dispose of it properly.
- Install the new battery in the battery tray, taking care to ensure the orientation is correct.
- Reattach the positive terminal first, and then the negative terminal, tightening the bolts with a wrench.
Cleaning the Battery Terminals
Corroded battery terminals can cause issues with charging and overall performance. To clean the terminals:
- Prepare a mixture of water and baking soda (1 cup water mixed with 1 tablespoon of baking soda).
- Dip a wire brush into the mixture and scrub the terminals of the battery, removing any visible corrosion.
- Rinse the terminals with clean water and dry them with a clean cloth.
- Apply a thin layer of dielectric grease to the terminals to help prevent future corrosion.
- Reattach the terminals to the battery, ensuring a tight connection.
Dealing with a Faulty Alternator
If the battery and terminals are in good shape, but your Mini Cooper still isn’t charging, a faulty alternator could be the culprit. To address this issue:
- Inspect the alternator for signs of wear or damage, such as cracked belts or fluid leaks.
- Use a multimeter to test the voltage output of the alternator. If the output is outside the normal range, it indicates a malfunctioning alternator.
- If necessary, replace the faulty alternator with a new one, following the manufacturer’s guidelines and instructions.
By addressing these issues and following the steps outlined above, you can resolve your Mini Cooper’s charging problem and keep your vehicle on the road.
Conclusion
In dealing with a Mini Cooper charging malfunction, a few potential culprits could be responsible. Checking the battery, alternator, and wiring harness can help pinpoint the issue.
Armed with this knowledge, you can confidently assess and address the problem. By taking the appropriate troubleshooting steps, you’ll soon have your Mini Cooper back up and running at optimal performance. And remember, always consult a professional mechanic if you’re unsure or uncomfortable tackling repairs yourself.

