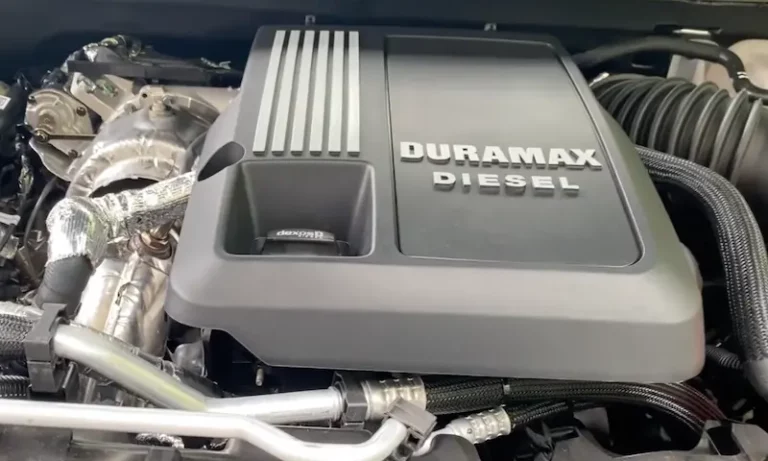
Your Duramax engine relies heavily on the NOx sensor to regulate emissions and maintain optimal performance. This component is critical for monitoring the levels of nitrogen oxides in your truck’s exhaust system. Occasionally, you may encounter issues that require a reset of the NOx sensor to return your diesel engine to its best condition.
Understanding the Duramax NOx sensor reset procedure is a handy skill that can save you time and money. It involves checking the readings of the NOx sensors and comparing them to gas analyzer measurements to ensure your vehicle’s emissions system is functioning properly. If you find yourself needing to replace or reset the sensors, following the correct steps is crucial for a successful fix.
Understanding NOx Sensors in Duramax Engines
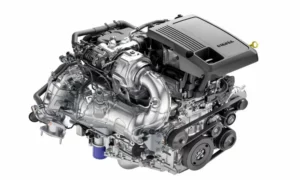
NOx sensors are critical components in the emissions systems of your Duramax diesel engine, ensuring reduced environmental impact by monitoring exhaust gases.
Role and Importance of NOx Sensors
Your Duramax engine relies on NOx sensors to regulate and reduce the amount of nitrogen oxides released into the atmosphere. These sensors constantly analyze the exhaust gas composition and provide feedback to the engine’s computer. This process is crucial for meeting emissions standards and for the proper operation of the emissions systems, helping to maintain air quality.
NOx Sensor 1 and Sensor 2: Functions and Differences
The NOx sensor 1, positioned upstream of the diesel particulate filter (DPF), monitors the amount of nitrogen oxide in the exhaust gas directly after it is produced during combustion. This sensor plays a pivotal role in adjusting engine settings to control NOx output.
In contrast, Sensor 2 is situated downstream of the DPF. Its job is to assess the effectiveness of the DPF by measuring NOx levels post-filtration. Understanding the difference between the two sensors helps you to troubleshoot issues with your diesel engine’s emissions system more effectively.
Pre-Reset Preparation
Before you begin the reset procedure for your Duramax’s NOx sensor, it’s critical to properly prepare to ensure a smooth process. This preparation involves identifying your specific Duramax model, understanding the diagnostic tools needed, and checking for NOx sensor codes through the vehicle’s system.
Identifying Your Duramax Model
To correctly reset the NOx sensor on your Duramax, you need to know your truck’s model as the procedure may vary slightly between different versions. Locate your Vehicle Identification Number (VIN), which can be found on the driver’s side dashboard or the driver’s side door frame. The VIN will help you identify whether you have an LML (2011-2016 models) or L5P (2017-present models) Duramax engine, as these models might have different reset procedures.
Diagnostic Tool Overview
You’ll need a reliable diagnostic tool to reset the NOx sensor properly. This tool will communicate with your truck’s Engine Control Module (ECM) or Engine Control Unit (ECU) to clear any trouble codes and reset the sensor. Ensure that your diagnostic tool is compatible with your Duramax model and can perform a NOx sensor reset. Some widely recognized tools are the Snap On Solus Ultra or similar scanners that are capable of interfacing with Duramax systems.
Checking NOx Sensor Codes
Before resetting, use your diagnostic tool to check for any NOx sensor codes. These trouble codes trigger a check engine light and indicate issues with your NOx sensor that need to be addressed. Ensure your Duramax is in a safe location, turn off the engine, and connect the diagnostic tool to your OBD-II port, usually located under the dashboard on the driver’s side. Follow your scanner’s instructions to retrieve the NOx sensor codes, which are essential for pinpointing the issue and verifying successful reset upon completion.
The Reset Procedure: Step by Step
In this section, you’ll learn how to access your Duramax vehicle’s emissions system to reset the NOx sensors. You’ll follow a clear, step-by-step process and verify that the reset was successful, ensuring your vehicle runs smoothly and remains compliant with emissions regulations.
Accessing the Emissions System
First, you’ll need to locate the Diagnostic Instrument Cluster (DIC) within your vehicle. This is usually found on the dashboard and is your gateway to interacting with the vehicle’s diagnostic systems. Once you’ve located the DIC, ensure your vehicle is in a safe and stable condition for performing diagnostics; this often means parking in a secure area and having the engine turned off.
NOx Sensor Resetting Process
To initiate the NOx Sensor Resetting Process, you’ll interact with the DIC. Typically, you’re looking for options like ‘Diagnose’ or ‘Vehicle Status’ within the DIC menus. Follow the on-screen instructions to navigate to the ‘Emission System’ settings. Once there, you may be prompted to execute the reset procedure for the NOx sensors. This process may involve clearing any trouble codes that have triggered a check engine light prior to the reset.
Verifying the Reset Success
After you’ve performed the reset procedure, it’s important to verify that it was successful. Start your vehicle and observe the DIC; it should no longer display any NOx sensor-related error messages. For a more thorough confirmation, you can use specific diagnostic tools to read live data from the NOx sensors and ensure they are operating within the expected parameters.
Post-Reset Actions
After you’ve completed the NOx sensor reset on your Duramax, it’s important to ensure that the sensor and emissions system are functioning correctly. This involves a couple of critical steps, which include conducting a test drive and monitoring the NOx sensor performance to confirm successful reset and calibrations.
Conducting a Test Drive
To verify the reset, take your vehicle for a test drive. While driving, pay attention to the vehicle’s performance especially if the emissions system goes into limp mode, which can signal an unresolved issue. If the vehicle drives smoothly without entering limp mode, it’s an initial sign of a successful reset.
Monitoring NOx Sensor Performance
Post-reset, keep a close eye on your NOx sensor performance. Look at the diagnostic tool’s real-time data to see that NOx levels are within normal ranges. This critical step ensures that the sensor is relaying accurate information to your vehicle’s onboard computer, allowing you to address any discrepancies before they impact your vehicle’s emissions compliance or engine efficiency.
Troubleshooting Common NOx Sensor Issues
When your vehicle’s dashboard lights up with an engine code related to the NOx sensor, it signifies an issue that needs addressing to maintain emission standards and vehicle performance. Below are some effective strategies to tackle different aspects of NOx sensor problems.
Resolving Malfunction Codes
If your vehicle is displaying malfunction codes related to the NOx sensor, the first step is to use a diagnostic scanner to retrieve and understand the codes. This will often guide you to the specific sensor issue, whether it involves the sensor’s ability to detect NOx levels accurately or a communication fault with the vehicle’s ECU.
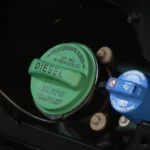
Handling DEF and DPF Related Issues
DEF (Diesel Exhaust Fluid) and DPF (Diesel Particulate Filter) are integral to reducing emissions in diesel engines. If your system indicates a NOx sensor problem, it’s often related to DEF quality or DPF clogging. Ensuring the DEF is at the correct level and not contaminated is crucial. If the DPF is clogged, a regeneration cycle might be required. Some scanners can initiate this cycle, clear related error codes, and perform a NOx sensor reset as needed.
Wiring and Heater Problems
Your NOx sensor’s performance can also be hindered by wiring or heater issues. Inspect the wiring harness for any signs of damage or corrosion, which can interfere with the sensor’s functionality. The sensor’s heater element is essential for proper operation, especially in cold weather when failing heaters are more prevalent. Check the connections to the sensor’s heater circuit, and if you’re experiencing repeated heater circuit codes, it may indicate that the sensor requires replacement.
NOx Sensor Replacement Tips
In working with your vehicle’s emissions system, understanding when and how to replace NOx sensors can save you time and ensure your diesel engine runs efficiently. Here are some key tips to guide you through the replacement process.
When to Consider Replacing NOx Sensors
Your vehicle will generally alert you to failing NOx sensors with a check engine light or a specific trouble code during a diagnostic test. It’s crucial to replace sensors that are no longer performing efficiently, as they are responsible for monitoring the level of nitrogen oxide your diesel engine emits. If you notice poor engine performance or decreased fuel economy, these could also signal that your NOx sensors need attention.
Choosing the Correct Replacement Sensors
When selecting new NOx sensors, ensure you’re getting the correct replacement sensors for your specific vehicle model. Compatibility is key, as the sensors need to accurately communicate with your vehicle’s control system. High-quality sensors tend to provide better longevity and performance, so opt for OEM parts or equivalents from reputable suppliers.
Installing New NOx Sensors
Installation of NOx sensors typically involves accessing the exhaust system and could require special tools. Begin with your vehicle’s engine switched off and disconnected from the battery to ensure safety. Precise steps for installation vary by vehicle, but generally, you will be replacing both the front and rear NOx sensors. It’s vital to follow your vehicle’s service manual closely, or if you’re not comfortable with the procedure, seek the help of a professional mechanic. After installation, a reset or relearn procedure may be necessary to sync the new sensors with the vehicle’s computer system.
Advanced Diagnostics and Monitoring
When tackling the intricate systems of a Duramax engine, specialized tools such as the CTS3 and iDash offer precise monitoring and diagnostics for NOx sensors, giving you an edge in both understanding and optimizing engine performance under various conditions.
Using the CTS3 and iDash for NOx Monitoring
- Using the Edge Insight CTS3: The CTS3 is a cutting-edge performance monitor that can diagnose and display real-time data from your NOx sensors. It provides a comprehensive view of engine parameters, allowing you to keep tabs on NOx levels. Utilizing the CTS3, you gain insight into how your sensors are functioning, which assists you in timely decision-making for resets or maintenance.
- Leveraging the Banks Power iDash: Similarly, the iDash by Banks Power serves as a diagnostic and monitoring tool, specifically designed for diesel engines. It enables you to view NOx sensor data and other critical engine diagnostics in a user-friendly format. With the iDash, not only can you diagnose potential issues, but you can also log data and track performance over time.
Adjustments for Temperature and Altitude
- Temperature Considerations: Your NOx sensors’ performance can fluctuate with temperature changes. The CTS3 and iDash facilitate monitoring these variations. It is essential to consider the operating temperature, as extreme cold or heat could affect sensor accuracy. By consistently monitoring, you can ensure that temperature is not adversely impacting your NOx readings.
- Altitude Adjustments: Altitude can also impact the NOx sensor performance. Using tools like the CTS3 or iDash, you can observe how elevated locations may alter your engine’s emissions and adjust your diagnostics accordingly. Close monitoring allows for optimal engine tuning and sensor performance, given the thinner air at higher altitudes which affects combustion and, subsequently, NOx levels.