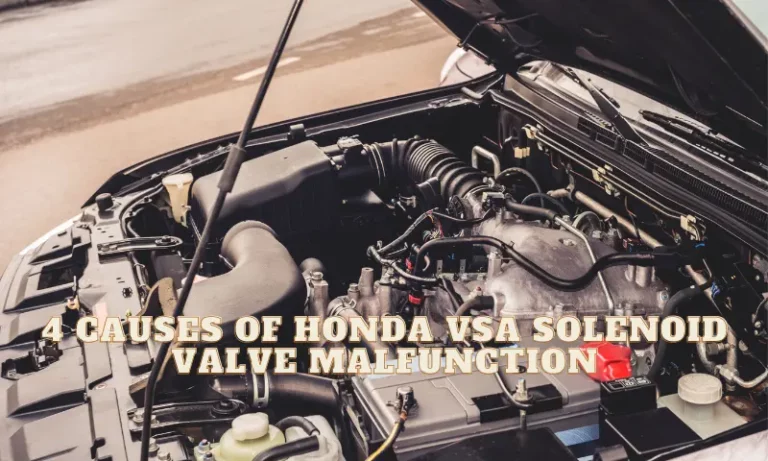
If your Honda’s dashboard just lit up like a Christmas tree—VSA light, ABS warning, brake light, and maybe even the steering alert—you’re likely dealing with a VSA solenoid valve malfunction. Before you panic about expensive repairs, let’s break down what’s actually happening and explore your options beyond the dealership’s $2,500 quote.
What Is the VSA System and Why Does It Matter?
Your Honda’s Vehicle Stability Assist (VSA) system is like having an invisible co-pilot. It constantly monitors wheel speeds, steering angle, and how your car’s actually moving versus where you’re pointing it.
When things don’t match up—say you’re sliding on wet pavement—the VSA system kicks in. It selectively brakes individual wheels and can even dial back engine power to keep you from spinning out.
The Two-Part System
The VSA modulator combines electronics and hydraulics in one unit:
The Electronic Control Unit (ECU) processes sensor data and makes split-second decisions about when to intervene.
The Hydraulic Control Unit (HCU) contains the pump motor and solenoid valves that actually apply the brakes without you touching the pedal.
Here’s the kicker: when you see error code 121-11 (the most common Honda VSA solenoid valve malfunction code), the problem isn’t usually the valve itself. It’s the electrical connection to that valve.
Why Honda VSA Modulators Fail So Often
If you own a 2008-2017 Honda Accord, CR-V, Odyssey, Pilot, or Civic, you’re part of an unfortunate club. These models share a common weakness in their VSA modulator design.
The Real Culprit: Wire Bond Fatigue
Inside your VSA module, tiny aluminum wires connect the circuit board to the solenoid valve pins. These connections were made using ultrasonic bonding—efficient for manufacturing, terrible for longevity.
Your engine bay cycles between freezing temps and over 200°F. Add constant vibration from the road, and those aluminum wires eventually snap. Usually happens between 70,000 and 120,000 miles.
The frustrating part? The solenoid valve works fine. The computer just can’t talk to it anymore because the wire broke.
This isn’t a “cold solder joint” like many people call it—it’s a fatigue fracture of a connection that was originally sound. But the repair process is similar: replace those fragile aluminum connections with robust soldered copper wire.
Recognizing the Warning Signs
The Honda VSA solenoid valve malfunction announces itself dramatically:
- Multiple dashboard lights illuminate simultaneously (VSA, ABS, brake, EPS)
- Normal brake pedal feel in most cases—your brakes still work
- Heavier steering because the power steering system lost data from the VSA module
- Tire pressure light stays on (2013+ models with indirect TPMS)
- AWD disabled on CR-V and Pilot models
Some owners report a spongy brake pedal, but that’s usually air in the lines rather than the VSA fault itself.
Model-Specific Quirks
2013-2017 Accord owners: Your Forward Collision Warning and Lane Departure systems will also fail. They rely on the VSA module.
CR-V drivers: You might experience mysterious battery drain if you engage the electronic parking brake right before shutting off the engine. There’s a software bug that keeps the VSA module awake.
Odyssey and Pilot owners: You’re more likely to see the spongy pedal issue because these heavier vehicles stress the hydraulic system more.
Decoding the Error Codes
When you scan your Honda, you’ll typically see one or more of these codes:
| Code | What It Actually Means |
|---|---|
| 121-11 | VSA solenoid valve electrical connection lost—the classic wire bond failure |
| 66-1 / 66-11 | Brake pressure sensor circuit failed (also internal to the module) |
| 31-11 through 38-11 | ABS solenoid valves have the same wire bond issue, just different wheels |
| 61-1 | Low voltage detected—check your battery before condemning the module |
| 81-1 | Internal processor malfunction or yaw sensor failure |
The DTC 121-11 code is the smoking gun for the wire bond failure affecting thousands of Hondas.
Can You Still Drive Your Honda?
Your regular brakes work fine. The hydraulic system doesn’t depend on the electronics for basic stopping power.
What you’ve lost:
- Anti-lock braking (wheels can lock up in panic stops)
- Traction control (spinning wheels on slick surfaces)
- Stability control (correcting slides and skids)
- Enhanced steering assist
Drive conservatively in good weather? You’re probably okay for a while. But wet roads, snow, or emergency maneuvers become genuinely dangerous. You’re essentially driving a 1990s car without modern safety systems.
Your Three Repair Options
Option 1: Dealer Replacement ($2,000-$2,500)
The dealership will quote you $1,400-$2,200 just for the VSA modulator part, plus labor for removal, installation, bleeding, and programming.
Pros: New part, dealer warranty, guaranteed compatibility.
Cons: The new module might fail eventually with the same wire bond issue. And for a 10-year-old car, this repair often costs 30-40% of the vehicle’s value.
Option 2: Professional Rebuilding ($250-$400)
Companies like Module Master, Circuit Board Medics, and XeMODeX specialize in fixing these modules. They’ll open your unit, replace the broken wire bonds with proper soldered connections, test everything, and send it back.
The process:
- You remove your VSA module (or have a mechanic do it)
- Ship it to the rebuilder
- They repair and return it in 3-7 days
- Reinstall and bleed your brakes
Pros: Saves about $2,000, typically comes with a 5-year or lifetime warranty, keeps your original VIN-coded module so reprogramming often isn’t needed.
Cons: Your car’s down for a week. You need to arrange the removal and reinstallation.
Many owners on Reddit report excellent experiences with these rebuilders. The repair usually outlasts the original because they use better materials.
Option 3: DIY Repair (For the Brave)
If you’re handy with electronics and have a good soldering setup, you can fix this yourself.
The basics:
- Carefully cut open the sealed module casing
- Locate the broken wire connections under a magnifying glass
- Solder copper wire bridges to bypass the failed aluminum bonds
- Reseal the unit with high-grade epoxy
Major risks: You can permanently damage the module. If your repair fails while driving, you lose all braking modulation. This isn’t a beginner project.
That said, dozens of YouTube tutorials show successful DIY repairs. Just understand that if you mess up, you’re buying a new module anyway.
Getting the Diagnosis Right
Before you spend money on repairs, confirm the actual problem.
Start Simple
Check your battery first. A weak battery causes voltage drops that trigger false VSA codes. Load test it. If you see code 61-1 specifically, this is often the real culprit.
Verify brake fluid level. The sensor is sensitive. Low fluid triggers the brake warning light even if the VSA module is fine.
Inspect the wiring harness going to the module. Rodents love engine bays. Corrosion in the connector can mimic internal failures.
Scan for Codes Properly
Generic OBD-II readers won’t cut it. You need a scanner that reads Honda-specific chassis codes. Many auto parts stores will scan these for free.
What to look for in live data:
- Brake pressure sensor should show 0V with pedal up, rising smoothly when pressed
- All four wheel speed sensors should read identically when driving straight
- Bidirectional tests can command solenoids to click—if they don’t respond, the internal failure is confirmed
The Old-School Paperclip Method
Don’t have a fancy scanner? You can use Honda’s Service Check Signal shortcut.
Grab a paperclip. Short pins 4 and 9 in your OBD-II port with the ignition on. The lights will blink out codes—long blinks are tens, short blinks are ones. Six long, six short? That’s code 66.
You can also try the “brake pedal dance” reset procedure while the pins are shorted. This clears temporary glitches.
But here’s the thing: If the light returns immediately after clearing it, you’ve got a hard fault. The wire bond is broken, and no reset procedure will fix that.
After the Repair: Critical Next Steps
Whether you went with a new module, rebuild, or DIY fix, you’re not done yet.
You Must Calibrate the System
The VSA module stores “zero” values for its sensors—steering angle, yaw rate, lateral acceleration. Disturbing the module invalidates these.
With a scanner: Park on a perfectly level surface, center the steering wheel, and run the “VSA Sensor Neutral Position Memorization” procedure.
Without a scanner: Some models allow a manual process involving the VSA Off button, but it’s unreliable. Spend the $100 to have a shop do the calibration properly. Your safety depends on it.
Brake Bleeding Is Mandatory
If you removed the hydraulic unit, air entered the system. A regular brake bleed gets the lines and calipers, but air trapped in the VSA module’s internal accumulator needs special attention.
You’ll need a scanner to cycle the pump and valves during bleeding. Otherwise, you’ll have a spongy pedal forever.
Understanding the Bigger Picture
This isn’t just bad luck. Federal safety regulations mandated stability control on all vehicles under 10,000 pounds starting in 2011. Honda’s implementation during this era used a manufacturing process (aluminum wire bonding) that couldn’t handle the thermal and vibrational stress of real-world use.
The math is simple: Heat cycles + vibration + dissimilar materials = metal fatigue.
Newer models may have addressed this with updated bonding techniques, but Honda has never acknowledged the widespread nature of this failure. There’s no recall for the 2008-2017 generation VSA modulators, even though code 121-11 affects tens of thousands of vehicles.
Contrast this with Honda’s 2023 recall for actual mechanical VSA valve failures in newer models—they’ll fix a defect affecting thousands, but not the electronic plague affecting hundreds of thousands from the prior decade.
What This Means for Honda Owners
If you’re shopping for a used 2008-2017 Honda, factor in a potential $300-$2,500 VSA repair. It’s not “if” but “when” for many of these vehicles.
If you already own one and the lights just came on, don’t let the dealer scare you into an immediate $2,500 repair. Get it diagnosed properly. Consider the rebuild option—it’s what most informed owners choose.
And if you’re mechanically inclined with good soldering skills, the DIY route works. Just understand the risks.
The good news? Once properly repaired with upgraded connections, these modules typically outlast the original. The rebuilders learned from Honda’s mistake and use materials that can actually handle the stress.
Your Honda’s basic brakes work fine even with the VSA light on. But you bought a car with modern safety systems for a reason. Getting them working again—affordably—keeps you and your family safer on the road.