You’re driving along when suddenly an ominous “Check Charging System” light illuminates your Honda’s dashboard. Your heart sinks as you wonder if you’ll make it to your destination or be left stranded on the roadside. This warning isn’t just an annoyance—it’s your vehicle’s way of alerting you to potential electrical failure that could shut down your engine without warning.
What Does the “Check Charging System” Warning Mean?
When your Honda displays this warning, it’s telling you something’s wrong with its electrical charging system. In normal operation, your alternator should produce around 14-14.5 volts while your engine runs, keeping your battery charged and powering all electrical components. When voltage drops below this threshold, your car triggers the warning light before complete electrical failure occurs.
Ignoring this warning is risky business. Without a functioning charging system, your Honda will eventually run solely on battery power without recharging. This leads to complete battery discharge, engine shutdown, and potentially being stranded with no warning.
Common Causes of Honda Charging System Problems
Failing or Worn Battery
Your battery is the foundation of your Honda’s electrical system. Several battery issues can trigger the charging system warning:
- Age-related deterioration: Most batteries last 3-5 years before their capacity significantly decreases. Even with a properly functioning alternator, an old battery can trigger the warning.
- Connection problems: Corroded, loose, or damaged terminals prevent proper electrical flow. Even a new alternator and battery will have issues if the connections are poor.
- Excessive parasitic drain: Components drawing power when your vehicle is off can deplete the battery. Honda’s guidelines indicate normal parasitic draw should be under 0.02 mA—anything higher signals a problem.
Alternator Issues
The alternator generates electricity while your engine runs. Common alternator problems include:
- Internal component failure: Worn brushes, damaged diodes, or failed voltage regulators reduce or create inconsistent charging output.
- Drive belt problems: A loose, worn, or broken serpentine belt prevents the alternator from spinning properly, reducing electrical generation.
- Connection issues: Damaged wiring or loose connections can interrupt charging flow, causing intermittent problems that trigger warnings.
Battery Sensor Malfunctions
Modern Hondas use a dedicated battery sensor to monitor battery condition:
- Sensor failures: The sensor on the negative terminal can malfunction, sending incorrect data to your vehicle’s computer.
- Poor sensor connections: Loose connections between the sensor and terminal can cause erratic readings and false warnings.
Many Honda owners, particularly those with 2016 Accords, have resolved persistent charging system warnings by replacing this sensor (part number 38920-T2A-A04), which costs around $49 at dealerships.
How to Diagnose Honda Charging System Problems
Basic Voltage Testing
A digital multimeter is your best friend for checking charging system health:
- Battery test (engine off): A healthy battery should show between 12.2-12.6 volts with the engine off. Readings below 12 volts indicate a discharged or failing battery.
- Charging system test (engine running): With the engine running, voltage should increase to approximately 14-14.5 volts, showing the alternator is charging properly.
- Load test: Turn on headlights, climate control, and other accessories while measuring voltage to reveal charging issues that might not appear at idle.
Visual Inspection Methods
Sometimes the simplest checks reveal the problem:
- Check battery terminals for corrosion, looseness, or damage. Clean connections with a wire brush and ensure they’re properly tightened.
- Inspect alternator connections to verify the main power cable is secure and undamaged. Also check the control connector that communicates with the vehicle computer.
- Examine the battery sensor on the negative terminal for secure connection and damage. Sometimes simply disconnecting and reconnecting this sensor resolves intermittent issues.
Professional Diagnostic Approaches
For more complex issues, professionals may use:
- Circuit testing to check voltage at various points in the charging circuit to isolate failures in wiring rather than components.
- Computer system scanning to read trouble codes stored in your Honda’s computer related to charging issues.
- Component-specific testing for more definitive diagnosis than basic voltage checks.
How to Fix Honda Charging System Warning
Battery Solutions
When battery issues cause your warning:
- Charge the battery: A deeply discharged but otherwise healthy battery can often be restored with proper charging.
- Replace when necessary: For battery replacement, match the cold cranking amps (CCA) rating to Honda specifications. One owner reported battery failure when the CCA dropped from the specified 580 to the low 200s.
- Clean terminals thoroughly: Use a wire brush on battery terminals and apply a protective coating to prevent future corrosion.
| Battery Maintenance Task | Frequency | Benefit |
|---|---|---|
| Visual inspection | Monthly | Catch corrosion early |
| Terminal cleaning | Every 6-12 months | Ensures good electrical contact |
| Voltage testing | Twice yearly | Identifies weakening battery |
| Replacement | Every 3-5 years | Prevents failing battery issues |
Alternator Repairs
For alternator-related issues:
- Replace the alternator: While sometimes repairable, alternators often require complete replacement when internal components fail. Remanufactured units offer cost savings over new ones.
- Check and replace the drive belt: Always inspect and replace the drive belt when servicing the alternator to ensure proper operation.
- Repair wiring when needed: Sometimes, damaged wiring between the alternator and battery or vehicle computer requires repair rather than component replacement.
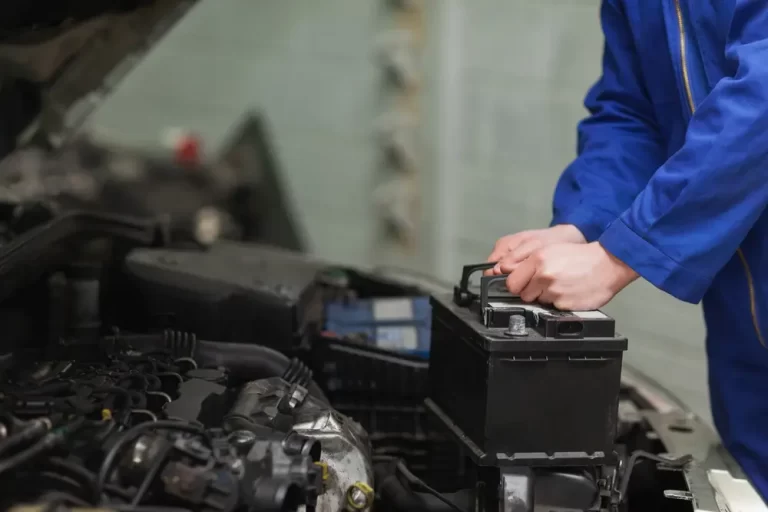
Battery Sensor Replacement
For Honda models with dedicated battery sensors:
- Locate the sensor on the negative battery terminal (it connects to the vehicle wiring harness).
- Replace using this procedure:
- Disconnect the battery (negative terminal first)
- Remove the sensor connector
- Remove the old sensor
- Install the new sensor
- Reconnect in reverse order
- Allow system reset: After sensor replacement, drive for at least 10 minutes to fully reset the system and clear the warning.
Preventing Future Charging System Problems
Routine Maintenance Tasks
Proactive maintenance prevents charging system failures:
- Regular voltage checks: Periodically test battery voltage (both at rest and with the engine running) to identify declining charging system performance.
- Annual battery testing: Have your battery tested annually, especially before extreme weather seasons, to identify weakening batteries before failure.
- Keep connections clean: Regularly inspect and clean battery connections to prevent resistance that reduces charging efficiency.
Recognizing Early Warning Signs
Before the warning light appears, watch for these symptoms:
- Dimming lights: Headlights or interior lights that dim when accessories are used suggest inadequate charging system output.
- Electrical accessory problems: Intermittent operation of power windows, audio systems, or other accessories can indicate charging system issues.
- Difficult starting: A vehicle that cranks slowly before starting often indicates a battery that isn’t being properly charged.
The Importance of Timely Repairs
Addressing charging system warnings promptly is crucial because:
- Prevents unexpected breakdowns: Fixing the issue early prevents being stranded with a dead battery.
- Protects other systems: Voltage fluctuations caused by charging system problems can damage sensitive electronic components in your Honda.
- Reduces repair costs: Early intervention often means simpler, less expensive repairs versus waiting for complete system failure.
What to Expect at the Repair Shop
If you take your Honda to a repair shop for this issue:
- Diagnostic testing: Expect technicians to perform voltage testing and computer scanning to identify the specific issue.
- Cost variations: Repairs can range from as little as $20 for cleaning connections to $500+ for alternator replacement at a dealership.
- Warranty considerations: If your Honda is under warranty, charging system issues may be covered—check your warranty documentation.
| Repair Type | Typical Cost Range | Parts vs. Labor | DIY Difficulty |
|---|---|---|---|
| Battery replacement | $120-$200 | 80% parts | Easy |
| Terminal cleaning | $0-$50 | Mostly labor | Easy |
| Alternator replacement | $350-$650 | 60% parts | Moderate |
| Battery sensor replacement | $75-$150 | 70% parts | Easy |
DIY vs. Professional Repair
Deciding whether to tackle repairs yourself depends on several factors:
- Your skill level: Battery cleaning and replacement are beginner-friendly, while alternator replacement requires more mechanical knowledge.
- Available tools: At minimum, you’ll need basic hand tools and a digital multimeter for diagnosis.
- Complexity of the issue: Simple battery issues are DIY-friendly, while intermittent electrical problems might be better left to professionals.
Long-term Reliability of Honda Charging Systems
Honda vehicles generally have reliable charging systems, but certain models have shown more frequent issues:
- Problematic years: 2016-2018 Accords have more reported battery sensor issues than other models.
- Weather impacts: Extreme heat accelerates battery deterioration, while cold weather can expose weaknesses in the charging system.
- Driving patterns: Vehicles used primarily for short trips may experience more battery-related issues as the charging system doesn’t have sufficient time to recharge the battery fully.
Addressing your Honda’s charging system warning promptly isn’t just about fixing an annoying dashboard light—it’s about ensuring your vehicle remains reliable and prevents you from being stranded. With proper diagnosis and timely repair, your Honda’s electrical system will provide years of trouble-free service, keeping all systems functioning as designed.