The Honda Civic “Tighten Fuel Cap” message is a common problem. So, there’s no need to worry if you’ve also encountered it. We will tell you how to fix the issue based on what could be its trigger.
The best part is that you probably won’t need to take your vehicle to the dealer. Check the solution out below.
How Do I Fix the Honda Civic “Tighten Fuel Cap” Message?
To fix the Honda Civic “Tighten Fuel Cap” message, you must identify the trigger first. Ensure that the fuel cap is present, in good condition, and tightly fitted. If the issue persists, reset the ECU or take the vehicle to a dealer to replace a faulty sensor or evaporator canister.
Here’s a detailed explanation for you:
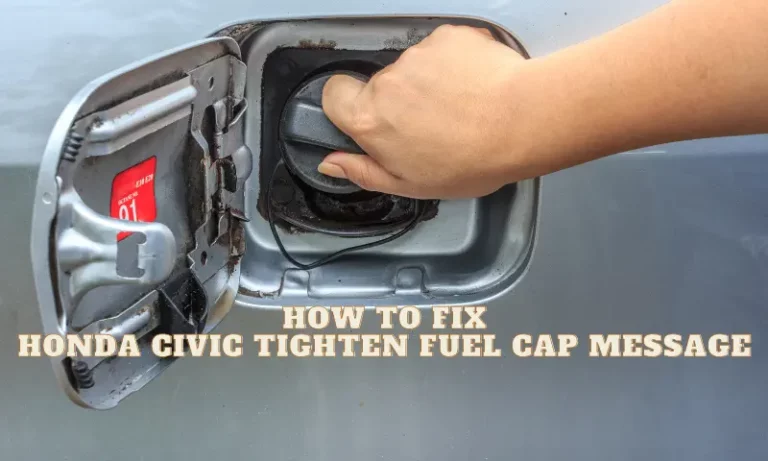
Solution #1: Check the Fuel Cap
The owner’s manual advises checking the cap and ensuring it’s present and tight. Hence, that should be the first thing to do. The fuel cap is the cause of most “Check Fuel Cap” issues on the Honda Civic.
Common fuel cap problems include a missing or loose fuel cap, which can happen after a fill-up. The cap could also be defective. In any case, you’re likely to see the warning light on your instrument cluster. Thus, examine the fuel cap and replace it if it’s defective or missing. Tighten the cap if it’s present but loose using the following steps:
- Twist it to the left until it disengages from the fill nozzle.
- Put the cap back on and line up the threads correctly.
- Twist it to the right until you hear a click.
- Drive the car normally and wait for the light to disappear after a few drive cycles.
Sometimes, the little strap (rubber seal/gasket) could be stacked in the neck or damaged. Other times, the fuel cap itself may be faulty. Either way, you must replace the broken gasket or the cap. After that, drive your car as usual and wait for the warning message to go away after about 50-100 miles.
Note: AVOID replacing the gas cap or gasket yourself if the vehicle is under warranty. It’s best to go to your dealer and have them take care of the issue. DIY replacement could interfere with the warranty.
Solution #2: Reset the ECU
If the light doesn’t turn off after implementing Solution #1 above, the problem could result from a code error. Resetting the Electronic Control Unit can clear the error, so the light disappears. Here’s how to reprogram the ECU:
- Park the vehicle and turn it off.
- Open the hood and locate the battery
- Disconnect the negative terminal for about 15 to 30 minutes
- Re-attach the terminal and start the engine.
The light should clear. If not, it indicates the problem still exists, and you must try Solution #3 below. Sometimes you might need to leave the battery disconnected overnight to give the control module enough time to reset.
Solution #3: Check for a Faulty Sensor
The fuel tank pressure sensor is a critical component of the fuel pump system. The manufacturer usually mounts it inside or on top of the fuel tank. This sensor reads the pressure in the fuel tank mainly during EVAP system monitoring.
Your vehicle’s onboard computer (Powertrain Control Module or PCM) uses the pressure readings to detect fuel vapor leaks. If the sensor fails or sends incorrect readings, you’ll see the “Check Fuel Cap” message on your dashboard. However, sometimes you can encounter the “Tighten Fuel Cap” message instead. It depends on the nature of the problem (sensor failure). To fix it:
- Perform a pinpoint voltage test to determine whether the sensor is faulty
- Remove the fuel tank
- Replace the defective sensor and reinstall the tank
- The light should turn off after a few driving sessions
Note: Replacing a defective sensor may be challenging for a DIYer. Taking your vehicle to a dealer or a reliable mechanic would be best.
Solution #4: Replace a Defective Evaporator Canister
The Evaporator canister is another Evaporative Emission Control system (EVAP) part. An EVAP system helps to prevent fuel vapor from escaping from the fuel system into the atmosphere. It’s a requirement on all gasoline-powered vehicles manufactured from the 1970s.
The system typically consists of a fuel tank, sealed gas cap, and valves and hoses. It also features an evaporator canister (EVAP vapor storage) full of charcoal. This canister is a wear-and-tear tool, which can develop faults and cause leak issues. When that happens, the PCM will alert you by turning on a warning light. Sometimes the alert could be the “Tighten Fuel Cap” message.
Evaporator canister damage is a rare problem, and you should take the vehicle to the dealer for part replacement. The procedure may be free of charge if your vehicle is under warranty.
FAQs
Is Driving With a “Tighten Fuel Cap” Message Safe?
Driving with a “Tighten Fuel Cap” message may not pose an immediate danger. However, you should rectify the problem as soon as possible to stop the leak in the EVAP system. Gasoline vapor is highly combustible, and leaks are a common car fire trigger. Additionally, inhaling the gas can cause severe health complications.
Does a Defective Fuel Cap Trigger the Check Engine Light?
A defective fuel cap causes fuel vapor leaks and can allow dirt and grime into the fuel system. The vapors and the contamination can trigger errors within the emission system and impacts your vehicle’s proper functioning. Eventually, the check engine light would turn on.
Conclusion
The Honda Civic “Tighten Fuel Cap” message may have appeared on your dashboard for the first time. Nevertheless, it’s a common problem among the Civics. As mentioned, you should ensure the fuel cap is in good condition and tightly fitted. That’s what the manufacturer says in your owner’s manual.
The good thing about this issue is that there’s no immediate danger. Thus, you don’t need to pull off the road somewhere at night to check the cap. If checking the cap doesn’t resolve the problem, try the other solutions discussed above and turn off the annoying message!