Is your car scanner showing power but refusing to read any data? You’re dealing with one of the most frustrating diagnostic issues—when your OBD2 port has power but no communication. This problem can stop you from diagnosing check engine lights, running emissions tests, or monitoring your vehicle’s performance. Let’s explore why this happens and how to fix it yourself before heading to a mechanic.
What Exactly Is Happening When OBD2 Has Power but No Communication
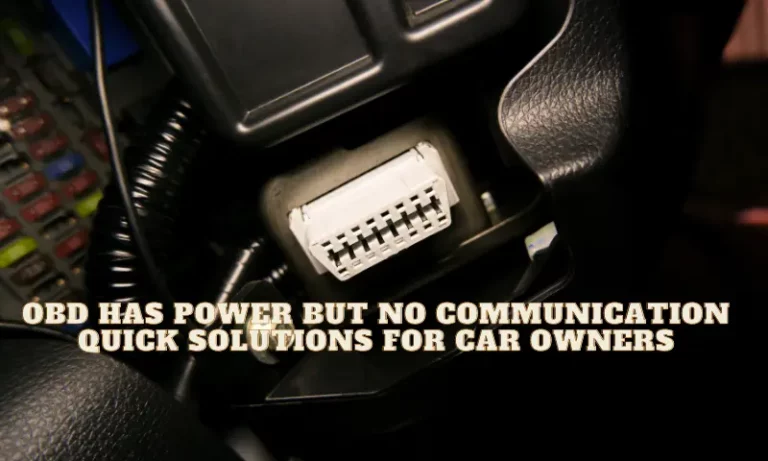
When your OBD2 scanner lights up but shows “no communication,” “error,” or simply won’t connect, it indicates your diagnostic port is receiving power through pin 16 (12V) but can’t establish a data connection with your vehicle’s computer systems. This means the electrical pathway for data exchange between your car and the scanner is broken somewhere along the line.
The OBD2 system uses specific pins for power, ground, and various communication protocols. For proper function, all relevant pins must have good connections and the correct signals flowing through them.
Common Causes of OBD2 Communication Failure
Ignition Position Issues
Sometimes the fix is remarkably simple. Many vehicles require specific key positions for proper OBD2 communication. Before assuming there’s a complex problem:
- Make sure your ignition key is in the “ON” or “RUN” position (not just “ACC”)
- Wait at least 30 seconds after turning the key before connecting your scanner
- Allow all dashboard lights to complete their startup sequence
- For some vehicles, the engine needs to be running for communication
I’ve seen countless cases where simply turning the key one more click solved what seemed like a complicated issue.
Damaged or Loose Connector Pins
The OBD2 port in your vehicle contains multiple pins that can become damaged or loose over time. This is especially common in vehicles that have had multiple scan tools connected or in older vehicles where the connector has degraded.
To inspect and fix connector pin issues:
- Locate your OBD2 port (typically under the dashboard on the driver’s side)
- Use a flashlight to visually inspect the connector pins
- Look for pins that appear recessed, bent, or corroded
- Gently use a small screwdriver or pin to carefully push loose pins back into position
- For corroded pins, use electrical contact cleaner and a small brush
Bent pins are one of the most common causes of communication problems that still allow power to flow through.
Blown Fuses
Your vehicle has multiple fuses protecting various electrical circuits. The OBD2 system typically has dedicated fuses that might be labeled as “DLC,” “OBD,” “DATA,” or something similar.
Check these potential fuse locations:
- Engine compartment fuse box
- Interior fuse panel (often near the driver’s knee area)
- Secondary fuse blocks (some vehicles have multiple)
A blown fuse can prevent communication while still allowing power to reach pin 16 of the OBD2 port. Always check your vehicle’s manual for specific fuse locations and descriptions.
Wiring Problems and Rodent Damage
Wiring issues between your OBD2 port and the vehicle’s computer modules can cause communication problems while still allowing power to flow. Common wiring issues include:
- Rodent damage (mice love to chew on wiring, especially soy-based insulation)
- Broken wire inside the insulation (appears fine externally)
- Damaged splice connections
- High resistance in ground connections
To check for wiring issues:
- Inspect visible wiring near the OBD2 connector
- Look for signs of rodent activity (droppings, chewed materials)
- Check for pinched wires where harnesses pass through tight spaces
- Pay special attention to ground wires, which can corrode over time
ECU Communication Issues
Sometimes the problem isn’t with the port or wiring but with the ECU (Engine Control Unit) itself. The ECU might be:
- In a “locked” or “hung” state
- Damaged from a previous electrical issue
- Running incompatible software
- In a protection mode due to voltage issues
The most effective way to address ECU communication issues is through a reset:
- Disconnect the negative battery terminal
- Wait 15-30 minutes (allows capacitors to fully discharge)
- Press and hold the brake pedal for 30 seconds to drain residual power
- Reconnect the battery
- Try communication again
Testing Your OBD2 System With a Multimeter
Using a multimeter is the most reliable way to diagnose OBD2 communication problems. Here’s how to perform basic tests:
Power Supply Test
- Set your multimeter to DC voltage
- Connect the positive lead to pin 16 of the OBD2 connector
- Connect the negative lead to a good ground point
- With ignition in “ON” position, you should read 12-14 volts
- If voltage is present but low (below 11V), you may have a weak battery or charging system
Ground Circuit Test
- Set your multimeter to resistance (ohms)
- Connect one lead to pins 4 or 5 (ground pins)
- Connect the other lead to the negative battery terminal
- You should read very low resistance (less than 1 ohm)
- High resistance indicates a poor ground connection
Communication Line Testing
This test is more complex but can pinpoint specific protocol issues:
For CAN bus vehicles (most 2008 and newer):
- Pins 6 and 14 should show approximately 2.5V each when measured against ground
- Resistance between pins 6 and 14 should be 60 ohms (with ignition off and scanner disconnected)
For older protocols:
- J1850 vehicles: Check voltage on pins 2 and 10
- ISO vehicles: Check voltage on pins 7 and 15
| Pin Number | Function | Expected Voltage | Notes |
|---|---|---|---|
| 16 | Battery Power | 12-14V | Always has power |
| 4, 5 | Ground | 0V | Must have good connection |
| 6 | CAN High | ~2.5V at rest | Used in 2008+ vehicles |
| 14 | CAN Low | ~2.5V at rest | Used in 2008+ vehicles |
| 2, 10 | J1850 | Varies | Used in older Ford/GM |
| 7, 15 | ISO protocol | Varies | Used in older imports |
Scanner Compatibility Issues
Not all scan tools can communicate with all vehicles. This is particularly true for:
- Budget code readers with limited protocol support
- Vehicles with non-standard implementations
- Older scan tools trying to communicate with newer vehicles
- Specialized European vehicles
To determine if scanner compatibility is your issue:
- Try your scanner on a different vehicle (preferably same make)
- Try a different scanner on your vehicle
- Check the scanner manufacturer’s website for compatibility information
- Consider manufacturer-specific scanners for problematic vehicles
Professional-grade scanners have more robust communication abilities and can often connect when consumer models fail.
Protocol-Specific Troubleshooting
Different vehicles use different communication protocols. Understanding which protocol your vehicle uses can help troubleshoot more effectively.
CAN Bus (ISO 15765-4)
- Most common in vehicles 2008 and newer
- Uses pins 6 (CAN-H) and 14 (CAN-L)
- Most reliable protocol but sensitive to wiring issues
- Look for 60 ohm resistance between CAN-H and CAN-L
ISO 9141-2 and 14230 (KWP2000)
- Common in older imports (Toyota, Honda, many Europeans)
- Uses pins 7 and 15
- Often slower to initialize (can take 5-30 seconds)
- May require multiple connection attempts
SAE J1850 PWM/VPW
- Used in older Ford (PWM) and GM (VPW) vehicles
- Uses pins 2 and 10
- Often affected by electrical noise
- May require manufacturer-specific adapters for reliable connection
Step-by-Step Diagnostic Process
Follow this systematic approach to solve your OBD2 communication issues:
- Verify proper ignition position and wait time
- Inspect physical condition of OBD2 connector pins
- Check related fuses (consult your owner’s manual)
- Test power and ground with a multimeter
- Perform a battery reset if all else checks out
- Try a different scan tool if available
- Test for specific protocol signals based on your vehicle type
- Inspect wiring between the OBD2 port and ECU for damage
This methodical approach will identify most communication issues without throwing parts at the problem.
Advanced Troubleshooting Techniques
For persistent issues, these advanced techniques may help:
Bus Network Testing
For CAN bus vehicles, you can use specialized tools to monitor network health:
- CAN bus analyzers can detect communication errors
- Oscilloscopes can show signal quality issues
- Network resistance testing can find short circuits
Module Programming Issues
Sometimes, vehicle module programming can cause communication failures:
- Check for recent battery disconnections or replacements
- Look for aftermarket modifications that might interfere with bus networks
- Consider if any recent software updates were performed
Manufacturer-Specific Quirks
Some vehicles have unique requirements for OBD2 communication:
- Many Chrysler vehicles require the security gateway module to be functioning
- Some European vehicles go into sleep mode and need “wake up” procedures
- Certain Nissan/Infiniti models need special scanner settings for full communication
- Some hybrid vehicles won’t communicate unless in “ready” mode
Ground Loop Issues
Poor grounds can cause intermittent communication problems:
- Check engine-to-frame ground straps for corrosion
- Verify battery terminals are clean and tight
- Look for added accessories that might create ground loops
- Test voltage drop across ground circuits under load
Preventive Maintenance for OBD2 Systems
Maintain reliable OBD2 communication with these preventive measures:
- Apply dielectric grease to OBD2 connector pins to prevent corrosion
- Avoid leaving scan tools connected for extended periods
- Use port covers when not in use
- Keep battery connections clean and corrosion-free
- Address check engine lights promptly before multiple issues accumulate
- Use rodent-deterrent tape on wiring harnesses in rodent-prone areas
Most Common Vehicle-Specific OBD2 Issues
Different manufacturers tend to have different common OBD2 communication issues:
| Make | Common Issues | Typical Fix |
|---|---|---|
| Ford | J1850 PWM timeout | Clean pins 2 & 10, check specific fuses |
| GM | Module sleep issues | Cycle ignition multiple times before connecting |
| Toyota | Weak K-Line signals | Check pin 7 connections, try different scanner |
| VW/Audi | Selective communication | Use VAG-specific scanner, check for CAN bus issues |
| Chrysler | Gateway module blocking | Use gateway bypass method or dealer scanner |
| BMW | Sleep mode | Follow specific wake-up procedure before scanning |
By understanding these make-specific quirks, you can save significant diagnostic time.
With these troubleshooting steps and information, you should be able to diagnose and fix most OBD2 communication problems. Remember that patience and systematic testing almost always reveal the underlying issue when your OBD2 port has power but no communication.