You’re cruising along when that annoying message pops up: “Start Stop Service Required.” Before you panic about expensive hybrid system repairs or major electrical failures, take a breath. That warning is almost always pointing to one simple culprit—a tiny battery hiding under your hood that’s given up the ghost. Let’s break down what’s happening and how you can fix it yourself for about $100 instead of $600 at the dealer.
What Does “Start Stop Service Required” Actually Mean?
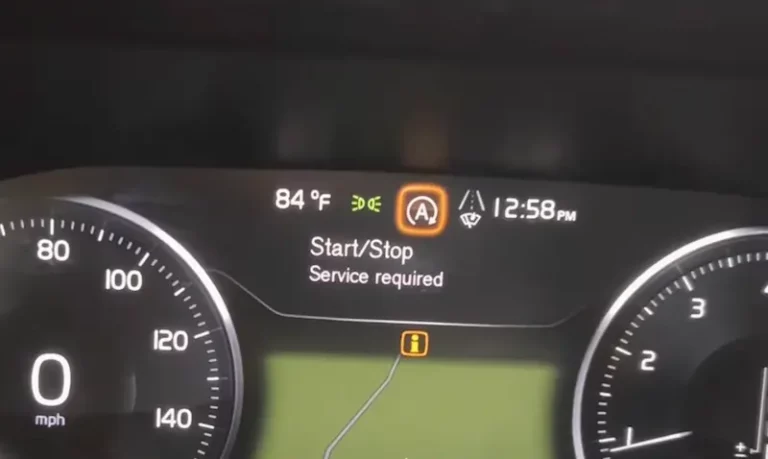
When your Volvo displays this message, it’s telling you the Start/Stop system can’t function properly. You’ll notice the engine never shuts off at red lights anymore—it just idles like older cars used to.
Here’s the thing: your car is completely safe to drive. This isn’t a critical safety warning. The fault only affects your fuel efficiency feature, not your ability to get around. That crossed-out “A” symbol on your dashboard confirms the automatic stop function has been disabled.
The system shuts itself down when it detects the auxiliary battery—a small 12V unit in your engine bay—can’t maintain stable voltage during engine restarts. Without that voltage stability, your infotainment, sensors, and electronics could reset every time the engine kicks back on. Volvo’s playing it safe by keeping the engine running continuously.
Why Volvo Uses Two Batteries (And Why One Keeps Dying)
Modern Volvos don’t use just one battery—they use two. It’s a sophisticated setup that prevents your radio from cutting out every time the engine restarts.
The Main Battery vs. The Auxiliary Battery
Your main battery lives in the trunk or cargo area. It’s big, powerful, and handles the heavy lifting for starting the engine and powering major systems.
The auxiliary battery sits in your engine compartment, typically on the driver’s side near the firewall. It’s much smaller—about 10 amp-hours—and its only job is buffering your sensitive electronics during those brief restart moments.
When you stop at a light and the engine shuts off, both batteries support your electrical systems. When it’s time to restart, the Battery Control Switch Module isolates the main battery so it can dump all its power into cranking the engine. Meanwhile, the auxiliary battery keeps your electronics stable and happy.
Why the Auxiliary Battery Fails So Often
That small auxiliary battery sits right in the engine bay, surrounded by heat from your turbocharged engine. We’re talking temperatures regularly exceeding 140°F–175°F.
AGM (Absorbed Glass Mat) batteries hate heat. For every 18°F temperature increase, the battery’s degradation rate roughly doubles. The electrolyte trapped in those glass mats slowly evaporates through the valve vents, and the battery’s internal resistance skyrockets.
Add in Volvo’s regenerative charging strategy—which intentionally doesn’t fully charge the batteries to leave room for brake energy recovery—and you’ve got the perfect recipe for sulfation. Lead sulfate crystals form on the battery plates and gradually become permanent, stealing away the battery’s capacity.
Most auxiliary batteries fail within 2–4 years. If you drive mainly short trips in the city, expect yours to be on the shorter end of that range.
Where to Find Your Auxiliary Battery
Battery location varies depending on your Volvo’s platform. Knowing your platform saves you time and frustration.
For SPA Platform vehicles (2016+ XC90, 2018+ XC60, 2017+ S90/V90, 2019+ S60/V60):
- Look in the engine bay on the driver’s side (US/left-hand drive)
- It’s near the strut tower and firewall
- You’ll see a plastic cover acting as a rain shield
- The main battery stays in the cargo area under the floor panel
For CMA Platform vehicles (2018+ XC40, C40):
- Engine compartment, usually more accessible
- Top-mount location with simpler cover removal
For P3 Platform vehicles (2010–2017 S60, V60, XC60, XC70, S80):
- Under the windshield cowl/plenum cover
- Passenger side on left-hand drive vehicles
- Requires wiper removal in some cases—trickier access
The Mild Hybrid Confusion (B5/B6 Models)
If you’ve got a B5 or B6 badge on your Volvo, you might think the 48-volt hybrid system is causing your problems. It’s not.
Yes, your car has a 48V lithium-ion battery in the trunk that powers the Integrated Starter Generator. But Volvo kept the traditional 12V auxiliary battery in the engine bay for backup and voltage stabilization.
When a 2023 XC60 B5 throws the “Start Stop Service Required” message, it’s the same fix as a 2017 XC90 T6: replace that small 12V AGM battery under the hood. The 48V system isn’t your problem.
Don’t Confuse This With “Volvo On Call Service Required”
These are two completely different issues:
Start/Stop Service Required:
- Caused by auxiliary battery failure
- Located in engine bay
- Affects fuel-saving auto-stop feature
Volvo On Call Service Required:
- Caused by telematics backup battery failure
- Located inside the connectivity module (often under seats or deep in dash)
- Affects emergency SOS calling capability
Replacing your auxiliary battery won’t fix a Volvo On Call message, and vice versa.
How to Test Your Auxiliary Battery
Before buying parts, verify the battery is actually dead. The simplest test takes five minutes with a basic multimeter.
Voltage Testing Steps
- Pop your hood and locate the battery cover near the firewall/strut tower
- Remove the cover (usually T25 Torx screws or plastic clips)
- Let the car sit off for at least 10 minutes to eliminate surface charge
- Set your multimeter to DC Volts
- Touch the probes directly to the battery terminals
What the numbers mean:
| Voltage Reading | Battery Status | What to Do |
|---|---|---|
| Above 12.6V | Healthy, 100% charged | Check other systems—battery is fine |
| 12.4V–12.6V | Normal range | Likely okay, monitor it |
| 12.0V–12.3V | Weak/partially discharged | Charge and retest, probably needs replacement soon |
| Below 12.0V | Failed | Replace immediately |
Most failed auxiliary batteries in these cases read somewhere between 9V and 11.5V. If yours shows 10V, you’ve found your problem.
Load Testing
Professional shops use conductance testers to measure Cold Cranking Amps (CCA). The spec is 170 CCA. If a shop tests your battery as “Good—Recharge,” use only an AGM-compatible charger. Old-style “boil” chargers will destroy the valve regulation system.
What You Need for Replacement
The Right Battery
Volvo Part Number: 30659531
This is the official OEM battery for SPA and CMA platforms. It’s an AGM type, 12V, 10Ah capacity, with 170A cold cranking amps.
Expect to pay:
- $180–$260 at the dealer parts counter
- $80–$130 from online Volvo parts specialists or FCP Euro
- $150–$200 for aftermarket equivalents
Aftermarket Alternatives
Compatible options include:
- Exide EK111
- Varta 510909017I312
- Bosch S5A X30
Warning about motorcycle batteries: Some folks try using YTX14-BS or YTX12-BS powersports batteries because they’re cheap. Don’t. The terminal orientation is often wrong (square nut vs. threaded post), and height differences can prevent your cover from fitting back properly. Water leaking into your engine bay electronics isn’t worth the $20 savings.
Tools You’ll Need
- 10mm socket (for main battery terminals)
- 8mm socket (for auxiliary battery terminals)
- T25 Torx driver (for covers)
- Socket extension bar
- About 20 minutes of time
Step-by-Step DIY Replacement (SPA Platform)
This procedure works for XC90 (2016+), XC60 (2018+), S90, V90, S60, and V60 models on the SPA platform.
Step 1: Disconnect the Main Battery Ground
This is crucial. Don’t skip it.
- Go to your trunk or cargo area
- Lift the floor panel to access the main battery
- Use your 10mm socket to disconnect the negative (–) terminal only
Why? This de-energizes the entire electrical system. It prevents the Battery Control Switch Module from freaking out when you disconnect the auxiliary battery, and it eliminates any chance of accidentally shorting something with your tools.
Step 2: Access the Auxiliary Battery
- Open the hood
- Locate the battery cover on the driver’s side near the firewall
- Remove the cover clips or T25 screws
- Set the cover aside
Step 3: Remove the Old Battery
- Use the 8mm socket to disconnect the negative (–) terminal first
- Then disconnect the positive (+) terminal
- Remove the cross-bar or hold-down bracket
- Lift out the old battery (it only weighs a few pounds)
Step 4: Install the New Battery
- Drop the new battery into the tray
- Secure the hold-down bracket
- Connect the positive (+) terminal first
- Connect the negative (–) terminal second
Critical warning: These terminals are delicate. Don’t overtighten the 8mm bolts. You can snap the terminal posts clean off with too much torque. Snug is enough.
Step 5: Restore Power and Button Up
- Replace the engine bay battery cover
- Walk back to the trunk
- Reconnect the main battery negative (–) terminal with your 10mm socket
- Close the trunk floor panel
- Start the engine
The “Start Stop Service Required” message might still show immediately after replacement. Don’t worry—that’s normal.
The Battery Monitoring System Reset
Modern Volvos track battery age and adjust charging voltage accordingly. When you install a fresh battery, the system needs to recognize that change.
Does the Auxiliary Battery Need a Reset?
There’s some nuance here. The main battery absolutely requires a Battery Management System reset via VIDA diagnostic software. The auxiliary battery doesn’t have the same dedicated sensor setup.
Most Volvo techs agree the system self-calibrates for the auxiliary battery. After installation, let your car sleep (locked and untouched) for 4–6 hours. The Battery Control Switch Module measures the new battery’s voltage, recognizes the improvement from the old 10V reading to the new 12.8V, and clears the service message after a few drive cycles.
The Manual BMS Reset Trick
Want to speed things up? There’s a “cheat code” that resets the main battery management logic, which helps the whole system accept the new configuration.
Here’s the procedure:
- Get in the car and close all doors
- Turn the start knob clockwise and hold it for 5 seconds (foot OFF the brake pedal)
- The instrument cluster lights up but the engine stays off
- Turn your headlight switch to “Parking Light” position
- Press the Rear Fog Light button 6 times
- Press the Hazard Light button 3 times
- Watch for the battery icon on your instrument cluster to flash 3 times rapidly
That flash confirms the reset worked.
If the message doesn’t clear immediately, drive for 15–20 minutes to charge the new battery, then park and lock the car overnight. The warning typically vanishes by morning.
What It Costs: Dealer vs. DIY
The economic case for doing this yourself is overwhelming.
| Service Provider | Diagnostic | Parts | Labor | Total |
|---|---|---|---|---|
| Dealership | $150–$220 | $180–$260 | $100–$180 | $430–$660 |
| Independent Shop | $100–$150 | $150–$200 | $80–$120 | $330–$470 |
| DIY | $0 | $80–$130 | $0 | $80–$130 |
You’re removing about five screws and swapping a battery that weighs less than a gallon of milk. The entire job takes 15–20 minutes once you’ve done it the first time. Unless you’re physically unable to use a socket wrench, there’s no reason to pay someone else 400 bucks.
Why This Keeps Happening
Let’s be honest: this is a design compromise. Volvo stuck a heat-sensitive AGM battery in the hottest part of your vehicle to solve a voltage stability problem.
The auxiliary battery lives in an environment that regularly exceeds 140°F. AGM batteries degrade twice as fast for every 18°F temperature increase. Add in the partial state-of-charge operating strategy from regenerative braking, and you’ve got a component with a predictable 2–4 year lifespan.
It’s essentially a wear item, like brake pads or wiper blades. The difference is that it’s marketed as part of a sophisticated hybrid/efficiency system rather than routine maintenance, so the failure catches people off guard.
If you drive mostly short urban trips, your battery won’t get enough runtime to fully recharge between Start/Stop cycles. That chronic undercharging accelerates sulfation and shortens lifespan even further.
What Happens If You Ignore It?
Technically, nothing catastrophic.
Your car won’t strand you. The engine won’t fail. You’ll just burn slightly more fuel because the engine idles at every stoplight instead of shutting off. Over a year of city driving, that probably costs you an extra $50–$100 in gas.
The bigger risk is what happens to your main battery. With the auxiliary battery failed, your electrical system might place extra strain on the main battery or charging system. Long-term neglect could accelerate wear on those components.
Get it fixed when you can, but don’t panic if you need to drive for a few weeks with the message showing.
Other Causes (Rare But Possible)
In about 95% of cases, the auxiliary battery is your culprit. But occasionally, something else is going on.
Other potential causes:
- Blown fuse in the Battery Control Switch Module circuit
- Faulty voltage sensor giving incorrect readings
- Corroded battery terminals creating false resistance
- Software glitch in the Battery Management System
- Main battery also failing simultaneously
If you’ve replaced the auxiliary battery, done the reset procedure, let the car sleep overnight, and the message still won’t clear after several drive cycles, it’s time to visit a shop with VIDA diagnostic software. They can pull the specific fault codes to see what the Central Electronic Module is actually reporting.
The Hybrid System Isn’t Your Problem
Let’s clear this up one more time because it’s a huge source of confusion.
If you own a B5 or B6 Volvo with the 48-volt mild hybrid system, you have three batteries:
- A 48V lithium-ion battery in the trunk (for the Integrated Starter Generator)
- A 12V main battery in the trunk (for standard automotive systems)
- A 12V auxiliary battery in the engine bay (for voltage buffering)
The “Start Stop Service Required” message almost never relates to the 48V lithium battery. That system has its own fault messages. Your issue is still the little 12V AGM unit hiding under the hood.
Field reports and technical documentation consistently confirm this. Save yourself the headache of chasing hybrid system diagnostics and just check that auxiliary battery first.
Final Thoughts
The “Volvo Start Stop Service Required” warning looks scarier than it is. You’re not facing a hybrid system meltdown or a $2,000 electrical repair. You’ve got a $100 battery that’s reached the end of its service life.
This is a straightforward fix that most Volvo owners can handle in their driveway with basic tools. Order part number 30659531, disconnect your main battery, swap the auxiliary, reconnect everything, and do the manual reset procedure. Give your car a good drive and an overnight rest, and you’re done.
The fact that this battery lives in such a hostile environment means you’ll probably be doing this again in another 3–4 years. That’s just part of owning a modern efficiency-focused vehicle. At least now you know exactly what’s happening and how to fix it yourself for a fraction of dealer cost.
Your Volvo’s still the safe, reliable vehicle you bought. It just needs a fresh auxiliary battery to keep delivering those fuel-saving auto-stops at every red light.