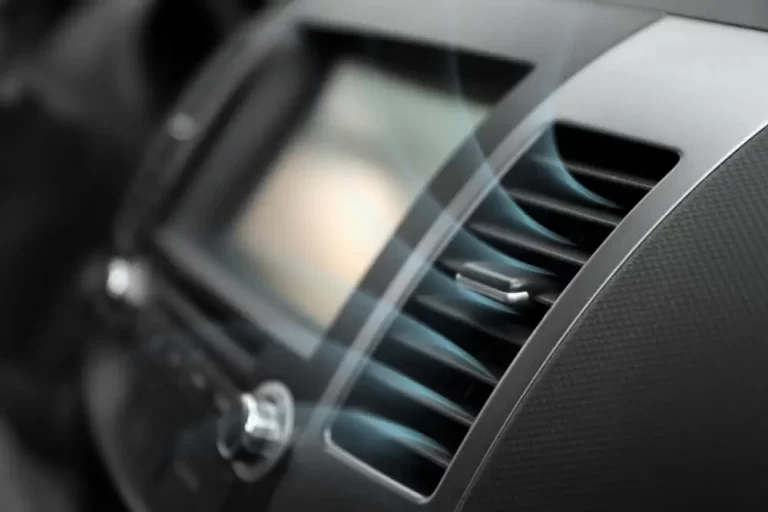
Sweating through your commute because your car AC barely keeps up? You’re probably doing a few things wrong — or your system needs some attention. This guide covers everything from quick fixes you can do right now to maintenance that’ll keep your AC blasting cold all summer long. Stick around — the tips near the end could save you hundreds.
Start Here: Cool Your Car Down Fast Before Touching the AC
Here’s the mistake almost everyone makes. You jump in a hot car, crank the AC to max, and wonder why it takes forever to cool down.
The problem? Your car’s interior can hit 140°F or more after sitting in the sun. You’re asking your AC to fight a furnace.
Do this instead:
- Roll all windows down first. Don’t close them right away.
- Open and close the driver’s door rapidly a few times. This pumps the superheated air out like a bellows and pulls cooler outside air in.
- Set the AC to fresh air mode (not recirculation) for the first minute or two.
- Once the vents start blowing cold, close the windows and switch to recirculation mode.
That last step matters a lot. Recirculation re-cools air that’s already chilled, so the temperature drops faster and the compressor works less. Think of it as a compounding effect — each pass through the evaporator gets colder.
Quick heads-up: Don’t leave recirculation on for hours straight. It traps moisture from your breath and can cause serious window fogging on humid days.
Smart Parking Cuts Your AC’s Workload in Half
Learning how to make AC cooler in car often starts before you even turn the key.
Where you park changes everything. A car in the shade starts 30–50°F cooler than one baking in direct sun. That gap means your AC reaches your target temperature in minutes instead of half an hour.
When shade isn’t an option:
- Use a reflective windshield sunshade. It bounces solar radiation away from the dashboard and steering wheel — the two biggest heat sponges in your cabin.
- Park with your rear window facing the sun if possible. Your back glass gets less direct exposure than your windshield.
- Crack your windows slightly (if it’s safe where you’re parked). Even a small gap lets built-up heat escape.
These habits also protect your interior. Extreme heat cracks dashboards, fades upholstery, and breaks down the adhesives holding your trim together.
One more habit worth keeping: Run your AC for a few minutes every week during winter. This circulates the refrigerant oil and keeps your seals from drying out and cracking. Skipping this is a sneaky way to develop leaks.
Window Tint: The Best Passive Upgrade for a Cooler Car
If you want to know how to make AC cooler in car without touching the mechanical system, quality window film is your answer.
Most factory glass does almost nothing to block infrared radiation — the part of sunlight that actually heats your cabin. Premium ceramic window tints can reject up to 98% of infrared radiation, and they do it without making your windows look like a limo.
Not All Window Films Are Equal
| Window Film Type | Infrared Heat Rejection | Key Drawback |
|---|---|---|
| Dyed | Low to Moderate | Fades purple over time; absorbs heat into the glass |
| Metallic | High | Blocks GPS, cell signals, and radio |
| Carbon | Moderate to High | Can look slightly hazy |
| Nano-Ceramic | Exceptional (up to 98%) | Most expensive; needs professional installation |
Nano-ceramic films win on every performance metric. They stay crystal clear, don’t interfere with your phone or navigation, and can drop your parked interior temperature by 10 to 30°F.
The fuel economy angle is real too. Your AC compressor runs directly off the engine via the serpentine belt. Every time it cycles on, it burns gas. By lowering your cabin’s baseline temperature, ceramic tint lets the compressor cycle off more often. That can improve fuel efficiency by 3 to 8% — roughly 30 gallons saved per year for average drivers. Over time, the film pays for itself.
Replace Your Cabin Air Filter (Seriously, Check It)
This is the most overlooked fix on the list. A clogged cabin air filter is one of the top reasons car AC feels weak — and replacing it can instantly restore airflow.
Here’s what happens when the filter is choked with dust and pollen: your blower motor fights against backpressure. Less air crosses the evaporator. The vents feel weak no matter how high you set the fan.
Worse, severe airflow restriction can freeze the evaporator solid. Ice buildup completely stops cooling until the system thaws out.
Change it every 12,000 to 15,000 miles — or more often if you drive in dusty or polluted areas. The filter usually lives behind the glove box. Most replacements take under 10 minutes and cost $15 to $30. It’s one of the easiest wins in car AC maintenance.
Clean Your Condenser (Carefully)
Your condenser sits at the very front of the car, ahead of the radiator. It dumps heat from the refrigerant into the outside air. If it’s clogged with bugs, leaves, and road grime — which it definitely is — airflow gets blocked and system pressure spikes dangerously.
When that happens, a high-pressure safety switch shuts the compressor off. You get warm air, especially at idle where there’s no forward airflow to help.
How to clean it safely:
- Use a soft-bristled brush to loosen debris first.
- Follow with a low-pressure garden hose — spray from the engine bay outward through the front grille.
- Never use a pressure washer. The aluminum fins are paper-thin. High pressure permanently crushes them, destroying the condenser’s ability to flow air.
Fix That Musty Smell and Restore Evaporator Performance
That sour, musty blast when you first turn on the AC? That’s mold and bacteria living on your evaporator core. The evaporator is perpetually damp and dark — a perfect breeding ground for biological growth.
Beyond the smell, mold coating the evaporator fins acts as insulation, reducing the heat transfer that makes cold air possible.
You can’t physically scrub the evaporator without dismantling your entire dashboard. Instead, use a foaming evaporator cleaner:
- Locate the evaporator drain tube under the car (passenger side, near the firewall).
- Insert the foam cleaner’s probe into the drain tube.
- Discharge the full can — the foam expands to fill the evaporator housing.
- Let it dwell 15 to 20 minutes, then it drains out with the dissolved gunk.
- Run the blower on max for 10 minutes to dry the housing.
Also spray disinfectant directly into your dashboard vents and clean the air intake near the windshield wiper cowl for extra odor control.
Diagnose Mechanical Failures Before Spending Big
When operational fixes and maintenance don’t cut it, something’s broken. Here’s what to suspect:
| Component | Signs of Failure | Typical Repair Cost |
|---|---|---|
| Compressor | Warm air; grinding/clicking sounds; clutch won’t engage | Highest — full replacement often needed |
| Blend Door Actuator | Hot on one side, cold on the other | Moderate to High — dashboard disassembly required |
| Expansion Valve | Inconsistent cooling; frost on AC lines | Moderate — requires system evacuation and recharge |
| Condenser | Warm air at idle; visible damage | Moderate to High — bumper removal and recharge |
| Fuses/Relays/Sensors | System won’t respond; cooling fans fail | Low — cheap parts, just needs testing |
Low Refrigerant Means You Have a Leak
The most common cause of weak AC is low refrigerant. Refrigerant doesn’t get “used up.” If your system is low, it’s leaking somewhere.
Common leak points include rubber o-rings and hoses that dry out from years of heat cycling, and the condenser, which takes hits from road debris. When refrigerant drops, the compressor starts short-cycling — clicking on and off rapidly — and eventually shuts down entirely to prevent damage.
A professional uses UV fluorescent dye or an electronic sniffer to find exactly where the leak is. Expect to pay $250 to $350 for a professional diagnosis and recharge.
DIY Recharge Kits: What to Know Before You Try
Consumer recharge kits cost $40 to $60 and work for slow leaks. But there are real risks if you skip the basics.
Essential safety gear: thick nitrile gloves and impact-resistant goggles. Refrigerant expands instantly and can cause severe frostbite and eye damage.
Connect the kit to the low-pressure port (it’s sized differently from the high-pressure port — that’s intentional). Engine running, AC on max, blower on high.
Add refrigerant slowly while watching the pressure gauge. Your target pressure depends on outside temperature:
| Ambient Temp (°F) | Target Low Side Pressure | Target High Side Pressure |
|---|---|---|
| 65°F | 25–35 PSI | 135–155 PSI |
| 75°F | 35–45 PSI | 150–170 PSI |
| 85°F | 45–55 PSI | 225–250 PSI |
| 95°F | 50–55 PSI | 275–300 PSI |
Note: Exact specs vary by vehicle and refrigerant type. Always cross-reference with your specific system.
Two mistakes that destroy compressors:
- Inverting the can. Always keep it upright. Tipping it sends liquid into the compressor. Liquids don’t compress — your compressor will shatter instantly.
- Overcharging. More refrigerant doesn’t mean colder air. Overfilling raises head pressure beyond design limits, ruptures hoses, and can blow the condenser apart.
Also: don’t add refrigerant without addressing the leak. Moisture that entered through the leak reacts with refrigerant oil under heat to form corrosive acids that eat your system from the inside. A professional recharge includes a full vacuum evacuation to pull out moisture before adding fresh refrigerant.
Know the Rules: Refrigerants and the Law
Car AC refrigerants are regulated because they’re serious greenhouse gases. R-134a — what most cars built before 2017 use — has a global warming potential 1,400 times greater than CO₂. Newer cars use R-1234yf, which has a global warming potential of just 4.
Under Section 609 of the Clean Air Act, intentionally venting refrigerant is illegal. Anyone paid to service car AC must hold EPA Section 609 certification. Bulk refrigerant sales are restricted to certified technicians.
Small retail cans (under 2 lbs) are still legal for consumers to buy federally — but not everywhere:
- Washington State bans retail sales of R-134a entirely. If your car uses it, you need a certified shop.
- California requires manufacturers to use reclaimed refrigerant in new retail cans and mandates self-sealing valves on packaging.
- Wisconsin makes it illegal to add refrigerant to a leaking system2.) — leaking or not, the leak must be fixed first.
Check your state’s rules before buying a retail kit. Getting this wrong isn’t just a fine — it directly contributes to climate damage.
The Fastest Wins — All in One Place
Not sure where to start? Here’s your priority list:
- Do right now: Purge hot air before running the AC; use recirculation after the car cools down
- This weekend: Replace your cabin air filter; clean the condenser with a garden hose
- This month: Get a foaming evaporator cleaner; add a reflective windshield shade
- Bigger investment: Ceramic window tint; professional leak diagnosis and recharge
Work through that list and your car AC will perform dramatically better — without replacing anything expensive.