Dead battery. Cold morning. No one around to help. Sound familiar? A DEWALT jump starter can get you moving again in minutes—but only if you use it right. Mess up the connection order or ignore a few safety basics, and you risk sparks, damage, or worse. This guide walks you through exactly how to use a DEWALT jump starter, step by step, so you can handle it like a pro.
What Makes DEWALT Jump Starters Different
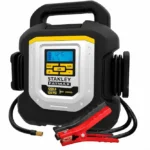
DEWALT power stations pack a lot into one box. You get jump-starting power, a digital air compressor, an AC inverter, and USB ports for your phone or tablet. These units are built (and licensed) by Baccus Global for the US market, ranging from 1400-amp lead-acid models to 2500-amp lithium-ion versions.
Here’s the quick breakdown:
- Lead-acid models: Heavier but tough. Great for extreme conditions and broad compatibility.
- Lithium-ion models: Lighter, compact, and hold their charge way longer in storage.
Either way, skipping the basics on setup and use can shorten the lifespan of your unit fast.
Charge It Before You Need It
Your DEWALT jump starter won’t come fully charged out of the box. Lead-acid models need up to 40 hours on a wall outlet before their first use.
Here’s a weird thing that trips people up: you plug in a brand-new unit, and the display shows a full charge almost instantly. That’s usually a false reading caused by high internal resistance in the battery cells (a condition sometimes called high impedance). It’s not actually full. Leave it charging the full 40 hours anyway. This slowly breaks down that resistance and lets the battery take a real, deep charge.
Don’t worry about overcharging. The internal smart-charge system cuts off automatically once it’s topped off.
Check Your Clamps and Terminals First
Before connecting anything, look at your jump starter’s clamps and the vehicle’s battery terminals. Corrosion is public enemy number one here—it blocks current flow and wastes power as heat instead of cranking your engine.
If you spot corrosion:
- Mix baking soda with water to neutralize it
- Scrub with a stiff nylon or brass brush
- Wipe the clamps clean after every single use (battery acid eats through copper and rubber over time)
Gear Up Before You Touch the Battery
Car batteries aren’t harmless. They release explosive hydrogen gas, and a short circuit can weld metal jewelry straight to your skin. Before you start:
- Put on safety glasses (side shields or a full-face shield if you have one)
- Wear acid-resistant gloves
- Take off rings, watches, and bracelets
- Skip vinyl or synthetic clothing—static sparks can ignite battery gases
- Work in a ventilated area, away from spilled fuel or flammable liquids
If you’re jump-starting in an enclosed garage, keep the unit at least 18 inches off the ground. Tiny arcs inside the jump starter’s switches can ignite heavier-than-air fumes that pool near the floor.
How to Connect the Clamps (Step by Step)
Most cars use a negative-grounded system, meaning the negative terminal connects to the metal chassis. Here’s the order that keeps you safe:
- Turn off the ignition and unplug accessories (radio, phone charger, AC) to protect them from voltage spikes.
- Connect the red clamp to the positive terminal on the dead battery.
- Connect the black clamp to an unpainted metal part of the engine block or chassis—away from the battery itself.
- Turn the jump starter on.
- Crank the engine in short bursts, no more than 5-6 seconds at a time.
- If it doesn’t start, wait 3-5 minutes before trying again. This lets heat dissipate and protects both the starter motor and your jump starter.
Once it starts, disconnect in reverse order: turn off the jump starter, remove the black clamp first, then the red one.
Why connect the black clamp to the engine block instead of the battery? Simple. The final connection often creates a small spark. If that spark happens right over the battery, it can ignite venting hydrogen gas. Moving the connection point away from the battery keeps that spark harmless.
Table: Connection Order by Vehicle Type
| Step | Negative-Grounded (Most Cars) | Positive-Grounded (Rare/Vintage) |
|---|---|---|
| First Clamp | Red (+) to battery positive | Black (-) to battery negative |
| Second Clamp | Black (-) to engine block | Red (+) to engine block |
| First Disconnect | Black (-) from engine block | Red (+) from engine block |
| Second Disconnect | Red (+) from battery | Black (-) from battery |
Got a vintage car or heavy equipment? Some older machines use positive-grounded systems. Check your manual first—hooking up the wrong polarity can melt wiring and destroy both the vehicle and your jump starter.
Using a lithium-ion model? The process is nearly the same, but smarter. These units detect the connection automatically and refuse to send power if they sense reverse polarity or a dead short. That built-in safety net is one reason lithium models are so popular.
Never Disconnect While the Engine Is Cranking
This one’s easy to overlook. When you disconnect the clamps while the starter is cranking or the alternator is still stabilizing, you risk triggering something called a “load dump.” That’s when a sudden break in the circuit sends a massive voltage spike through the electrical system—sometimes over 100 volts, according to SAE and ISO testing standards. This can fry your car’s electronics and your jump starter’s internal components. Wait until the engine is running smoothly before pulling clamps off.
Cold Weather Changes Everything
Freezing temps mess with battery performance big time. At 32°F, you lose about 15-20% of cranking capacity. Drop to -20°F, and you could lose nearly half.
Table: Cold Weather Capacity Loss
| Temperature | Capacity Loss | Recommended Minimum Jump Starter Rating |
|---|---|---|
| 70°F | 0% | 500 Amps |
| 32°F | ~15% | 650 Amps |
| 0°F | ~30% | 850 Amps |
| -20°F | ~45% | 1000+ Amps |
Warm Up a Cold Jump Starter First
If your jump starter has been sitting in a freezing trunk overnight, try this trick before using it: turn on the built-in flashlight or plug in your phone for 2-3 minutes. This small electrical draw generates a little internal heat, which helps the battery deliver full power when you need it.
Never jump-start a frozen car battery. If the electrolyte inside has frozen solid, applying current can cause it to boil rapidly and explode. Bring a frozen battery indoors and let it thaw for 24 hours before testing it.
Also—don’t recharge a cold lithium jump starter. Charging below freezing causes lithium plating, which permanently damages the battery and can lead to internal shorts. Let it warm up to room temperature first.
Test Your Alternator Too
Many DEWALT units include an Alternator Check feature. This tells you if your charging system is actually healthy—useful if you don’t want to jump-start the same car again next week.
No-load test: Turn off all accessories, start the engine, and press the Alternator Check button. You want to see “ALT GOOD.”
Under-load test: Turn on headlights, wipers, and heated seats (skip the AC, it can throw off the reading). Press the button again. If the voltage holds steady, your alternator’s doing its job.
Using the AC Inverter and USB Ports the Right Way
DEWALT jump starters with built-in inverters can power small tools, lights, or laptops through a standard AC outlet. But there’s a catch: these inverters produce a “modified sine wave,” not a pure one.
That means simple devices (lights, heaters) work fine. But sensitive electronics—like CPAP machines or certain chargers—might buzz, overheat, or fail. Always check your device’s manual before plugging it in.
If you’re using an extension cord with the inverter, cord thickness matters more than people think.
Table: Extension Cord Gauge Guide
| Load (Amps) | 0-25 ft | 26-50 ft | 51-100 ft |
|---|---|---|---|
| 0-6A | 18 AWG | 16 AWG | 16 AWG |
| 6-10A | 18 AWG | 16 AWG | 14 AWG |
| 10-12A | 16 AWG | 16 AWG | 14 AWG |
| 12-16A | 14 AWG | 12 AWG | Not recommended |
Using too thin a cord causes voltage drop and overheating—both fire risks. It also voids your warranty.
USB ports are for charging only, not data transfer. If a device draws more power than the port can handle, the unit triggers an overload fault and shuts down automatically. That’s a safety feature, not a malfunction.
Running the Air Compressor Safely
The built-in air compressor can inflate tires up to 120 PSI using a threaded nozzle that fits standard valve stems. Set your target pressure, hit “AIR,” and it stops automatically once it hits the number.
One rule to remember: don’t run it more than 10 minutes straight. The internal components generate heat fast, and continuous use can warp the gears or housing. Give it 30 minutes to cool down before inflating more tires.
Keep It Charged, Or Lose It
Lead-acid batteries hate sitting empty. Every time you use your jump starter, recharge it right away—even if you barely used it. If it’s in storage, give it a maintenance charge every 30 days.
Skip this, and you risk sulfation—a buildup of lead sulfate crystals on the battery plates that permanently reduces capacity. Once that happens, there’s no undoing it.
Charging via your car’s cigarette lighter port? That’s fine for short trips, but don’t do it for more than 6 hours straight. And never charge using AC and DC methods at the same time—that overloads the circuit.
Common Troubleshooting Fixes
DC adapter not charging? Check the small glass fuse inside the barrel plug. Unscrew the end cap, pull out the fuse, and look for a broken or blackened filament. Swap it for an identical 2-amp automotive fuse.
Inverter not working? You might have tripped the internal circuit breaker by plugging in something too powerful. Some newer models have an external reset button. Older models require opening the unit—which isn’t recommended unless you’re experienced with electronics repair.
Lithium unit won’t charge or turn on? This usually means the Current Interrupt Device tripped—a safety switch that cuts power if internal pressure gets dangerously high. Don’t try to reset this yourself. It’s there to prevent thermal runaway, and bypassing it is genuinely dangerous. Treat the unit as end-of-life and look into warranty replacement.
Recycling When It’s Done
Never toss a jump starter in regular trash. Lead-acid and lithium batteries both pose serious environmental risks if they end up in landfills or get crushed in waste compactors—lithium cells especially can spark fires.
Table: Disposal by Battery Type
| Battery Type | Main Risk | Where to Recycle | Before Transport |
|---|---|---|---|
| Lead-Acid | Soil/water contamination | Certified e-waste recycler, auto parts store | Keep casing intact, store upright |
| Lithium-Ion | Fire risk | Call2Recycle kiosks (like Home Depot), TerraCycle | Tape terminals or bag the unit |
The EPA recommends taping exposed terminals or bagging lithium units before drop-off, just to prevent accidental short circuits during transport.
Final Thoughts
Learning how to use a DEWALT jump starter properly isn’t complicated—it just takes a little patience and attention to detail. Charge it fully before first use, connect the clamps in the right order, respect the cold weather limits, and recharge it after every use. Do that, and your jump starter will bail you out reliably for years, whether you’re dealing with a dead battery in your driveway or stuck somewhere with no help in sight.