Got a smell in your car that just won’t quit? Smoke, mildew, pet odors, or something you’d rather not think about? An ozone machine might be exactly what you need. This guide walks you through how to use an ozone machine in a car safely and effectively — from prep to post-treatment care.
What an Ozone Machine Actually Does
Before you hit the power button, it helps to know what’s happening inside your car.
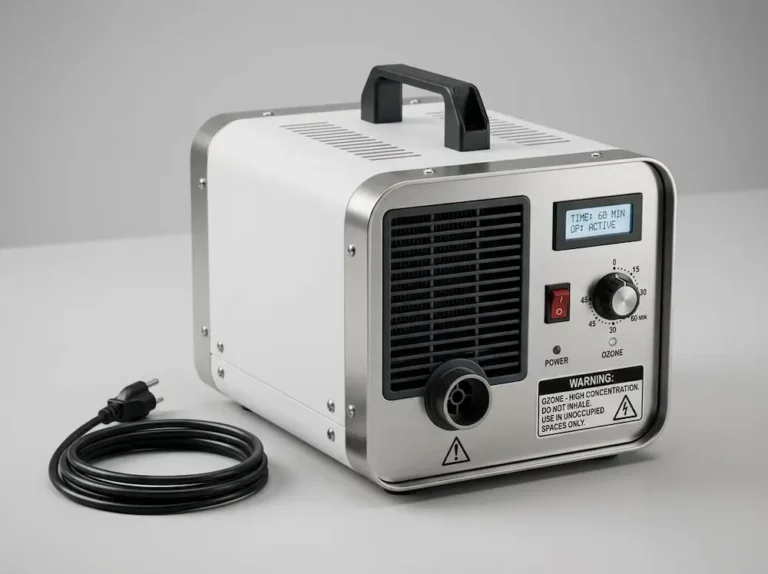
An ozone machine converts regular oxygen (two atoms) into ozone (three atoms). That unstable third atom breaks away and attacks odor-causing molecules — cigarette tar, mold spores, pet dander — at the chemical level. It doesn’t mask smells. It destroys them.
Once the reaction’s done, the ozone reverts back to regular breathable oxygen. No chemical residue, no fragrance cover-up. Just clean air.
That said, the same oxidative power that destroys odor molecules is also toxic to human lungs, damaging to rubber seals, and potentially harmful to leather seats. So yes — it works brilliantly, but only when you use it correctly.
Is an Ozone Machine Safe for Cars?
Here’s the short answer: safe for the car when used properly, dangerous for people if they’re anywhere near it during treatment.
The EPA classifies ozone as a respiratory hazard even at low concentrations. Professional ozone machines push concentrations far above safe breathing limits. That’s exactly why they work so well — and why nobody should be inside the vehicle during a treatment.
Key safety rules you can’t skip:
- No people, pets, or plants in the car during treatment
- Never run the machine in an enclosed garage
- Always allow full ventilation before re-entering the vehicle
- Remove all child safety seats before you start — ozone silently degrades harness webbing without any visible signs of damage
One more risk worth knowing: if your car has air fresheners or scented cleaning products inside, ozone reacts with the terpene compounds in those fragrances and creates formaldehyde and other harmful byproducts. That’s worse than the original smell. Always use ozone on a chemically clean, fragrance-free interior.
Choosing the Right Ozone Machine: Corona Discharge vs. UV
There are two main types of ozone generators used in automotive detailing. Each works differently, and your environment determines which one fits better.
| Feature | Corona Discharge | UV Light |
|---|---|---|
| Output volume | Very high (5,000–10,000+ mg/hr) | Low to moderate (under 1,000 mg/hr) |
| Humidity sensitivity | High — produces corrosive nitrogen byproducts in damp air | Unaffected by moisture |
| Nitrogen oxide risk | Yes, in humid conditions | None |
| Maintenance | Frequent ceramic plate cleaning | Periodic UV bulb replacement |
| Best for | Dry climates, severe odors | Humid/coastal climates, cleaner output |
Corona discharge machines are the most common in U.S. detailing shops. They’re powerful and fast, but they need dry air to work cleanly. If you’re in Florida or a coastal state, UV generators produce purer ozone without the risk of acidic byproducts from moisture reacting with nitrogen in the air.
Step 1: Deep Clean the Car First
This is the step most people skip — and it’s the reason treatments fail.
Ozone treats the air and exposed surfaces. It doesn’t physically remove grime, sticky tar, or biological residue. If the source of the odor stays in the car, the smell will come back within days once the ozone dissipates.
Here’s what your pre-treatment clean needs to cover:
- Remove everything — floor mats, loose items, and especially all child safety seats
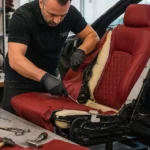
- Vacuum thoroughly — seats, carpets, floor pans, and crevices using a high-suction vacuum and a detailing brush for vents and seat tracks
- Wipe down hard surfaces with a pH-neutral, unscented cleaner — dashboard, console, door cards
- Use enzyme cleaner on biological stains — pet accidents, vomit, spilled milk. Enzyme cleaners break down the proteins causing the odor at a microscopic level, which ozone alone can’t do
- Extract fabric and carpet with a hot water extractor or steam cleaner for anything deeply soaked
The Drying Step You Can’t Rush
After cleaning, the car must be completely dry before ozone treatment begins. Wet interiors cause two problems:
- Corona discharge machines pull in moisture and produce acidic byproducts that coat your freshly cleaned surfaces
- Residual moisture buried in seat foam creates perfect conditions for mold to regrow once the treatment ends
Use high-velocity fans pointed into the cabin with windows down, or run the car’s heat on maximum until the interior feels completely bone dry.
Step 2: Set Up the Ozone Machine Correctly
Positioning matters. Poor placement means uneven treatment, and some areas of the car won’t get properly treated.
Option A — Machine inside the cabin:
Place the unit on the center console or rear seat, elevated off the floor. Keep one window cracked one to two inches. This lets fresh oxygen flow in continuously so the machine maintains peak output without depleting the cabin’s oxygen supply.
Option B — Machine outside with a duct hose:
Route the output hose through a cracked window and seal the gap with tape or cardboard. The machine sits on the ground outside. This method gives the machine a constant supply of fresh air, keeps it cool, and prevents it from recycling its own concentrated byproducts inside the cabin.
Configure the HVAC System
A big portion of car odors hides inside the ductwork and evaporator core — especially that musty “dirty sock” smell when you first turn on the AC. To treat those areas:
- Start the engine and let it idle outside in open air
- Set temperature to around 75°F — extreme heat or cold shortens ozone’s effective lifespan before it can penetrate upholstery
- Switch the AC to recirculate mode (not fresh air) — this pulls ozone-laden air through the evaporator and ductwork, scrubbing the hidden areas that cause AC odors
- Open all vents fully — dash vents, floor vents, and defrost
Step 3: Set the Timer and Walk Away
Once everything’s set up, start the machine, set the timer, close all doors, and leave the area immediately.
How long should you run it? Match treatment time to odor severity:
| Odor Severity | Typical Sources | Treatment Time |
|---|---|---|
| Mild | Fast food, light mustiness, faint body odor | 30–60 minutes |
| Moderate | Pet dander, spilled milk, occasional smoking | 1–2 hours |
| Severe | Heavy long-term smoking, flood damage, serious mold | 2–4 hours (split into separate cycles) |
For severe cases, don’t run one continuous four-hour session. Two separate two-hour cycles with ventilation between them is safer for interior materials and just as effective.
Step 4: Ventilate Thoroughly Before Re-Entry
When the machine shuts off, the car is still dangerous to enter. Ozone has a half-life of roughly 20 to 30 minutes at room temperature — meaning concentrations drop by 50% every half hour, but you need multiple cycles of that before it’s safe.
Ventilation protocol:
- Wait 30–60 minutes after the machine powers down with doors closed. Let the ozone finish its oxidation reactions on deep-seated odors
- Hold your breath, quickly open all four doors and the trunk simultaneously, then step away immediately
- Leave the car fully open in a well-ventilated outdoor area for at least one to two hours for standard treatments
- For heavy smoke or flood damage treatments, allow four to eight hours of ventilation before the car is comfortable to sit in
Expect a sharp, clean smell like air after a lightning storm. That’s normal. It fades within a few days. Driving with windows slightly down for the first couple of days clears it faster.
Step 5: Post-Treatment Restoration
The treatment isn’t finished once the ozone clears. Ozone strips moisture and oils from surfaces, and a saturated cabin air filter will reintroduce odors immediately if you don’t replace it.
Replace the Cabin Air Filter
A filter loaded with smoke tar or mold spores won’t be fixed by ozone treatment — it just gets the active organisms killed, but the physical debris stays. Fresh air passing through a dirty filter picks up that stale scent and blows it straight back into the cabin. Replace it immediately after the ventilation phase.
Condition Leather and Vinyl
Ozone strips the natural oils from leather seats and vinyl surfaces. Don’t apply leather conditioner before treatment — ozone reacts with the oils and can leave permanent splotchy stains on your seats.
Condition only after full ventilation. Use a premium conditioner rich in lanolin or vitamin E, apply it with a microfiber applicator in a crosshatch pattern, let it absorb for 15 to 30 minutes, then buff away the excess. This restores the leather’s suppleness and protects it from UV damage going forward.
Keeping Your Ozone Machine Running Right
Corona discharge machines need regular maintenance or their output drops dramatically. The ceramic plates collect a sticky, acidic crust from humidity and airborne debris baked on by the electrical arc.
Clean the plates every three months (or more often in dusty or humid environments):
- Disassemble the unit and remove the ceramic plates carefully
- Wash with warm soapy water or a degreaser and scrub gently
- Rinse completely and dry bone dry before reassembly — even one drop of water can short-circuit the arc and crack the plate
UV units need significantly less maintenance. Just replace the UV bulbs periodically when output starts dropping.
How to Use an Ozone Machine in a Car: Quick Reference
Here’s the full process at a glance:
- ✅ Deep clean and dry the interior completely
- ✅ Remove all child safety seats and fragrance products
- ✅ Position the machine centrally with one window cracked
- ✅ Set HVAC to recirculate at 75°F with all vents open
- ✅ Start the machine, close the doors, leave the area
- ✅ Time the treatment to odor severity (30 mins to 2+ hours)
- ✅ Wait 30–60 minutes after shutdown, then ventilate for 1–8 hours
- ✅ Replace the cabin air filter
- ✅ Condition leather and vinyl after full ventilation
Done right, an ozone treatment delivers results that no spray, steam cleaner, or air freshener can touch. The science backs it up — research shows ozone destroys mold spores with efficacy rates as high as 97.5%, and studies in commercial environments confirm significant reductions in both bacterial and fungal counts when ozone systems are active. That same mechanism works in your car. You just have to give the process the respect it deserves.