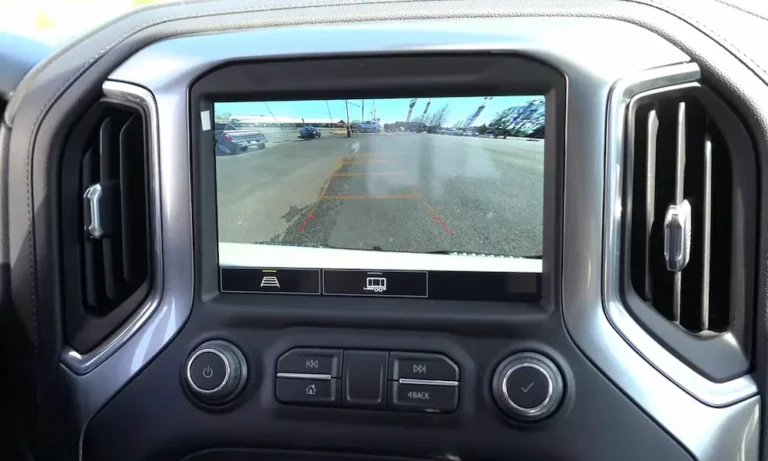
Thinking about adding a backup camera to your car? You’ve picked the right time. Whether your vehicle predates the 2018 federal mandate or you just want a better setup, this guide walks you through every step — from choosing the right camera type to wiring it without blowing an airbag. Stick around, because the electrical section alone could save you hours of frustration.
Why Backup Cameras Matter More Than You Think
Backover accidents kill and injure thousands of people every year — mostly children and elderly pedestrians. That’s exactly why the NHTSA announced a final rule requiring rear visibility technology back in 2014, projecting it would save 58–69 lives annually.
The rule — Federal Motor Vehicle Safety Standard 111 — made backup cameras mandatory on all new vehicles manufactured after May 1, 2018. It covers passenger cars, trucks, SUVs, and buses under 10,000 lbs GVWR.
Here’s the key thing: FMVSS 111 is a manufacturing standard, not a retroactive law. If your car was built before May 2018, you’re not legally required to add one. But safety advocates, insurers, and pretty much every mechanic you’ll ask will tell you: retrofit it anyway.
Several states — including California, New York, and Florida — have explored backup camera requirements for commercial fleets and school zone vehicles. That trend isn’t slowing down.
Choosing the Right Camera Mount Style
Before you touch a wire, pick the right camera for your vehicle’s rear end. The mount type changes how complex the install gets.
License plate mount — The easiest option. It slots behind your existing plate using the same screws. No drilling, minimal permanent modification. Works on most sedans and SUVs.
Lip or surface mount — Attaches under the trunk lid edge or above the rear window. Clean factory look. Good for hatchbacks and SUVs where the license plate position gives a bad viewing angle.
Flush mount — The most polished result. Requires drilling a precise 1.02-inch hole into the rear bumper. The camera sits completely flush, held by tension clips or a retaining nut. It closely mimics an OEM install.
Brake light integrated — Combines a camera with the brake light housing. Narrow install window but eliminates the need for an extra mount point.
Some cameras include built-in infrared LEDs for night vision. If you park in low-light areas regularly, this is worth the small price bump.
Wired vs. Wireless vs. Solar: Which System Fits Your Setup?
| System Type | Signal Quality | Install Difficulty | Best For |
|---|---|---|---|
| Wired (RCA) | Excellent — zero interference | High — full cable routing | Daily drivers, sedans, trucks |
| Wireless (2.4/5.8 GHz) | Good — susceptible to interference | Medium — still needs power wiring | Trailers, long vehicles, RVs |
| Solar wireless | Moderate — manual activation | Very easy — 30 minutes or less | Rentals, temp installs, minimalists |
Wired Systems
A wired backup camera system delivers the best signal quality. The yellow RCA cable carries your video signal on a copper core, shielded by braided copper that blocks electromagnetic interference from the engine and alternator.
The downside? You’re routing 20–30 feet of cable from the bumper through grommets, under carpet, and behind trim panels up to the dash. It takes time and the right tools — but the result is rock-solid with zero latency.
Wireless Systems
Wireless setups transmit video on the 2.4 or 5.8 GHz band. They’re fantastic for tow vehicles and trailers where running a physical cable across a hitch pivot point is impractical.
Don’t let the “wireless” label fool you. The camera still needs wiring into your reverse light circuit for power. Only the video signal goes wireless.
The tradeoff is signal reliability. Metal toolboxes, thick body panels, and dense urban Wi-Fi traffic can all cause dropped frames, flickering, or lag — that dangerous split-second delay where your screen shows where the car was, not where it is.
Solar Wireless Systems
These are genuinely tool-free installs. The camera runs on an internal battery topped up by an integrated solar panel. No splicing into the reverse circuit. No cable routing.
The catch? The camera doesn’t know when you shift into reverse. You manually activate it via a button, proximity sensor, or phone app. It then stays active for roughly 45–120 seconds before sleeping to save battery. If you’re fine with that trade-off, solar wireless cameras are hard to beat for sheer simplicity.
How to Wire a Backup Camera: Step-by-Step
This is where most DIY installs go sideways. Here’s how to do it right.
Step 1: Find the Reverse Light Wire (Don’t Guess)
Forget wire color charts. Wire colors change between manufacturers, model years, and trim levels — trusting color alone is a fast track to wiring your camera into the brake lights.
Do this instead:
- Turn the ignition to “ON” — engine off, parking brake set
- Shift into reverse to energize the backup lights
- Clip your multimeter’s black probe to a bare metal chassis point
- Probe individual wires in the taillight harness with the red probe
- The correct wire reads ~12V in reverse and drops to 0V in park
That on/off behavior is your confirmation.
Step 2: Make the Electrical Connections
Disconnect the negative battery terminal first.
- Camera red wire → splice into the verified positive reverse light wire
- Camera black wire → bolt a ring terminal directly to clean, bare metal on the body (no paint, no rust — a compromised ground causes 80% of grainy image issues)
Use crimped connectors or solder, then seal with heat-shrink tubing. Tape wraps alone won’t last.
Step 3: Run the RCA Cable
Route the cable from the rear bumper to the dashboard. Two common paths:
- Floor route — tucked under door sill plates along the vehicle floor
- Roof route — pressed behind the headliner edge
We’ll cover the airbag hazards for the roof route in a moment. First, tackle the rear hatch.
If your car has a hatchback, tailgate, or trunk lid, thread the cable through the factory accordion rubber conduit at the hinge. That boot exists precisely to protect wiring through a moving joint. Route outside it and your cable gets pinched and severed within months.
Use plastic trim removal tools throughout. Metal screwdrivers crack plastic panels and destroy retaining clips.
Step 4: Connect the Reverse Trigger Wire
The RCA cable you bought has a thin red wire poking out near each yellow plug. That’s the reverse trigger wire (also called the exciter wire).
Here’s how it works:
- At the rear: twist this red wire together with the camera’s main power wire and splice both into the positive reverse light circuit
- At the front: connect the other end to your head unit’s “Reverse,” “Back,” or “Trigger” input wire
When you shift into reverse, 12V travels up that trigger wire, hits the head unit, and forces the screen to switch to the camera input. Shift out of reverse, voltage drops, screen returns to radio. Clean and automatic.
| Wire | Color | Connect To |
|---|---|---|
| Camera power | Red | Positive reverse light wire |
| Camera ground | Black | Bare metal chassis bolt |
| Video signal | Yellow RCA | Head unit rear camera input |
| Trigger wire (rear end) | Red pigtail on RCA | Alongside camera power into reverse light |
| Trigger wire (front end) | Red pigtail on RCA | Head unit reverse sensing wire |
The CANbus Problem: Why Your Camera Flickers When the Engine Starts
Modern cars use Pulse Width Modulation (PWM) on lighting circuits. Instead of sending steady 12V to your reverse lights, the car’s body control module rapidly switches power on and off hundreds of times per second to control brightness and reduce electrical load.
Your eye sees a solid white light. But your camera sees a chaotic, fluctuating power supply — and it freaks out.
Classic PWM symptoms:
- Camera works fine with engine off, flickers or dies when engine starts
- Rolling horizontal lines or static that pulses with engine RPM
- “No Signal” or black screen during reversing
- Delayed activation or random mid-maneuver dropouts
Sound familiar? You need to isolate the camera from that dirty power source.
Fix 1: Use a Relay
A standard 4-pin Bosch automotive relay solves this completely. Here’s the logic: instead of powering your camera directly from the pulsed reverse light wire, you use that wire only to trigger the relay. The relay then connects your camera to a clean, steady power source — like a fused line off the battery.
| Relay Pin | Function | Connection |
|---|---|---|
| Pin 85 | Coil ground | Chassis ground |
| Pin 86 | Coil trigger | Pulsed reverse light wire |
| Pin 30 | Power input | Clean fused 12V source |
| Pin 87 | Output to camera | Camera red power wire |
| Pin 87a (5-pin only) | Normally closed — unused | Insulate this immediately |
The pulsed signal energizes the coil (which resists dropout at 70–90 ohms) while clean battery power flows uninterrupted to the camera. No more flickering.
Important: If your relay has an internal flyback diode, polarity matters. Pin 86 must be positive, Pin 85 negative. Reverse them and you’ll destroy the relay instantly.
Fix 2: Use a CANbus Power Filter
Prefer a simpler solution? A solid-state rectifier module like the ATD CCA-18123 wires inline between the reverse light circuit and the camera. Internal capacitors charge during each PWM “on” pulse and discharge during the “off” phase — effectively smoothing the pulsing voltage into a stable 12V DC output. Plug-and-play, no extra power runs required.
Routing Near Airbags: Don’t Skip This Section
This part isn’t optional reading. Side curtain airbags run the full length of your roofline — hidden behind the A-pillar, B-pillar, and C/D-pillars. In a side impact or rollover, they explode outward and downward in milliseconds.
If you’ve routed your camera cable tightly across the front of those pillar covers, two things can happen during a crash:
- The deploying airbag catches the cable and turns it into a projectile aimed at the occupants’ faces
- The cable tethers the airbag, preventing full inflation
Either outcome is catastrophic — and entirely preventable.
Safe routing rules:
- Remove trim panels with plastic tools — never pry with metal
- Route the cable along the rear-facing side of each pillar, tucked tightly behind the airbag module alongside factory wiring
- Secure the cable every 12 inches with electrical tape or zip ties to existing wire looms
- Never zip-tie directly to an airbag module casing or inflator
- For the safest approach, press the cable into the outer door rubber weatherstripping instead — this bypasses pillar cavities entirely, though it may slightly compress the weather seal
Fixing Common Backup Camera Problems
| Symptom | Most Likely Cause | Fix |
|---|---|---|
| Blue screen / No Signal | No power or disconnected RCA | Check 12V at camera harness in reverse; reseat yellow RCA plug |
| Flickers only when engine runs | PWM / alternator ripple | Install relay or CANbus filter inline |
| Grainy / static image | Bad ground connection | Move ground to bare metal structural bolt, away from painted surfaces |
| Screen doesn’t switch automatically | Trigger wire not connected | Verify red trigger wire reaches head unit’s reverse sensing input |
| Wireless image lags or freezes | RF interference / signal blockage | Clear metal obstructions between transmitter and receiver; consider hardwired alternative |
| Upside-down or mirrored image | Wrong mounting orientation or firmware | Rotate camera bracket; check for small green/white wire loops on harness — cutting specific loops flips or mirrors the image electronically |
A backup camera for car installation isn’t just a weekend project — it’s a genuine safety upgrade that can prevent a tragedy. Take your time with the wiring, respect the airbags, and test everything before you button up the trim. Your future self will thank you every time you reverse out of a tight spot without a second thought.