Got a car that looks rough but runs fine? A fresh coat of paint might be exactly what it needs — without draining your bank account. This guide breaks down every budget-friendly option, from commercial chains to DIY rollers, so you can pick what actually makes sense for your wallet and your wheels.
Why Cheap Paint Jobs Exist (and Why That’s Fine)
Here’s a simple truth: spending $10,000 to repaint a $4,000 car makes zero financial sense. You’ll never recover that money at resale.
Budget paint jobs exist because most people need a car that looks decent — not a showroom trophy. Whether you’re freshening up a daily driver, prepping for a quick sale, or covering surface rust before it spreads, cheap paint jobs serve a real purpose.
The key is knowing what each option costs, what you’re actually getting, and where the trade-offs are.
What Makes Professional Paint Jobs So Expensive
Before jumping into the budget options, it helps to understand why standard repaints cost so much.
Surface preparation eats up 70–80% of a professional paint job’s total cost. Painters remove door handles, trim, mirrors, and headlights so the new paint wraps cleanly around every edge. Then they sand, fill dents, block-sand, prime, and seal — all before a single drop of color goes on.
Add in premium urethane paints with UV-resistant clear coats, a temperature-controlled spray booth, and hours of skilled labor, and you can see why prices climb fast.
Budget options work by cutting labor time, skipping deep prep, and using simpler materials. That’s not inherently bad — it just means different results.
Commercial Budget Paint Chains: Maaco and Econo
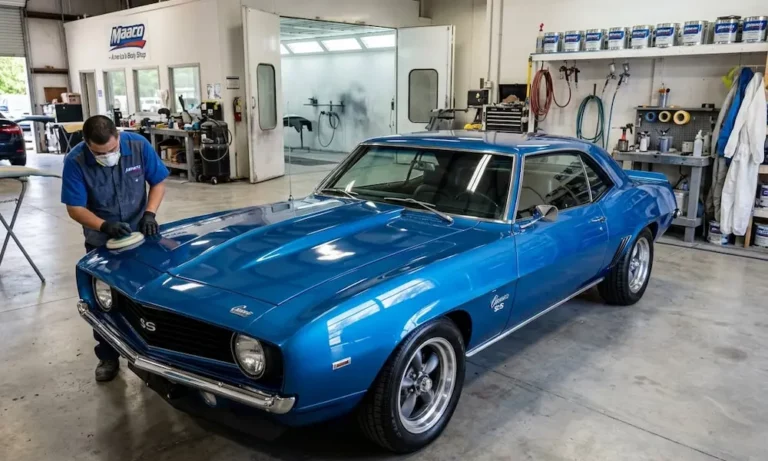
Maaco Auto Body Shop and Painting
Maaco is the biggest name in budget automotive painting. They’ve painted over 20 million vehicles since the early 1970s and operate on a high-volume, standardized model.
Their pricing runs roughly $300 to $900 for basic services, with comprehensive repaints reaching $2,700 or more depending on vehicle size and needed bodywork.
Here’s how their tiers break down:
| Service Tier | Paint System | Material | Warranty |
|---|---|---|---|
| Basic Paint Service | Single-Stage | Synthetic Enamel | 1 Year |
| Preferred Paint Service | Single-Stage | Urethane | 3 Years |
| Premium Paint Service | Two-Stage | Base Coat + Clear Coat | 5 Years |
The cheapest option — basic single-stage enamel — refreshes the color and stops the visual bleeding, but expect the gloss to fade within a couple of years. The urethane mid-tier is a noticeably better deal if you can stretch the budget slightly.
One important detail: Maaco’s budget packages are “doors closed” jobs. The door jambs don’t get painted. If you’re changing colors, that mismatch will show every time you open the door — unless you pay extra.
Since Maaco locations are independently owned, quality varies from shop to shop. Visit the specific location, read local reviews, and ask to see recent work before committing.
Econo Auto Painting
Operating mainly in the Southeast — Florida, Tennessee, and the Carolinas — Econo Auto Painting is Maaco’s closest competitor in the budget space.
Their base pricing starts at around $425, with seasonal promotions occasionally dropping below $350. They use a seven-step standardized process and source materials through long-term relationships with suppliers like Axalta to keep costs down.
Here’s their tier breakdown:
| Paint Package | Sanding Method | Material | Guarantee |
|---|---|---|---|
| Enamel Deluxe | Hand sanding for adhesion | Automotive Enamel | 1 Year |
| Polycrystalline Finish | Hand + dual-action machine sanding | Catalyzed Enamel | 2 Years |
| Poly-Supreme | Hand + dual-action machine sanding | Catalyzed Enamel + Clear Coat | 3 Years |
| Fulthane Urethane | Hand + dual machine sanding | Premium Axalta Urethane + Full Sealer | 4 Years |
Note that vans, trucks, and SUVs carry surcharges due to extra surface area. Environmental disposal fees are also added separately. The top-tier Fulthane Urethane isn’t available at every location.
The “Tape and Spray” Trade-Off
Both Maaco and Econo use the tape and spray method instead of removing trim and hardware. Masking teams cover everything with tape and paper, which is much faster than full disassembly.
The downside? Paint butts up against tape edges rather than wrapping around panel edges — which makes those edges more vulnerable to peeling, especially after pressure washing. Overspray on rubber trim is also a common complaint in budget jobs.
Still, a fresh, uniform coat from a commercial chain beats a faded, oxidized exterior for most daily drivers.
DIY Liquid Paint: The Cheapest Paint Jobs for Cars
If commercial chain prices still feel steep, you can go full DIY. These methods put the work — and the savings — entirely on you.
The Rust-Oleum Roller Method
This is one of the most famous cheapest paint jobs for cars, and it genuinely works if you do it right.
The concept is simple: grab oil-based Rust-Oleum from a hardware store, thin it down with mineral spirits, and roll it onto your car with high-density foam rollers. Total material cost? $50 to $200 for a full sedan.
Here’s the basic process:
- Thin the paint heavily — mix it with mineral spirits until it’s as runny as watery milk. This lets it self-level and eliminates roller texture.
- Roll thin coats — the first coat looks terrible. That’s normal. Don’t panic and glob more on.
- Apply 4–7 layers — let each coat flash dry for several hours before adding the next.
- Wet-sand between coats — start at 800 grit, finish at 2000 grit to level the surface.
- Polish the final surface — a machine buffer with cutting compound brings back the gloss.
The results can genuinely surprise people. The finish won’t compete with a professional two-stage clear coat, but it looks clean, covers oxidation, and costs almost nothing. The paint is also easy to touch up later — just grab the same can and roll it on.
The real cost here is time. This job takes weeks of spare hours when done properly. And hardware store enamel lacks the UV protection of proper automotive paint, so expect fading faster in sunny climates.
Aerosol Automotive Paint (Rattle Cans)
Aerosol paint works best for single panels rather than full resprays. Replacing a hood or repainting a fender after a minor repair? Rattle cans make sense here.
Skip the generic hardware store spray paint — it doesn’t hold up to UV, road salt, or automotive fluids. Instead, use exact-match automotive aerosols from suppliers like AutomotiveTouchup, which mix paint to your car’s factory color code for $35–$50 per can.
The game-changer for aerosol work is the two-part catalyzed clear coat, like the SprayMax system. These cans have an internal hardener bladder — puncture it, and the clear coat activates. The result genuinely rivals spray-gun applied clear coats in terms of durability.
One catch: once activated, you must use the can within 48 hours before it hardens completely.
For full-body aerosol projects, the can costs add up fast and can push your budget close to what a Maaco basic job would cost anyway. Rattle cans are most cost-effective for targeted repairs, not whole-car resprays.
DIY Spray Gun Setup
This is the most involved option — and the one that produces the best DIY results. You’ll need an air compressor, a high-volume low-pressure (HVLP) spray gun, moisture filters, a full respirator, and a makeshift spray booth.
Raw materials — epoxy primer, urethane base coat, premium clear coat — typically run $700 to $1,500 just for supplies. Add the equipment cost on top of that.
The learning curve is steep. Spray gun technique takes real practice, and mistakes like runs, drips, and orange peel are common for beginners. That said, for a project car or a vehicle you’re planning to keep long-term, this investment pays off over multiple jobs.
Alternative Budget Options: Wraps and Peelable Coatings
Plasti-Dip and Peelable Rubber Coatings
Products like Plasti-Dip — available through retailers like DipYourCar — spray on like paint but dry into a flexible rubber membrane. When you’re done with the color, you peel it off by hand. The factory paint underneath stays completely untouched.
A full DIY kit with a turbine sprayer, masking supplies, and enough coating for a complete car typically costs $250 to $500.
The reversibility makes it perfect for leased vehicles or anyone who changes their mind often. But it does have limits:
- Standard dip finishes look matte or satin — not the deep gloss of factory paint
- Durability runs about 12 to 24 months before edges start fraying or fading
- Automatic car washes eat through it faster
It’s a solid choice for temporary color changes, but don’t expect it to look like a professional paint job up close.
Vinyl Wraps
Vinyl wrapping covers the car in adhesive-backed polymer film. The range of finishes is genuinely impressive — gloss, matte, satin, color-shifting, carbon fiber texture, and more.
Professional installation runs $1,500 to $3,000 because of the labor involved in stretching and squeegeeing film over complex curves without bubbles or tears. DIY vinyl film rolls cost a few hundred dollars, but the application demands patience and practice.
Here’s how the film types compare:
| Vinyl Film Material | Cost Profile | Durability |
|---|---|---|
| Polyvinyl Chloride (PVC) | Lowest | Least elastic, fades faster, short-term use |
| Polyethylene Terephthalate (PET) | Mid-Range | Better elasticity, smoother finish, longer life |
| Thermoplastic Polyurethane (TPU) | Highest | Self-healing, superior UV resistance, up to 7 years |
Vinyl also protects the original factory paint from rock chips and UV fading — a real bonus for anyone planning to sell the car down the road.
Surface Prep: The Part Most People Skip
Here’s the honest truth about the cheapest paint jobs for cars: the prep work determines whether a $300 paint job looks decent or starts peeling within a year.
You can actually do your own prep before dropping the car at a budget chain — and significantly improve the final result without paying for the shop’s prep labor. Here’s what proper prep involves:
Decontamination: Wash the car thoroughly and wipe every panel with a wax and grease remover. Any invisible wax or silicone left on the surface will cause the paint to fish-eye or peel.
Sanding:
- Coarse 60–80 grit to remove rust or failing paint down to bare metal
- 320–400 grit to feather edges between old paint and bare metal
- 600–800 grit to scuff sound existing paint for adhesion
Rust treatment: Don’t paint over rust and hope for the best. It will bubble through within months. Remove it completely with wire wheels or stripping discs before priming.
Priming: Bare metal needs epoxy primer — it seals out moisture and prevents future corrosion. Body filler repairs need urethane high-build primer to fill micro-scratches from sanding.
Masking: Use proper automotive masking tape and paper. Newspaper bleeds paint solvents through onto glass. Tuck tape edges under rubber trim seals so you don’t get a hard paint line along the trim edge.
Common Mistakes That Ruin a Cheap Paint Job
Knowing what to avoid saves you from repainting the same car twice.
Painting in bad conditions: Too hot (above 80°F) and the paint dries before it flows together — you get rough dry spray or heavy orange peel. Too cold and it won’t cure properly. High humidity traps moisture under the film, which causes bubbling and peeling.
Spraying too thick: Gravity wins every time. Multiple thin coats always beat one thick coat. Thick coats sag, drip, and ruin the panel.
Mixing incompatible chemicals: Spraying a strong urethane clear coat over old synthetic enamel without a barrier sealer can cause the old paint to wrinkle and lift — it looks like a prune skin and it’s not fixable without stripping everything back down.
Waxing too soon: Fresh paint needs up to 30 days to fully outgas solvents. Waxing during that window traps those solvents inside the film, causing rippling and permanent discoloration. Wash with mild soap and water only until the curing period is done.
Picking the Right Option for Your Situation
Here’s a quick way to match your situation to the right budget approach:
Aging commuter car, just needs to look presentable: A basic Maaco or Econo single-stage enamel package makes the most sense. Spend $300–$500, accept some fade over 2–3 years, and move on.
Selling the car soon: Step up to a mid-tier urethane package. The uniform gloss genuinely helps at resale and the investment is recoverable.
Leased vehicle or want reversibility: Plasti-Dip or a vinyl wrap. Don’t permanently alter a car you don’t own.
Project car or long-term keeper: DIY spray gun setup. The upfront cost is higher but the result is dramatically better and you’ll use the equipment again.
Single damaged panel: Exact-match aerosol with a SprayMax catalyzed clear coat. Clean, targeted, and surprisingly durable for the money.
The smartest move? Do your own prep at home, then take the car to a budget chain for the spray. You get professional spray application without paying shop rates for sanding and masking labor. It’s the best way to stretch a tight budget without sacrificing the final result.