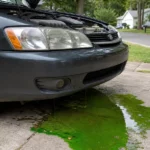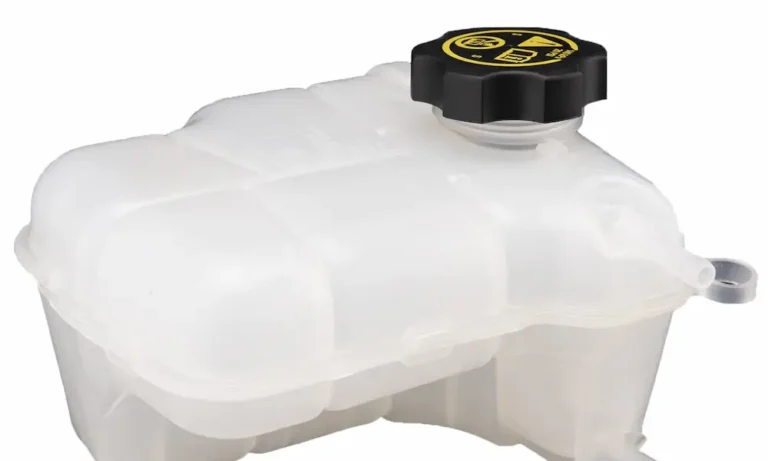
Noticed a puddle under your car, or maybe a sweet smell coming from the engine bay? Your coolant reservoir tank might be failing — and ignoring it can destroy your engine fast. This guide walks you through everything: how to spot the warning signs, what the replacement actually costs, and how to do it yourself without making expensive mistakes. Stick around — the bleeding section alone could save your engine.
What Does the Coolant Reservoir Tank Actually Do?
Your engine runs hot — seriously hot. The cooling system circulates fluid through the engine block to absorb heat, then pushes it to the radiator to cool back down.
As coolant heats up, it expands and needs somewhere to go. That’s the reservoir’s job. It holds the overflow fluid when the system pressurizes, then feeds it back in as the engine cools down.
Without it, your cooling system loses fluid, sucks in air, and your engine overheats — fast.
There are two main reservoir setups:
- Unpressurized recovery tanks — the pressure cap sits on the radiator. The tank just holds overflow fluid at atmospheric pressure.
- Pressurized expansion tanks — common on European cars. The cap sits on the tank itself, and coolant actively circulates through it. These fail faster because they handle constant pressure and heat.
Warning Signs Your Reservoir Needs Replacing
Catch these early and you’ll save yourself a much bigger repair bill.
Visual red flags:
- Tank has turned yellow, brown, or cloudy — that’s oxidized, brittle plastic
- Flat surfaces on the tank look bowed or bulging outward
- Hairline cracks near the mounting tabs, filler neck, or hose barbs
- Chalky white, green, or orange residue around any fitting
Other warning signs:
- Sweet, syrupy smell near the front grille after driving
- Bright colored puddles under the car
- Low coolant warning light on your dash
- Engine temperature climbing higher than normal
Here’s the thing about micro-cracks: they don’t always leak when the engine is cold. But once the system pressurizes at operating temperature, vapor pushes through. By the time you see residue, the damage is already done.
How Long Do Plastic Reservoir Tanks Last?
Most thermoplastic reservoirs last 8 to 10 years. Here’s why they fail:
Manufacturers build reservoirs from polypropylene, high-density polyethylene, or fiberglass-reinforced nylon. These materials handle heat well — initially. But constant cycling between cold starts and operating temperatures above 200°F degrades the polymer chains over time.
The tank goes from flexible to brittle. The ultrasonic weld seams — the joints where two molded halves fuse together — become the weakest point. Eventually the pressure wins, the seam splits, and you lose coolant instantly.
Epoxy or glue won’t fix it. Once the plastic is that far gone, no patch will hold. Replace the tank.
Coolant Reservoir Tank Replacement Cost
Here’s what you’re looking at if you take it to a shop:
| Vehicle | Labor Cost | Parts Cost | Total Estimate |
|---|---|---|---|
| Chevrolet Silverado 1500 | $88–$129 | $609–$644 | $697–$773 |
| Mazda CX-5 | $73–$107 | $283–$295 | $356–$403 |
| Toyota Corolla | $199–$293 | $192 | $391–$484 |
| Honda Civic | $88–$129 | $287–$310 | $375–$439 |
| Nissan Altima | $88–$129 | $351–$365 | $439–$494 |
If you do it yourself, you only pay for the tank and coolant. That’s typically $50–$150 in parts, depending on your vehicle.
OEM vs. Aftermarket vs. Aluminum: Which Tank Should You Buy?
This decision matters more than most people realize.
Budget aftermarket tanks look identical to the original but often use inferior plastic grades, thinner walls, and weaker weld seams. They fail sooner and cause sensor headaches.
Genuine OEM tanks cost more, but they guarantee exact fitment, correct pressure ratings, and reliable sensor integration. Installing one effectively resets the clock — you get another 8–10 years of service.
Aluminum tanks are the permanent fix. They’re TIG-welded from thick aerospace-grade aluminum, immune to thermal degradation, and built with billet-machined filler necks. They’re the best option for high-performance builds, tow vehicles, or anyone who never wants to deal with this again. Higher upfront cost, zero repeat failures.
Choosing the Right Coolant — This Part Is Critical
Don’t fill your new tank with the wrong coolant. The color tells you nothing about chemical compatibility.
| Coolant Type | Additive Chemistry | Service Life | Best For |
|---|---|---|---|
| Inorganic Additive Technology (IAT) | Silicates and phosphates | 2 years / 30,000 miles | Older vehicles |
| Organic Acid Technology (OAT) | Carboxylate organic acids | 5 years / 150,000 miles | Modern aluminum engines |
| Silicated OAT (SIOAT) | OAT + silicates | Extended life | European vehicles |
| Phosphated OAT (POAT) | OAT + phosphates | Extended life | Asian vehicles |
| Nitrited OAT (NOAT) | OAT + nitrites | Heavy-duty extended | Diesel and commercial engines |
Never mix incompatible coolant types. If you pour traditional silicate-based coolant into a system with OAT fluid, the additives react violently. The result is a thick, gelatinous sludge that blocks your radiator tubes, coats your water pump, and destroys your heater core. It also strips away all corrosion protection simultaneously.
If you don’t know what’s in the system and can’t find out fast, top it off with distilled water only. It’s far safer than guessing wrong.
How to Replace Your Coolant Reservoir Tank: Step-by-Step
Safety First — Always
Never open a hot cooling system. The fluid runs above water’s normal boiling point. The cap is the only thing keeping it liquid. Pull that cap on a hot engine and superheated coolant erupts instantly.
- Park on a flat surface
- Wait a minimum of 2 hours after driving
- Wear safety glasses and nitrile gloves
Drain the Fluid
Use a fluid transfer syringe to pull coolant from the top of the tank first. Then locate your radiator’s petcock drain valve — it’s usually a small wingnut plug at the lower corner of the radiator. Open it to drop the fluid level below the reservoir before disconnecting hoses.
Coolant is toxic. Capture all fluid in a sealed container and take it to an auto parts store or municipal hazardous waste facility for proper disposal.
Disconnect the Hoses
Modern cars use spring clamps, not worm-gear clamps. Don’t try to muscle these off with regular pliers — the jaws slip and the clamp snaps shut dangerously. Use dedicated hose clamp pliers with swiveling, textured jaws designed to grip the spring tabs.
For hoses buried deep in the engine bay, a cable-operated hose clamp plier is invaluable. The flexible cable reaches into tight spaces, and the ratchet holds the clamp open while you use both hands to remove the hose.
To break the hose loose from the barb without tearing it, use a non-marring hose removal hook. Sweep it around the barb circumference to break the adhesion gently.
If your car uses nylon quick-disconnect fittings (common on Ford, GM, and BMW), don’t pull or twist them. The nylon gets brittle with age and shatters under force. Use a right-angle pick to remove the external locking wire first, apply penetrating lubricant, then use a quick-disconnect release fork to push the internal tabs while wiggling gently.
Remove the Old Tank
Spray penetrating oil on the mounting bolts and wait 5 minutes. These bolts corrode badly from road salt exposure. Don’t force them dry or you’ll snap them.
Remove the fasteners, lift the tank out carefully, and inspect the mounting brackets and hose condition while everything is accessible. Replace any hose showing bulging, sponginess, or cracking — this is the ideal time.
Install the New Tank and Torque Correctly
Lower the new tank into position and align any plastic pegs into their rubber grommets. Hand-thread all bolts before applying any torque.
This is where people break brand-new parts: plastic mounting tabs require very low torque values measured in inch-pounds, not foot-pounds. Using a standard ratchet with normal force will crack the new tank immediately.
Use a low-range inch-pound torque wrench and consult your vehicle’s factory service data. Here’s why precision matters:
| Component | Torque Value | Notes |
|---|---|---|
| Ford 7.3L Fuel Filter Sensor | 35–45 inch-lbs | Extremely delicate — requires specialized wrench |
| Subaru Valve Cover Bolts | 62–83 inch-lbs | Shows typical small fastener sensitivity |
| Heavy-Duty Reservoir Bolts | 15–25 ft-lbs | Higher for commercial plastic tanks only |
Apply one drop of fresh coolant to each plastic barb as lubricant before reconnecting hoses. Push hoses on until they bottom out against the molded flange, then seat spring clamps exactly in their original indentations on the rubber.
Bleeding the Air Out — Don’t Skip This
A trapped air pocket causes the water pump to cavitate, fluid stops circulating, and your engine overheats in minutes. Bleeding air is the most critical step of any coolant reservoir tank replacement.
Spill-Free Funnel Method
Park with the nose slightly elevated so the reservoir filler neck sits at the highest point in the system. Lock a spill-free funnel onto the neck, fill it halfway with a 50/50 mix of coolant and distilled water — never tap water, which causes mineral scaling inside your radiator.
Start the engine and set cabin heat to maximum, blower on low. This opens the heater core circuit and pushes air out of the cabin loop. As the thermostat opens, large air burps will appear in the funnel — keep topping it off. Squeeze the upper and lower radiator hoses repeatedly to dislodge stubborn pockets.
Bleeding is complete when the electric cooling fans cycle on and the funnel level holds steady with no bubbles.
Vacuum Airlift Method (Fastest)
Connect an airlift vacuum tool to your shop compressor and pull the empty system to 25–30 inches of mercury. Watch the gauge for 5 minutes — a steady needle confirms a perfect seal. Then release a valve, and atmospheric pressure sucks the coolant in instantly, filling every void with zero air pockets.
BMW/Audi Electric Pump Bleeding
Some European vehicles run a computer-controlled electric water pump with an automated bleeding routine. Connect a battery charger to prevent drain. Press ignition once without the brake pedal, set heat to maximum, fan on low, then press the accelerator to the floor and hold for 10–12 seconds. The pump cycles automatically for about 10–12 minutes, purging air completely while you top off the tank.
Pressure Test Before You Drive
Once everything is assembled, pressure test the system before driving anywhere. Attach a radiator pressure tester to the reservoir neck and pump it to the PSI printed on your pressure cap — typically 12–15 PSI.
Watch the gauge for 5 minutes. No movement means a perfect, leak-free installation. A dropping needle tells you exactly what to look for: a misaligned hose clamp, a pinched O-ring, or a loose bleed screw. Find and fix it now — not on the highway.
FAQs
How should I dispose of old engine coolant legally?
Coolant is classified as hazardous waste in the US. Never pour it down a drain or onto soil — it contaminates groundwater. Seal it in a container and drop it off at a municipal hazardous waste facility, quick-lube shop, or auto parts retailer. Most accept it free.
Is coolant dangerous to pets?
Extremely. Ethylene glycol-based coolants are rapidly fatal to dogs, cats, and wildlife even in tiny amounts. It tastes sweet, which makes it attractive. The US mandates bittering agents in coolant to deter animals, but clean up any spills immediately regardless.
Can I drive with a cracked reservoir?
No. Even a hairline crack drops system pressure, which lowers the coolant’s boiling point and lets air in during cool-down. That air eventually reaches the water pump, causes cavitation, and your engine overheats within miles. Pull the car off the road and get it repaired.
What if I damaged a hose during removal — can I bypass the heater core temporarily?
Technically yes — loop the inlet and outlet hoses together with a brass barb and clamps to bypass the heater core. But this kills your cabin heat, eliminates defrost capability, and alters coolant flow dynamics significantly. Treat it as an emergency measure to reach a shop, never as a permanent solution.
Does car insurance cover a failed coolant reservoir?
Standard comprehensive and collision policies don’t cover mechanical wear or material fatigue. Unless a collision directly damaged the tank, the repair cost falls on you. However, if your vehicle is still under a factory warranty or extended service contract, the failure and associated labor may be fully covered — check your policy.