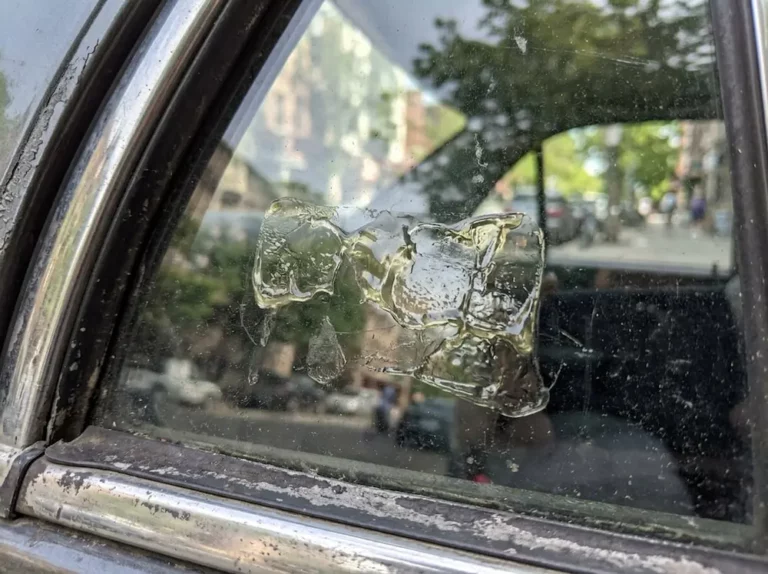
Sticky residue left behind by stickers, old tint, or parking permits is genuinely frustrating. The good news? You can remove car window adhesive cleanly and safely with the right tools and sequence. Stick around — the wrong approach can scratch your glass or destroy your defroster grid permanently.
Why Car Window Adhesive Gets So Stubborn
Fresh adhesive peels off easily. Old adhesive doesn’t.
When a sticker or tint film bakes in direct sunlight through summer after summer, the glue chemically transforms. The acrylic or rubber-based adhesive cross-links and polymerizes, turning from a pliable film into a hardened, brittle layer that grips the glass with real tenacity.
Yanking it off dry guarantees one of two outcomes:
- The sticker tears, leaving the adhesive layer fully bonded to the glass
- The brittle glue fractures into an opaque, hazy film that blocks your sightlines
Neither outcome is good. That’s why technique matters so much here.
Know Your Surface Before You Touch It
Not all car glass is the same. Treating every window identically is a fast track to an expensive mistake.
Windshields vs. Side and Rear Glass
Your windshield is laminated glass — two glass layers bonded around a plastic interlayer. It’s highly sensitive to thermal shock. Never pour boiling water on a cold windshield or blast a heat gun at one spot too long.
Side windows and rear windshields are tempered glass. They’re tougher, but microscopic particles from the manufacturing process can fuse into the surface. Drag a dry metal blade across them and those particles act like sandpaper under your tool, etching permanent scratches into the glass.
Window Tint Film
Aftermarket tint is a soft polyester film applied to the interior glass surface. It scratches easily — even a stiff paper towel can haze it. It’s also chemically fragile. Ammonia-based cleaners degrade the film over time, causing purple discoloration, bubbling, and peeling. Acetone, xylene, or toluene will melt it instantly.
Rule for tinted glass: ammonia-free products only, plastic tools only.
Rear Defroster Grids
The horizontal lines printed on your rear windshield carry electrical current to clear ice and fog. They’re made from conductive silver or copper paste baked onto the glass surface — and they’re extremely fragile. One slip of a metal blade severs a line permanently. Repairing broken defroster lines is tedious, imprecise, and never looks perfect.
The rear windshield requires zero mechanical scraping whenever possible.
Step One: Use Heat to Weaken the Adhesive Bond
Heat is your best first move when learning how to remove car window adhesive. Warming the glue breaks down its polymer chains and dramatically reduces how hard it grips the glass.
Hair Dryer (Safest Option)
A standard hair dryer on medium heat is ideal for most consumer jobs. Hold it a few inches from the sticker and keep it moving in a circular sweep for 30 to 60 seconds. Stationary heat risks cracking the glass or blistering surrounding rubber trim.
Heat Gun (Professional Use)
Heat guns run much hotter and work well for large vinyl graphics or deeply baked tint film. But they demand constant motion. Holding one still for even a few seconds can warp interior plastics, scorch paint, or shatter glass through localized thermal expansion.
Steam Cleaner (Best for Rear Windows)
Professional detailers widely consider pressurized steam the gold standard. Steam delivers heat and moisture simultaneously — the moisture hydrates and reactivates the old glue while the heat softens it. For rear windshields specifically, steam often eliminates the need for scraping entirely, keeping your defroster grid completely safe from physical contact.
The Trash Bag Solar Method (For Full Tint Removal)
No steamer? Try this for large-scale rear-window tint adhesive removal:
- Spray the interior glass generously with soapy water
- Cut a black trash bag to the exact shape of the window
- Press it flat against the wet glass — the water holds it in place
- Park in direct sunlight for 30 to 60 minutes
The black plastic absorbs solar heat and traps solvent vapors against the glass, softening the adhesive deeply. The film often peels off in large continuous sheets when you pull it back.
Step Two: Pick the Right Solvent
When heat alone isn’t enough, a chemical solvent does the heavy lifting. The right choice depends entirely on your surface.
| Solvent | Best For | Safe On Tint? | Risk Level |
|---|---|---|---|
| Warm soapy water | Tinted glass, light labels | ✅ Yes | Very low |
| White vinegar | Exterior paper stickers | ⚠️ Avoid | Low |
| Isopropyl alcohol (90%+) | Exterior glass residue, light haze on tint | ✅ Light use only | Low–Moderate |
| Goo Gone Automotive | Bumper stickers, heavy exterior residue | ⚠️ Avoid edges | Moderate |
| WD-40 | Stubborn exterior residue | ⚠️ Avoid | Moderate |
| 3M Adhesive Cleaner / Stoner Xenit | Professional vinyl and tape removal | ⚠️ Professional | Moderate–High |
| Goof Off / Acetone / Brake Cleaner | Last-resort bare glass only | ❌ Never | Extreme |
A Word on Goo Gone vs. Goof Off
This mix-up causes real damage every year. Goo Gone uses d-limonene — a citrus-derived oil — blended with mild petroleum distillates. It’s slow-acting but safe on clear coats and bare glass.
Goof Off is a completely different product. It contains acetone and xylene — chemicals designed to strip dried paint. A stray drip of Goof Off near your car window will etch the clear coat, melt interior plastic trim, and destroy window tint on contact. Don’t use it anywhere near automotive glass.
Always Allow Dwell Time
Apply your solvent and wait. Three to five minutes minimum. Rushing and immediately scrubbing forces you to use more physical pressure — which is exactly how glass gets scratched. The chemistry does the work when you give it time.
Step Three: Scrape Safely Using the Right Tools
Choosing the wrong scraper — or using the right one incorrectly — creates scratches that are difficult or impossible to fix.
Tool Selection by Surface
- Metal razor blade: Use only on bare exterior glass, never on tint or near defroster lines. Always in a dedicated safety handle, never bare-handed.
- Heavy-duty polycarbonate plastic blade: Great for areas near painted pillars, or for general-purpose consumer work on bare glass.
- Soft Delrin plastic blade: The only acceptable tool for tinted glass and anywhere near defroster grids.
The Four Rules for Using a Razor Blade on Glass
Breaking any of these rules causes scratches. All four are non-negotiable.
- Use a fresh blade every time. A chipped or rusted edge acts like a serrated knife on glass.
- Keep the glass thoroughly wet. Dry scraping is the primary cause of razor-induced scratches. The fluid creates a micro-layer that lets the blade hydroplane over the glass surface.
- Hold the blade at 30–45 degrees. Too steep, and the blade digs in. Too shallow, and it slides uselessly over the sticker.
- Push forward only — never pull back. The back edge of a razor isn’t honed. Pulling it backward drags accumulated grit and hardened glue across the glass, guaranteeing scratches. Lift the blade completely, return through the air, push forward again.
Wipe adhesive buildup from the blade after every single pass.
How to Remove Car Window Adhesive: By Window Type
Exterior Bare Glass (Windshield, Side Windows)
- Wash and dry the surrounding area to remove dirt and grit
- Apply heat with a hair dryer for 30–60 seconds, keeping it moving
- Lift one corner with a plastic card and peel slowly at 45 degrees
- Apply Goo Gone or isopropyl alcohol to remaining residue
- Wait 3–5 minutes
- Scrape with a lubricated razor blade at 30 degrees, pushing forward only
- Clean with an ammonia-free glass cleaner and a fresh microfiber towel
Interior Tinted Glass
- Park in the shade — sunlight evaporates your lubricant too fast
- Apply very gentle heat with a hair dryer on low, kept moving, for 20–40 seconds
- Spray warm soapy water onto the adhesive and let it dwell for 3–5 minutes
- If you need something stronger, spray tint-safe remover onto a microfiber cloth first, then dab it onto the glue — never spray directly at the edge of the tint
- Wipe with straight, controlled strokes — no circular scrubbing
- Use only soft plastic tools for stubborn spots
- Finish with an ammonia-free glass cleaner
Rear Windshield With Defroster Grid
The single rule here: chemical dwell time substitutes for physical force.
- Use a steam cleaner if at all possible — it’s the safest method by a wide margin
- If no steamer is available, apply isopropyl alcohol or soapy water generously and wait significantly longer than you think you need to
- When wiping, move only horizontally — parallel to the defroster lines, never across them
- If the adhesive doesn’t lift, stop, reapply solvent, apply more heat, and wait longer
- A metal blade should never touch this surface under any circumstances
If You Accidentally Scratch the Glass
Minor surface scratches from razor blades can often be polished out. Deep gouges that catch a fingernail typically require professional windshield repair or replacement.
For shallow micro-scratches, cerium oxide is the industry-standard solution. It’s a rare-earth mineral compound that polishes glass at the molecular level. Mix it into a paste with water and apply it using a rotary polisher fitted with a felt or rayon glass pad.
Work in short 30–60 second bursts. Keep the paste moist with a spray bottle — dry cerium oxide spinning at speed generates heat fast enough to distort or crack the glass. Repeat the cycle patiently until the scratches are gone.
Your Quick-Reference Toolkit
Here’s everything you need before you start:
- Hair dryer (medium heat)
- Isopropyl alcohol (90%+) or Goo Gone Automotive
- Ammonia-free automotive glass cleaner
- Safety scraper handle with fresh razor blades
- Heavy-duty polycarbonate plastic blades and soft Delrin blades
- Microfiber towels (multiple, clean)
- Spray bottle with soapy water
- Steam cleaner (if tackling rear window tint)
The process for how to remove car window adhesive safely comes down to three things done in the right order: soften the glue with heat, dissolve what remains with the correct solvent, and scrape only with adequate lubrication at the right angle. Skip any step and you’re gambling with your glass.