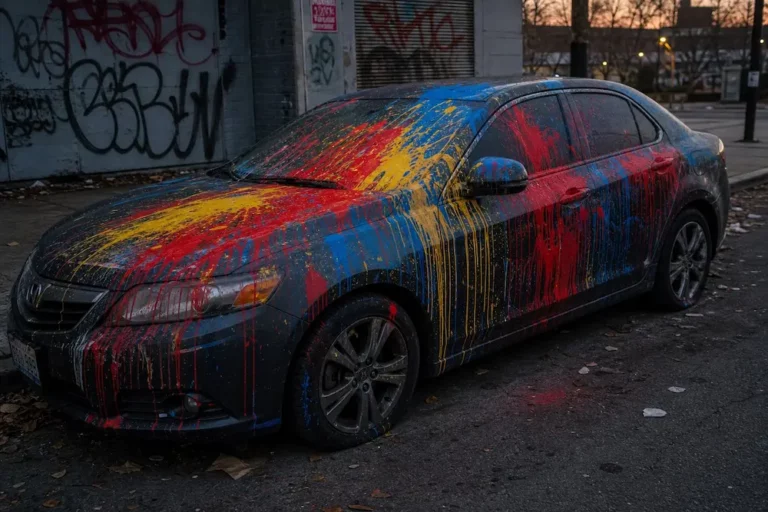
Found spray paint on your car this morning? Don’t panic — and don’t grab the first solvent you can find. The wrong move can cause more damage than the vandalism itself. This guide walks you through every method, from the safest fix to the heavy-duty solutions, so you know exactly what to reach for.
Why Your Car’s Finish Is Tougher Than You Think
Your car’s exterior isn’t just bare metal with color on top. It’s a multi-layered system built to resist UV rays, acid rain, and chemical solvents. From the inside out, it goes: metal → electro-deposition primer → base coat (your color) → clear coat.
That clear coat is the hero here. It’s baked on at extreme temperatures during factory production, which makes it highly resistant to most chemicals. Spray paint, on the other hand, isn’t baked or catalyzed the same way — it just sits on top of the clear coat.
That’s your window of opportunity.
The three factors that control how hard this job will be:
- Time elapsed — Fresh paint (under 24 hours) lifts easily. Old, baked-on paint fights back hard.
- Temperature — Heat expands the clear coat’s pores and lets spray paint sink in deeper.
- Surface type — Painted metal, plastic trim, glass, and headlights all need different approaches.
Safety First: Gear Up Before You Start
Before you touch the car, protect yourself and your driveway.
- Nitrile gloves — Standard latex melts when it contacts petroleum distillates. Use heavy-duty nitrile.
- Safety glasses — Especially when using spray solvents near your face.
- Respirator mask — Required for acetone, lacquer thinner, or Goof Off in enclosed spaces.
- Drop cloth or plastic sheeting — Aggressive solvents stain and dissolve asphalt driveways. Protect the ground.
Work in a shaded area with good airflow. A hot panel in direct sunlight causes solvents to flash-evaporate before they can work — and concentrated, rapidly drying chemicals can etch the clear coat permanently.
Tape off rubber seals, plastic trim, and badges with automotive masking tape before applying any liquid solvent. Runoff on sensitive materials causes irreversible bleaching and melting.
The Golden Rule: Always Start Mild
Professional detailers follow the principle of least aggression. Start with the mildest method and escalate only if necessary. Jumping straight to acetone on a fresh paint job is like using a sledgehammer to hang a picture frame.
Here’s the full escalation ladder:
| Phase | Method | Best For | Risk to Clear Coat |
|---|---|---|---|
| 1 | Warm soapy water | Paint under 12 hours old, still damp | None |
| 2 | Carnauba wax | Fresh to moderately cured spray paint | None |
| 3 | Detailing clay bar | Dried, rough-textured overspray | Low (minor micro-marring possible) |
| 4 | IPA solution / bug & tar remover | Stubborn spots on painted metal | Low if diluted correctly |
| 5 | WD-40 / mineral spirits | Baked paint, road-stripe splatter | Low to moderate |
| 6 | Acetone / lacquer thinner | Heavy cured vandalism (use sparingly) | High if left too long |
Phase 1: Warm Soap and Water
If you catch the vandalism fast — the paint is still damp — a quality automotive shampoo might be all you need.
Soak the area, then agitate gently with a plush microfiber towel using light circular motions. If you have a pressure washer, a wide-angle fan tip from a safe distance can blast off heavy clumps before they cure. Don’t get the tip too close — high-pressure water can lift existing chips and strip the clear coat.
Phase 2: Carnauba Wax
This sounds backwards, but it works. Liquid carnauba wax contains mild carrier solvents that reactivate and soften fresh spray paint. The wax solids then encapsulate and lift the foreign pigment away from the surface.
Apply a generous amount to a foam applicator pad. Work it into the affected area with firm, circular motions. The wax softens the spray paint, captures it, and buffs it away — leaving behind a protective hydrophobic layer. This is arguably the best first-line defense for recent vandalism.
Zero abrasives. Zero chemical risk. Worth trying every time before escalating.
Phase 3: Detailing Clay Bar
Paint feel rough and gritty? Like sandpaper? That’s dried overspray. Detailing clay is your tool here.
How to use it:
- Wash the vehicle first to remove loose dirt.
- Soak the area with dedicated clay lubricant or a quick-detailing spray.
- Flatten the clay into a thin patty and glide it back and forth with zero downward pressure.
- The clay’s tackiness grabs the raised spray paint particles and shears them off.
- Fold the clay inward as it loads with paint and expose a clean surface.
Clay bars won’t scratch the harder clear coat beneath the overspray. They’re ideal for light road-line splatter and overspray but aren’t fast enough for thick graffiti.
Phase 4: Isopropyl Alcohol and Bug & Tar Removers
Isopropyl Alcohol (IPA)
Isopropyl alcohol is a go-to in professional detailing for panel prep before ceramic coatings. It breaks down fresh paint, tree sap, and light adhesives effectively.
Don’t use it undiluted. Full-strength IPA can swell and dull the clear coat with repeated exposure. Mix one part 91% IPA with several parts distilled water to reach a working concentration of roughly 15–20%. Spray it on a clean microfiber cloth, hold it against the spray paint to soften the surface, then wipe gently.
IPA evaporates fast, which limits the risk of damage. But keep it off rubber and plastic trim — repeated exposure draws out plasticizers and causes cracking.
Bug and Tar Removers
These products blend mild petroleum distillates with lubricating oils, making them safe for OEM clear coats while still offering enough solvency to tackle hardened paint. Apply directly to the spot, let it dwell per the product’s instructions, then wipe gently. This is a strong middle-ground option.
Phase 5: WD-40 and Mineral Spirits
WD-40
WD-40’s aliphatic hydrocarbons are excellent at loosening road tar, bug splatter, and light paint transfers. Spray generously, let it dwell a few minutes, then wipe with a thick microfiber towel. The heavy mineral oil content lubricates the surface during removal, minimizing the chance of scratching.
Two things to watch:
- Don’t leave it sitting in direct sunlight — petroleum distillates will slowly attack your wax and eventually the clear coat.
- Never use WD-40 on matte or satin paint finishes. The mineral oils permanently penetrate the microscopic texture that creates the flat effect, leaving irreversible glossy stains.
After using WD-40, degrease the area thoroughly with automotive shampoo to remove the oily residue.
Mineral Spirits
A highly refined petroleum distillate that dissolves fresh oil-based and latex road-stripe paints well. It evaporates slower than acetone, allowing better dwell time on stubborn spots. It’s generally safe for fully cured OEM clear coats.
Phase 6: Heavy Solvents (Use Carefully)
Acetone and Nail Polish Remover
Acetone is a powerful ketone solvent that melts nearly all spray paints on contact. It’s also found in nail polish remover — which is essentially the same thing in a gentler formula.
The rules if you use acetone:
- Never pour it directly onto the car.
- Apply to a microfiber towel, not the panel.
- Work in tiny sections and flip the towel constantly.
- Rinse immediately with soap and water after each pass.
Acetone left dwelling on clear coat will soften and permanently etch the finish. It also instantly melts automotive plastics and fogs polycarbonate headlights. Keep it strictly on painted metal only.
Lacquer Thinner
This is the most aggressive tool in the kit. Lacquer thinner contains toluene and ketones that strip cured spray paint effortlessly. It’ll also strip your wax, sealant, and ceramic coating in the same swipe. Use it only on painted metal, applied sparingly to a cloth, wiped swiftly, and rinsed instantly.
Choosing the Right Commercial Product
Not sure which bottle to grab? Here’s how the main players stack up:
| Product | Active Ingredients | Strength | Safe On Plastics/Rubber? |
|---|---|---|---|
| Goo Gone Automotive | Citrus terpenes (d-Limonene) | Low–Moderate | Yes |
| Goof Off Professional | Xylene, acetone, methanol | Very High | No — melts plastic and rubber |
| Motsenbocker’s Lift Off | Water-based bond-breaker | High | Yes |
| 3M Specialty Adhesive Remover | Solvent blend | High | Safe on cured clear coat and glass |
Goo Gone vs. Goof Off — don’t mix these up. Goo Gone is a mild citrus gel that’s safe on almost every surface but requires significant scrubbing. Goof Off is an industrial solvent containing acetone and xylene — it destroys spray paint in seconds but will melt trim and aftermarket paint if you use it carelessly.
Motsenbocker’s Lift Off uses a proprietary water-based formula that breaks the molecular bond between the spray paint and the surface — the paint lifts away in sheets rather than dissolving into a chemical smear. Safe on plastics, clear coat, rubber, and vinyl.
3M Specialty Adhesive Remover is the professional body shop standard. It flashes quickly, leaves no residue, and handles severe overspray that over-the-counter solvents can’t touch.
Surface-Specific Rules You Can’t Ignore
Unpainted Plastic Trim and Rubber Seals
These are the most vulnerable surfaces on your car. Acetone, lacquer thinner, and Goof Off will melt plastic, bleach the black color to a chalky white, and destroy rubber seals instantly.
For unpainted plastic, use Motsenbocker’s Lift Off or diluted IPA only. A magic eraser (melamine foam) soaked in soapy water can work, but use feather-light pressure — it acts as a micro-abrasive that can scuff the texture. After removing paint, apply a ceramic trim restorer to replenish plasticizers and restore the deep black color.
Automotive Glass
Glass is far denser and harder than clear coat. Most solvents are safe on it, but the most efficient method is mechanical scraping.
- Saturate the glass with foaming glass cleaner or soapy water.
- Hold a brand-new single-edge carbon steel razor blade at a 30–45-degree angle against the wet glass.
- Push firmly forward in straight lines, shaving the paint off in ribbons.
- Buff residue with ultra-fine (0000) steel wool.
Keep razor blades and steel wool away from painted panels and rubber seals — they’ll cause deep, immediate scratches.
Polycarbonate Headlights
Polycarbonate is fragile in ways glass isn’t. Razor blades gouge it. Acetone, xylene, and lacquer thinner trigger crazing — thousands of tiny spider-web cracks that permanently cloud the lens.
Use gentle heat from a hair dryer to soften the paint first. Apply WD-40 or Goo Gone, then scrape lightly with a plastic credit card or plastic razor blade. If the paint has bonded deeply, wet-sand the headlights starting at 1500 grit, progressing to 3000, then polish back to clarity with a compound and machine polisher. Seal with a ceramic coating or protective film afterward.
Restoring the Finish After Removal
Getting the paint off is only half the job. Solvents strip wax and can introduce micro-marring, swirl marks, and dullness. Leaving the clear coat bare invites UV damage and oxidation.
Polish Out the Damage
Use a quality automotive compound like Meguiar’s Ultimate Compound to level micro-scratches. Modern compounds use diminishing abrasive technology — they cut aggressively at first, then break down into finer particles as you work, finishing with a high-gloss result.
For professional results, use a dual-action orbital polisher. The random orbital motion prevents heat buildup that could burn through the clear coat, making it safe even for first-timers. Work at moderate speeds in slow, overlapping cross-hatch passes.
Re-Protect the Surface
After polishing, apply protection immediately. Options include:
- Liquid carnauba wax — Easy application, warm gloss finish
- Synthetic polymer sealant — Longer lasting than wax, great water beading
- Silicon dioxide ceramic coating — Maximum UV protection and longevity
A freshly protected surface also makes future vandalism easier to remove — spray paint has a much harder time bonding to waxed clear coat.
Insurance and Professional Help: Know When to Escalate
Some situations go beyond DIY. Seek a certified detailer or auto body shop if:
- Total vehicle coverage — The chemical volume and labor required risk uneven clear coat degradation without professional equipment like paint depth gauges.
- Clear coat failure — If the spray paint etched through into the base coat, you’re looking at professional wet-sanding or a panel repaint.
- Matte or satin finishes — These can’t be polished, clay-barred, or treated with oily solvents. Any friction or heavy oil permanently creates glossy spots that require a full panel respray.
On the insurance side, vandalism typically falls under comprehensive coverage. Before filing a claim, compare your deductible against the cost of a professional detailer. For moderate vandalism, a detailer often costs less than the deductible — meaning you can skip the claim and avoid any premium increase.