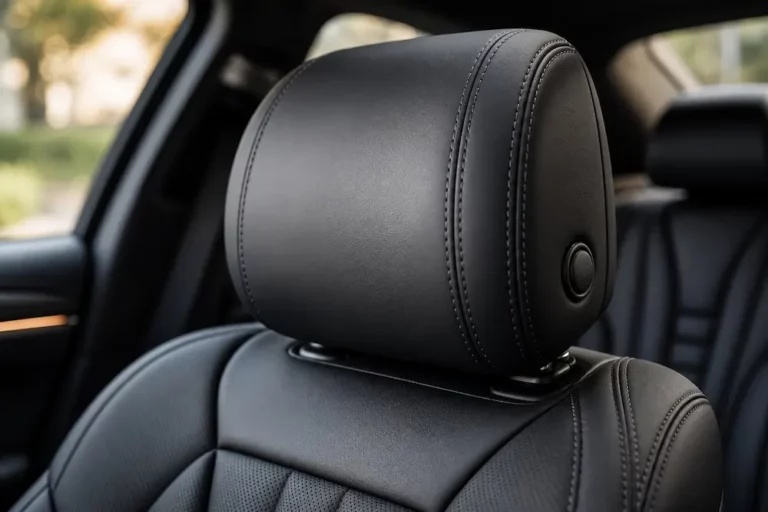
Staring at a headrest with zero buttons and no obvious way to get it out? You’re not the first person to feel stumped. Modern cars deliberately hide or eliminate the release mechanism — and there’s a very good reason for that. This guide breaks down exactly how to remove a headrest with no button, covering the most common vehicle types and the tools you’ll need.
Why Your Headrest Has No Visible Button
Car manufacturers didn’t accidentally forget to add a button. They removed it on purpose.
Federal safety standards require headrests to stay locked in place during a rear-end crash. A big, easy-to-press button defeats that goal. By hiding or eliminating the release, engineers make sure the headrest can’t pop out when it matters most.
The result? You get a safer car but a genuinely confusing removal process.
The good news: once you know which hidden mechanism your car uses, removal usually takes under two minutes.
The Tools You’ll Actually Need
Keep these nearby before you start:
- A straightened paperclip or thin metal pick
- A small flathead screwdriver
- A plastic trim removal tool (optional but helpful)
- A hex key (for stubborn pinhole systems)
That’s it. No power tools. No dealership visit required.
The 6 Types of Hidden Headrest Release Mechanisms
| Mechanism Type | What It Looks Like | Tool Needed | What You Do |
|---|---|---|---|
| Pinhole detent | Tiny hole on the side of the collar | Paperclip or pick | Push straight in to compress the internal lock |
| Slotted collar | Narrow slot on the collar face | Small flathead screwdriver | Pry the wire clip outward |
| Sub-upholstery lever | No visible mechanism at all | Your fingers | Press firmly through the seat fabric |
| Rotary escutcheon | Seamless plastic cap | Bare hands | Twist counterclockwise |
| Snap-fit cap | Solid plastic dome over the collar | Trim tool | Pop the cap off, then press the internal lock |
| Internal spring clip | Fully sealed hollow tube | Flathead and wrench | Insert tool down the tube to depress a hidden tab |
Still not sure which one you have? Check your car’s owner’s manual first. If that fails, keep reading — the vehicle-specific sections below have you covered.
How to Remove a Headrest With No Button: Step-by-Step by Mechanism
The Pinhole Method (Most Common)
This is the most common hidden release you’ll find on modern Ford, GM, Toyota, and Subaru vehicles.
Here’s how to do it:
- Look at both guide sleeves (the plastic collars at the base of the headrest posts). One has a button — the other has a tiny hole, usually on the side or inner face.
- Straighten a paperclip completely. A small hex key works even better since it won’t bend.
- Press the regular button on the first collar with one hand.
- Simultaneously insert the paperclip into the pinhole on the second collar. Push straight in until you feel resistance give.
- While holding both pressed, pull the headrest straight up.
Pro tip: Tilt your seatback slightly rearward. This reduces friction on the posts and makes pulling much easier.
The Sub-Upholstery Method (Mostly European Vehicles)
Some older Mercedes-Benz models and certain utility vehicles hide the release beneath the seat fabric entirely. There’s nothing to see on the guide sleeves.
- Run your fingers down from the headrest post into the padded seat back.
- Feel for a firm, localized hard point beneath the fabric — it feels like a small triangle or circle.
- Press that point firmly forward or downward through the upholstery.
- While holding pressure, pull the headrest up and out.
Vintage Mercedes-Benz W108 models use this exact triangular hidden button inside the seat padding. For the G-Wagon (W460), pull the headrest to maximum height first, press down sharply, then yank up fast to beat the tight internal tolerances.
The Rotary Escutcheon Method
No holes, no slots, no buttons — just a smooth plastic cap sitting at the top of the guide sleeve.
- Grip the plastic collar with your fingers or wrap it gently with a cloth and use non-marring pliers.
- Twist counterclockwise, typically between 15 and 90 degrees.
- Once the cap disengages from its internal bayonet lock, pull the headrest straight up.
This method is common on certain aftermarket seat cover installations where the collar must be rotated before the post can slide free.
The Snap-Fit Cap Method
This one’s used on the Hyundai Palisade and Santa Fe, among others.
- Look for a solid plastic dome covering one of the guide sleeves.
- Insert a trim tool or flathead screwdriver under the edge of the cap.
- Pry the cap upward carefully — there are front and back clips that require real leverage to unseat.
- Once the cap is off, you’ll see the internal metal lever or spring clip.
- Press it down with a screwdriver while pulling the headrest up.
Cold weather warning: Do this in a warm garage if possible. Cold plastic snaps easily, and those retaining tabs don’t survive many prying attempts.
Vehicle-Specific Instructions
Ford F-150 and F-Series Trucks
Front seats use the classic dual-action pinhole system: one button, one pinhole, both pressed simultaneously.
Rear seats are trickier. The headrest hits the headliner before the posts clear the sleeves. You need to fold the seatback forward first. Ford hides the rear seatback release behind the seat — slide a long box wrench into the gap between the seat cushion and rear bulkhead, hook the silver locking pin, and pull upward.
2010 Ford Fusion rear headrests: Raise the headrest to maximum height, then lower it slightly until it clicks into the top detent. Only in that position will the pinhole mechanism actually engage.
2011–2019 Ford Explorer: These use a deep tubular clip, not a pinhole. You need a crescent wrench applying upward pressure at the collar base while a flathead screwdriver goes down the tube alongside the post to depress a recessed plastic tab. Go slow — that plastic tab breaks if you push sideways.
Chevrolet, GMC, and Cadillac
Most Silverado and Sierra trucks use the standard pinhole setup on front and rear outboard seats. A straightened paperclip handles it cleanly.
The Silverado EV center headrest is a special case. The release button sits completely flush with the collar — it looks like a mold seam rather than a button. You need to press precisely on that tiny surface area to move the headrest down or remove it entirely.
Jeep Wrangler and Gladiator
There are absolutely zero buttons, holes, or slots on the rear guide sleeves of these vehicles.
Two options:
- Unzip the seat upholstery from the top of the seat frame to access the internal spring clips. Expand the clips manually to free the posts.
- Grip the guide sleeves and pull up hard — both the sleeve and headrest come out as one unit. This method risks damaging the internal retaining rings, so use it only if you’re okay with that tradeoff.
Parents installing forward-facing child seats in a Gladiator frequently run into this problem. The fixed forward pitch of the headrest blocks the child seat from sitting flush — a real safety concern that makes removal necessary.
Ram 1500
Front seats are actually easier than most trucks. There’s a large height-adjustment button and a smaller secondary rectangular button on the same collar (or opposite post). Press both simultaneously and pull up.
Rear outboard seats revert to the standard pinhole system — use two paperclips at once, one per collar.
Subaru Outback, Forester, and Crosstrek
The release button on many Subaru rear seats sits on the right-hand guide sleeve only. Press it and pull straight up.
The bigger problem is geometry. The sloping roofline blocks the posts before they clear the sleeves. Recline or fold the seatback to create enough vertical clearance.
Critical warning: Never insert a Subaru headrest backward. The asymmetric notches act as a one-way ratchet — the post locks in permanently. If this happens, slide a thin metal shim (a feeler gauge works well) down the sleeve alongside the post to manually wedge the locking tang open while pulling up hard and steady.
Tesla Model S and Model Y
Tesla headrests aren’t designed for casual removal. The Tesla service manual outlines a full procedure that includes removing the seat back shell, unclipping upholstery, disconnecting the side airbag harness, the recliner motor, the lumbar valve pack, and the seat heater connectors — before you can even get to the headrest bayonets.
This is a shop job for Tesla models unless you’re genuinely experienced with automotive interiors.
Active Headrests: Read This Before You Touch Anything
Some vehicles use Active Head Restraints (AHR) — systems that fire forward during a crash to protect your neck. They’re connected to your car’s airbag network with live electrical wiring routed through the headrest posts.
Pull one of these out without disconnecting the wiring first and you’ll either snap the harness or, worse, accidentally trigger a deployment.
How to Safely Disconnect an Active Headrest
- Disconnect the negative terminal on your main 12-volt battery.
- Disconnect any auxiliary battery if your car has one (common on hybrids and start-stop vehicles).
- Wait at least one to three minutes. The airbag control module stores charge in internal capacitors. BMW’s I-CAR safety specifications require a minimum one-minute wait for vehicles built after 9/93. Don’t skip this.
- Open the seat back, locate the yellow or orange SRS connector inside, and unplug it carefully.
- Now you can release the mechanical locks and remove the headrest.
Never splice or repair yellow SRS wiring. Honda, Toyota, Subaru, Mazda, Hyundai, Kia, and Stellantis all explicitly state in their service standards that damaged SRS wiring requires full harness replacement — no patch jobs.
Also, don’t try to fool the system with a resistor if you permanently remove an active headrest. It clears the dashboard warning light, but it disables your active whiplash protection entirely.
Headrests and Child Car Seats: What You Need to Know
Modern headrests pitch aggressively forward — great for adult whiplash protection, terrible for child seat installation. A tall forward-facing child seat often can’t sit flush against the vehicle seatback because the headrest blocks it.
That makes proper removal genuinely important for child safety, not just convenient. When you can’t run the top tether anchor correctly because of headrest interference, the entire child seat installation is compromised.
If you drive a Jeep Gladiator, Subaru Outback, or Ford F-150 and you’re installing a forward-facing seat, removing the rear headrest isn’t optional — it’s necessary for a safe, stable installation.
Installing Aftermarket Seat Covers? Here’s What to Know
Seat covers from brands like ShearComfort and PRP Seats require full headrest removal — the cover has to slide cleanly over the seat back shoulder.
Once the headrest is out and the cover is pulled tight, locate the guide sleeves through the fabric by feel. Cut small, precise holes directly above them. Tuck the edges under the escutcheons with a trim tool for a clean finish. Then push the headrest back through the new material until the locks click.
One exception: If your vehicle has wired active headrests, don’t remove them for cover installation. Use a cover with full-length Velcro closures or hidden zippers instead — these wrap around the existing posts without disturbing the SRS wiring.
Quick Fixes for Common Headrest Problems
Headrest is stuck and won’t budge: Check if it’s been inserted backward. Asymmetric notches on some vehicles (especially Subaru) will jam the post permanently if reversed. Use a thin metal shim to manually pry the locking tang open.
Paperclip keeps bending in the pinhole: Switch to a small hex key or a rigid pick. Paperclips are fine for softer spring plates but buckle on tighter mechanisms.
Headrest hits the headliner before coming out: The seatback needs to fold or recline first. Don’t force it — you’ll bend the posts.
Plastic cap broke during removal: The collar can usually still function without the cap, but check that the internal spring clip is still seated correctly before reinstalling the headrest.