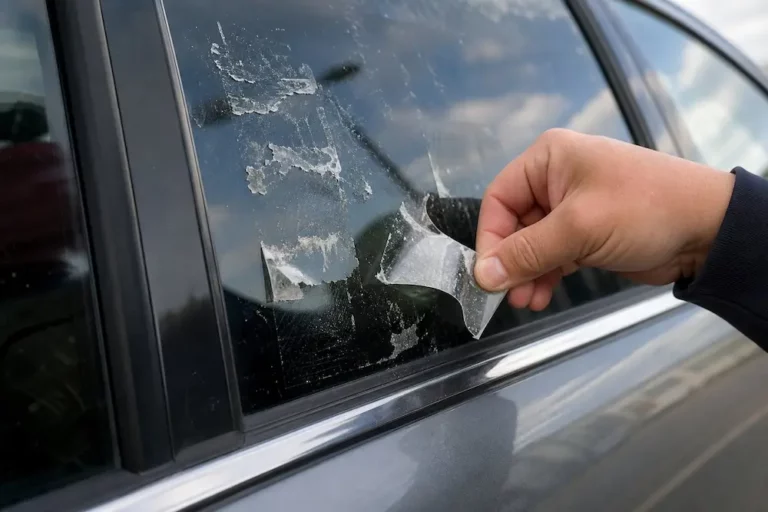
Got a stubborn inspection sticker, parking permit, or old bumper sticker stuck to your car’s glass? You’re in the right place. This guide covers every surface — windshields, rear windows, tinted glass — with the right tools and the right order of steps. Stick around, because the wrong move can cost you a lot more than a sticker.
First, Know What Type of Glass You’re Dealing With
Before you grab a razor blade or spray anything, check two things: where the sticker is and what’s on the glass.
Three glass types need different approaches:
- Front windshield — laminated glass. It cracks under extreme heat. Go gentle.
- Side and rear windows — tempered glass. Tougher, but still scratchable.
- Rear windshield with defroster lines — those horizontal lines are painted on, not embedded. Scrape over them and you’ll cut the circuit permanently.
Factory privacy glass vs. aftermarket tint — this matters a lot:
Factory privacy glass has its dark color baked into the glass itself. It’s tough. You can use solvents and careful blade work on it without worry.
Aftermarket window tint is a thin polyester film stuck to the inside of your glass. Acetone, ammonia, or a metal razor blade will destroy it instantly.
Quick check: Roll the window down slightly. See a faint edge line near the top? That’s aftermarket tint. Dark all the way to the edge with no gap? Factory glass.
What You’ll Actually Need
You don’t need to buy anything fancy. Most of this is probably already at home.
| Tool or Product | Best For |
|---|---|
| Hair dryer or heat gun (low setting) | Softening adhesive before peeling |
| New single-edge razor blade | Exterior bare glass only |
| Plastic scraper or old credit card | Interior glass, tinted windows |
| Rubbing alcohol (isopropyl) | General adhesive residue |
| WD-40 or citrus-based remover (Goo Gone) | Thick, sun-baked glue |
| Warm soapy water | Paper stickers, pre-soaking |
| Microfiber cloths | Applying solvents, final clean |
| Automotive glass cleaner | Final streak-free wipe |
One rule on razor blades: Always use a brand-new blade. A used blade picks up tiny nicks and rust that scratch glass like sandpaper. One blade, one job.
How to Remove Stickers from Glass on a Car: Step-by-Step by Location
Exterior Windshield or Side Windows (No Tint)
This is the most forgiving surface. Here’s what works:
Step 1: Wash the area first.
Scraping dirty glass drags grit across the surface. Rinse the sticker and surrounding glass with soapy water before touching anything else.
Step 2: Heat the sticker.
Use a hair dryer on medium heat, held a few inches away. Keep it moving. Don’t blast one spot. Thirty to sixty seconds until it’s warm to the touch is enough. The adhesive softens and loses its grip.
Step 3: Peel at a low angle.
Work a corner up with your fingernail or plastic scraper. Pull slowly and diagonally at about 45 degrees. Go slow — pulling fast tears the sticker into annoying little pieces.
Step 4: Dissolve what’s left.
Soak a microfiber cloth in rubbing alcohol, WD-40, or a citrus-based remover like Goo Gone. Press it firmly against the residue. Wait three to five minutes. Don’t wipe immediately — let the solvent do its job.
Step 5: Scrape cleanly.
Add more soapy water or solvent as lubricant. Hold your razor blade at 30 to 45 degrees and push forward in smooth, one-direction strokes. Wipe the blade clean after every few passes. Never drag it backward — the back edge of the blade is rough and will scratch.
Step 6: Clean the glass.
Oil-based solvents leave a film that causes glare and makes wipers streak. Spray automotive glass cleaner and wipe in vertical then horizontal passes with a clean microfiber cloth.
Interior Windshield (Inspection Stickers, Registration)
The inside of your windshield is trickier. You’re working at an awkward angle near the dashboard, and spilled solvents can damage plastics and vents.
Before you start: Drape a thick towel over your dashboard. Don’t spray solvents directly onto the glass — the mist drifts. Apply everything to a cloth first.
The process:
- Use your hair dryer from outside the windshield if you can, or aim it carefully from inside on low.
- Lift the sticker’s corner with a soft plastic scraper or credit card. Skip the metal blade — the angle makes slipping too easy.
- For leftover residue, press a cloth dampened with rubbing alcohol onto it. Rub in small circles until it balls up and lifts off.
- Finish with ammonia-free glass cleaner and a microfiber cloth.
Rear Windshield with Defroster Lines
This is the highest-risk spot on the car. Those defroster lines are silk-screened conductive paint sitting on top of the glass. One careless scrape severs the circuit.
What you must avoid: Metal blades anywhere near this area. Even plastic scrapers need to run parallel to the lines, never across them.
Safest method:
- Turn on the rear defroster for a few minutes before you start. It heats the adhesive from beneath — perfectly and evenly.
- Peel as much of the sticker off by hand as possible, pulling in a direction parallel to the defroster lines.
- Saturate a paper towel with isopropyl alcohol or a dedicated adhesive remover and press it against the residue. Leave it for five to ten minutes.
- Gently massage the softened residue away with a damp microfiber cloth. If spots remain, reapply and wait longer. Patience beats scraping here every time.
Windows with Aftermarket Tint
Treat tinted windows like they’re made of paper. Because functionally, the film kind of is.
Never use: Acetone, nail polish remover, ammonia-based cleaners, metal razor blades, or rigid plastic scrapers at steep angles.
What actually works:
- Mix warm water with a small amount of dish soap.
- Soak a microfiber cloth and press it against the sticker for five to ten minutes.
- Lift the corner gently with a soft rubber spatula or an expired credit card.
- For remaining adhesive, apply a tint-safe ammonia-free glass cleaner to a soft cloth — never sprayed directly on the film. Wipe gently until the residue lifts.
Removing EZ Pass and Toll Transponders
Toll transponders use very high-bond acrylic foam tape — the kind that’s engineered to survive years of sun and heat. Liquid solvents can’t penetrate the thick foam. You need a different physical approach.
Step 1: Cut through the foam with string.
Take a length of dental floss or fishing line. Wrap the ends around each hand and slide it behind the transponder mount. Use a side-to-side sawing motion to slice through the foam. This separates the plastic mount cleanly without prying against the glass.
Step 2: Tackle the remaining foam pad.
Saturate the leftover foam with rubbing alcohol, WD-40, or a dedicated adhesive remover. Let it soak for several minutes until the foam starts to break down.
Step 3: Push it off.
Use a plastic scraper or a lubricated razor blade to push the residue off in forward strokes. Finish with a solvent-dampened microfiber cloth to get the last sticky film.
Which Solvent Should You Use?
Not all residue is the same. Here’s a quick guide:
| Situation | Best Solvent | What to Avoid |
|---|---|---|
| Paper sticker, fresh | Warm soapy water or white vinegar | Nothing harsh needed |
| Old vinyl sticker, dried out | Rubbing alcohol or citrus remover | Acetone near tint or trim |
| Sun-baked glue, thick residue | WD-40 or Goo Gone | Acetone on paint or tint |
| Foam tape from transponder | Heavy-duty adhesive remover | Spraying near vents |
| Tinted window, any residue | Ammonia-free glass cleaner only | Acetone, ammonia, alcohol |
| Defroster line area | Isopropyl alcohol on a cloth | Metal blades, spray solvents |
Always allow dwell time. Press the solvent-soaked cloth on and walk away for a few minutes. Wiping immediately doesn’t give the chemical time to break anything down.
The Smart Prevention Trick
If you deal with rotating parking permits or annual inspection stickers, here’s a trick worth knowing: apply a layer of clear packing tape to the glass first, then stick the permit onto the tape. When it expires, the whole thing peels off cleanly with zero residue.
Even better, Sticker Shield makes static-cling polyester shields designed specifically for this. Stick your transponder or parking pass to the shield, press it against the glass, and it holds firmly. When you’re done, it peels off with nothing left behind — no scraping, no solvents, no stress.
Clean Up After You’re Done
This step is easy to skip. Don’t.
Oil-based solvents like WD-40 and citrus removers leave a slick film on the glass. At night, that film scatters headlights and creates dangerous glare. It also makes your wipers chatter and smear.
Final cleaning steps:
- Spray a generous amount of automotive glass cleaner over the work area.
- Wipe in straight vertical strokes, then horizontal strokes with a clean microfiber cloth.
- Buff dry with a fresh side of the cloth.
- If haziness remains under direct light, wipe once more with a high-concentration isopropyl alcohol on a clean cloth.
Once the glass is completely clean and bare, it’s the ideal time to apply a ceramic glass coating like Rain-X Pro Cerami-X. It chemically bonds to the glass, makes water bead and roll off at speed, and creates a non-stick surface that makes future bug splatter and tree sap much easier to clean.