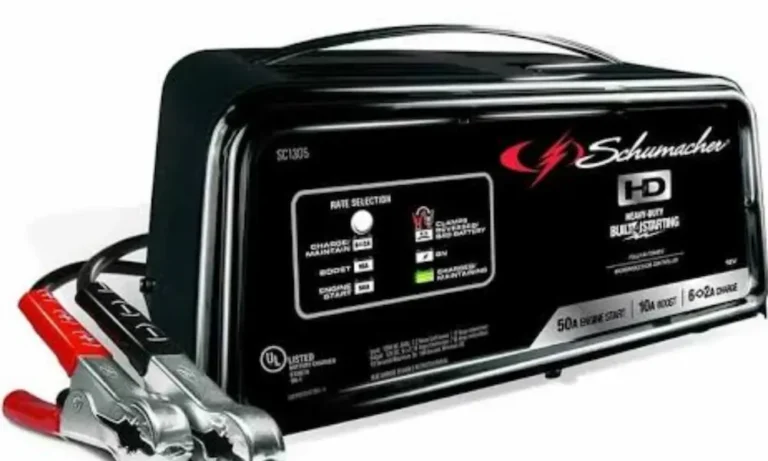
So you’ve got a Schumacher battery charger sitting in your garage, and the battery in your truck (or boat, or lawn mower) is deader than a doornail. Good news: charging it isn’t rocket science. Bad news: mess it up, and you could damage your battery, your charger, or worse.
This guide walks you through exactly how to use a Schumacher battery charger the right way. We’ll cover safety, hookup steps, charging modes, and what to do when your smart charger won’t even recognize your battery. Let’s get into it.
Safety First: What You Need to Know Before You Plug Anything In
Charging a battery isn’t like charging your phone. You’re dealing with corrosive acid and explosive gas. Take this part seriously.
Watch out for combustible gas. Flooded batteries release explosive gases while they charge. Keep the area well-ventilated. No smoking, no sparks, no open flames anywhere near the battery. Before you hook up your clamps, fan the area with a piece of cardboard to clear out any gas buildup.
Protect your eyes and skin. Battery acid is nasty stuff. Wear safety goggles and skip the jewelry (rings, watches, necklaces). If acid touches your skin, wash it off with soap and water right away. If it gets in your eyes, flush with cool water for a full ten minutes and get to a doctor.
Ditch the metal. Rings and bracelets can accidentally bridge a battery’s terminals. That creates a short circuit strong enough to weld metal to your skin. Take it all off before you start.
Never charge a frozen battery. If the electrolyte inside has frozen, charging it can cause the case to rupture. Let it thaw completely in a warm space first.
Don’t use this on regular batteries. Schumacher chargers are built for automotive, marine, and agricultural batteries only. Never use one on standard household batteries.
Getting Your Battery Ready to Charge
A few minutes of prep now saves you a headache later.
- Clean the terminals. Corrosion on the terminals messes with the charger’s ability to read voltage accurately. Scrub it off, but avoid breathing in the dust.
- Check fluid levels. If your battery has removable caps, top off low cells with distilled water only. Don’t overfill—charging causes the liquid to expand.
- Confirm the voltage. Check your owner’s manual to see if you’ve got a 6-volt or 12-volt system. Match the charger’s voltage selector to it. Get this wrong, and you’ll fry the battery.
- Start low if you can. If your charger lets you pick the amperage, start on the lowest setting before bumping it up.
Where to Put Your Charger
Placement matters more than you’d think.
Keep the charger as far from the battery as your cables allow. Never set it directly above or below the battery — the gases rising off it will corrode the charger’s internal parts over time.
Give it breathing room too. Don’t box the charger into a tight corner where air can’t circulate. And keep it off flammable surfaces like carpet or cardboard. This thing gets warm, especially during boost or engine-start modes.
One more thing: keep it dry. These chargers aren’t rated for rain or snow exposure.
How to Connect the Clamps (This Is the Part People Mess Up)
Before doing anything, make sure the charger is switched off and unplugged from the wall. Never let the red and black clamps touch each other while the unit is powered on.
If the Battery Is Still in the Vehicle
Route your cables away from fan blades, belts, and anything else that moves. If you need to close the hood while charging, double-check the clamps and cables aren’t getting pinched.
Most modern vehicles use a negative-ground system. Here’s the sequence:
- Connect the red (positive) clamp to the positive battery post.
- Connect the black (negative) clamp to an unpainted metal part of the engine block or chassis — not the negative post itself.
Why the chassis instead of the terminal? Because the spark that happens when you complete the circuit needs to happen far away from the battery’s gas vents. Never clip the negative lead to the fuel line, carburetor, or thin sheet metal.
Got an older vehicle with a positive-ground system? Just flip it — black to the battery, red to the chassis.
When you’re done, reverse the order: charger off, unplug from the wall, remove the chassis clamp, then remove the battery clamp.
If the Battery Is Out of the Vehicle
Marine batteries especially often need to come out for charging. Here’s how to do it safely:
- Attach a fully insulated extension cable (at least 6 AWG, 24 inches long) to the negative battery post.
- Connect the red clamp directly to the positive post.
- Step back as far as the cables allow, holding the loose end of your extension cable.
- Turn your face away, then connect the black clamp to the extension cable’s free end.
This keeps the spark at least two feet from the battery, which is exactly what you want.
Power Cord and Extension Cord Basics
Schumacher chargers run on standard 120-volt household outlets. Always use a grounded outlet — never remove the grounding pin from the plug.
Try to avoid extension cords if you can. If you must use one, match the gauge to your cord length:
| Cord Length | Minimum Wire Gauge Needed |
|---|---|
| Up to 25 feet | 18 AWG |
| Up to 50 feet | 16 AWG |
| Up to 100 feet | 14 AWG |
| Up to 150 feet | 14 or 12 AWG |
Skimping on gauge causes overheating and voltage drop. Neither is good for your charger or your battery.
Manual vs. Automatic: Know What You’ve Got
This matters a lot for how hands-on you need to be.
Manual chargers just push current continuously. They don’t stop on their own. You have to watch the meter and unplug it yourself once the battery’s full. Leave it too long, and you’ll boil the electrolyte and ruin the battery.
Automatic chargers use a built-in microprocessor to monitor the battery and shut off automatically once it’s charged. They then switch to a maintenance mode that tops off the charge as needed. If you’re not planning to babysit the process, go automatic.
Match the Charging Profile to Your Battery Type
Not all batteries charge the same way. Most Schumacher smart chargers let you pick a battery type before starting. Get it right — this isn’t a “close enough” situation.
| Battery Type | What Makes It Different | Charging Needs |
|---|---|---|
| Standard Flooded | Liquid electrolyte, often has caps | Tolerates higher voltage; mild gassing is normal |
| AGM | Sealed, electrolyte in fiberglass mats | Sensitive to overcharging — strict voltage limits |
| Gel Cell | Silica turns electrolyte into gel | Needs the lowest voltage of the bunch |
| Lithium Iron Phosphate | Lightweight, has its own management system | Needs a dedicated constant-current/voltage profile |
Never use a lead-acid profile on a lithium battery. Lithium batteries can’t handle the continuous float charge that lead-acid batteries need. Doing this risks lithium plating and even thermal runaway — a fancy way of saying “fire.” Always double-check your selector switch matches your actual battery before hitting start.
What Happens During a Charging Cycle
Modern Schumacher chargers run through several automatic stages:
Stage 1: Diagnostic check. The charger reads the battery’s resistance. If it detects heavy sulfation (crystallized buildup on the plates), it kicks into desulfation mode, sending pulsed voltage for up to 10 hours to break it down.
Stage 2: Bulk charging. Once the battery’s healthy, the charger dumps in maximum current until it reaches about 80% capacity.
Stage 3: Absorption. The charger slows down, capping voltage and tapering current to safely top off the last 20% without overheating anything.
Stage 4: Float/maintain mode. Once fully charged, the charger goes quiet, checking in periodically and topping off small amounts as the battery naturally self-discharges. This mode is great for batteries in storage — think boats or tractors sitting all winter.
Using Boost and Engine Start Modes
If your battery is too dead to even crank the engine, some Schumacher models have Boost and Engine Start settings for quick recovery.
Boost mode pushes a high current (usually 20-30 amps) for about 10-15 minutes. It’s not meant to fully charge the battery — just enough to get it crankable.
Engine Start mode delivers a massive current surge directly to help crank the engine. This is powerful, so there are strict rules:
- Crank for no more than 3-5 seconds at a time.
- If it doesn’t start, stop. The charger will force a 3-4 minute cooldown before you can try again.
- In cold weather, run Boost or standard Charge mode for 5 minutes first to warm up the battery chemistry.
Don’t try to override this cooldown — it’s there to keep the internal components from melting.
The “Dead Battery Won’t Charge” Problem
Here’s a frustrating scenario: your battery’s so dead the charger won’t even recognize it’s connected. This happens because smart chargers need a minimum voltage reading to kick in — often around 10 volts for a 12-volt system.
The workaround: connect a second, healthy battery in parallel (positive to positive, negative to negative) using jumper cables. The charger detects the healthy battery’s voltage and starts charging. Once your dead battery picks up enough charge to register on its own, disconnect the jumper battery and let the charger continue on the original one.
For Schumacher’s portable lithium jump starters, there’s a Manual Override button for this exact situation. Triple-check your clamp polarity before using it, since the override disables reverse-polarity protection.
Reading the Display and Testing Your Alternator
Most Schumacher chargers show real-time voltage or an estimated charge percentage on the display. Some higher-end models also test your alternator.
To run an alternator test, connect the charger, start the engine, and turn on high-draw accessories like your headlights and heater. A healthy alternator should output between 13.2 and 14.7 volts under load. If it can’t hit that range, your alternator might be on its way out.
Common Error Codes and What They Mean
If your charger throws an error code, don’t panic. Here’s a quick cheat sheet based on Schumacher’s troubleshooting guide:
| Code | What It Means | What to Do |
|---|---|---|
| F01 | Battery didn’t reach safe voltage after 2 hours | Battery has a dead cell — replace it |
| SUL/F02 | Desulfation failed after 10 hours | Battery is too far gone — replace it |
| F03 | Battery couldn’t hit full voltage | Try a higher amp setting; if it persists, replace the battery |
| F04 | Reverse polarity detected | Unplug immediately, fix clamp orientation |
| F05/F08 | Voltage dropped too fast in maintain mode | Disconnect vehicle cables and retest — could be a parasitic drain |
| F06 | Battery is overheating dangerously | Stop immediately, dispose of the battery safely |
| F07 | Charger itself is overheating | Move to a cooler, ventilated spot |
Taking Care of Your Charger
A little maintenance goes a long way.
- Wipe down the clamps after every use to prevent corrosion buildup.
- Keep the cables coiled neatly — no kinks or knots.
- Store the unit upright, indoors, somewhere cool and dry.
- Never clip the positive and negative clamps together during storage.
- Always unplug the charger when it’s not in use.
Final Thoughts
Learning how to use a Schumacher battery charger really comes down to three things: safety, the right connection sequence, and matching the charging mode to your battery type. Get those right, and you’ll keep your battery — and your charger — running for years.
If you ever hit an error code you’re unsure about, check your specific model’s manual before troubleshooting further. Every Schumacher model has slightly different features, but the core process stays the same. Once you’ve done it a couple of times, it becomes second nature.