
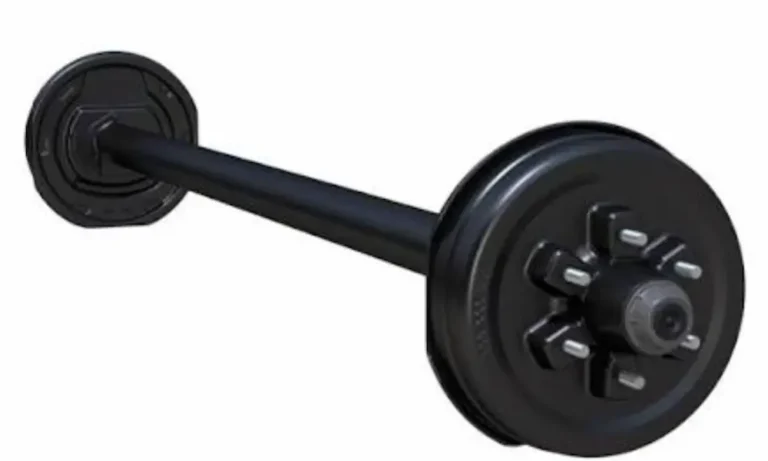
Ever crawled under your trailer looking for a part number and found… nothing but rust? You’re trying to order a replacement axle or just figure out what you’re working with, and the label’s gone. That’s a real headache, but it’s fixable. This guide walks you through exactly how Lippert axle identification works, from reading the factory label to measuring the spindle yourself when there’s nothing left to read. By the end, you’ll know exactly what those confusing letters and numbers mean.
Why Lippert Axle Identification Actually Matters
Get the wrong axle and you’re not just wasting money. A mismatched hub face can make your tires rub the frame. A wrong spring center will bend your leaf springs sideways. And if the weight rating is off, you’re risking a real breakdown on the highway.
Every Lippert axle is built to exact specs: capacity, spindle size, hub width, spring center distance, and brake type. All of it needs to match your trailer’s original design. That’s why nailing down the correct ID before you buy parts saves you time, money, and a potential roadside disaster.
Where to Find Your Lippert Axle Label
Look at the center of the axle tube, on the side facing the back of the trailer. That’s where Lippert puts the factory ID label on every unit. They put it there on purpose. Facing backward, the label gets some protection from road grime, rocks, and spray coming off the front tires.
Problem is, years of salt, mud, and weather still wreck these labels. If yours is peeling, faded, or missing entirely, don’t panic yet.
What to Do When the Label Is Gone
Lippert stamps a nine-digit serial number directly into the steel, near the center of the tube, same rear-facing side as the label. This etching survives even when the sticker doesn’t, according to Lippert’s own axle ID documentation.
If rust is covering the stamp, try this trick: rub a piece of chalk across the metal. The chalk settles into the stamped grooves and makes the numbers pop out. It’s a cheap, low-tech fix that actually works.
What’s Actually on the Lippert Axle Label
A full, readable label gives you way more than just a part number. Here’s what each piece tells you:
| Label Info | What It Means | Why It Matters |
|---|---|---|
| Serial Number | Unique 9-digit ID for that exact axle | Lets Lippert pull your factory build sheet |
| Part Number | ID for standard, off-the-shelf axles | Used for exact replacement orders |
| Variant Number | Used instead of part number on custom builds | Means the axle has custom dimensions or brackets |
| Axle Capacity | Max weight rating, based on the weakest part | Sets your legal towing limit |
| Date of Manufacture | Exact build date | Confirms warranty status and brake tech era |
| Description String | Coded sequence of letters/numbers | Blueprint for brakes, spindle, dimensions, lube type |
Quick note on capacity: it’s based on the weakest link in the whole assembly, whether that’s the tube, spindle, or bearings. It does not include your tires or wheels. Those need their own separate capacity check.
Cracking the Axle Description String
This is the real goldmine. That long string of letters and numbers on the label looks like gibberish, but it’s actually a modular code. Each chunk tells you something specific. Once you know how to read it, you can rebuild the axle’s whole spec sheet in your head.
Model Number Tells You the Capacity
The string starts with “LCI” followed by a number. That number roughly matches the weight capacity in hundreds or thousands of pounds.
| Model | Weight Capacity | Standard Brake Size |
|---|---|---|
| LCI20 | 1,000–2,000 lbs | 7″ x 1.5″ drum |
| LCI35 | 2,500–3,500 lbs | 10″ x 2.25″ drum |
| LCI52 | 4,000–5,200 lbs | 12″ x 2″ drum |
| LCI60 | 6,000 lbs | 12″ x 2″ drum |
| LCI70 | 7,000 lbs | 12″ x 2″ drum |
| LCI80 | 8,000 lbs | 12.25″ x 3.375″ drum |
| LCI100 | 10,000 lbs | 12.25″ x 3.375″ drum |
| LCI120 | 12,000 lbs | 12.25″ x 5″ drum |
| LCI160 | 16,000 lbs | 12.25″ x 5″ drum |
As capacity climbs, brake drums get bigger too. That makes sense, right? A heavier trailer needs more surface area to soak up the heat from braking.
Torsion or Leaf Spring? Check the Letters
If you spot a “D” in the string, you’ve got a diamond-oriented torsion tube — the square tube is rotated 45 degrees. No “D” usually means a standard square tube resting flat. This detail comes straight from Lippert’s torsion axle nomenclature guide.
Spindle Type and Brake Codes
Next up in the string, you’ll see a two or three-letter code for the spindle and brakes:
- SB – Straight spindle, electric drum brake
- SBSA – Straight spindle, self-adjusting brake
- SI – Straight spindle, no brakes (idler axle)
- DB – Drop spindle, electric drum brake
- DBSA – Drop spindle, self-adjusting brake
Drop spindles sit the axle lower, which is great for trailers that need a lower deck height, like car haulers or livestock trailers.
Hub Face and Spring Center Numbers
These two numbers are the ones that trip people up most, so pay attention here.
Hub face is the distance from one wheel mounting surface straight across to the other. Get this wrong and your tires either hit the fenders or rub the frame. Neither is good.
Spring center is the distance between the centers of the two spring mounting pads. If this doesn’t match your frame’s spring hangers, the springs bow or splay, and eventually the suspension just fails.
Both numbers show up directly in the description string, and both need to match your original axle exactly.
Lubrication Codes (L, G, O)
One letter tells you how the bearings get greased:
- L – Super-lube system. There’s a grease fitting on the spindle tip, so you can flush fresh grease through the whole hub without pulling it apart.
- G – Standard grease with a solid dust cap. You’ll need to pull the hub apart to repack it.
- O – Oil bath system, usually only on axles rated 8,000 lbs and up. A clear cap lets you check oil level at a glance.
Bolt Pattern and ABS Codes
“545” means a 5-lug hub on a 4.5-inch circle. “655” means a 6-lug hub on a 5.5-inch circle. If the string ends with “ABS,” the hub’s built with a tone ring for anti-lock braking sensors.
No Label, No Etching? Measure It Yourself
Sometimes the trailer’s too old or too beat up, and there’s genuinely nothing left to read. That’s when you break out the tape measure and calipers.
Measuring Hub Face and Spring Center
Lift the trailer safely and pull both wheels. Hook a tape measure on the flat hub face (not the studs) and pull it tight, straight across to the other hub face. That’s your hub face measurement.
For spring center, find the small centering holes on top of the welded spring seats and measure between them. On torsion axles, measure between the outside or inside edges of the mounting brackets instead, per Lippert’s spring axle manual.
Measuring Spindle Diameter to Find Capacity
If you have no idea what the axle’s rated for, pull the hub, bearings, and seal, then measure the spindle with a caliper at the inner and outer bearing steps.
| Inner Step | Outer Step | Estimated Capacity |
|---|---|---|
| 1″ | 1″ | 2,000 lbs |
| 1.375″ | 1.0625″ | 3,500 lbs |
| 1.75″ | 1.25″ | 5,200–6,000 lbs |
| 2.25″ | 1.75″ | 7,000 lbs |
| 3.5″+ | Varies | 8,000 lbs and up |
These bearing sizes are standardized across the industry, so once you know the spindle diameter, you know roughly what the axle can carry.
Leaf Spring vs Torsion: A Quick Visual Check
While you’re under there, it helps to know which suspension type you’re looking at. It changes how you approach repairs and what parts you’ll need.
Leaf spring axles have stacked steel plates bolted to the axle tube with U-bolts, connected to the frame by hangers and shackles. They’re tough, easy to fix piece by piece, and great for heavy hauling, according to Lippert’s own breakdown of axle types.
Torsion axles have no visible springs at all. The axle tube bolts straight to the frame, and the suspension movement happens inside the tube, where rubber cords twist around a steel bar. These ride smoother and need less maintenance, but if the rubber cords wear out, you can’t just replace a part — you need a whole new axle beam.
Neither type is “better.” It depends on what you’re hauling and how much upkeep you want to deal with.
Reading Tire Wear to Confirm Axle Problems
Once you’ve got the axle identified, it’s worth checking tire wear too. It tells you a lot about whether the axle itself is bent or misaligned.
| Wear Pattern | Likely Cause |
|---|---|
| Wear on the inside edge | Axle sagging or bent, or trailer overloaded |
| Wear on the outside edge | Too much positive camber for the current load |
| Feathered or scalloped tread | Toe misalignment, bent spindle, or shifted hangers |
| Cupping or flat spots | Unbalanced wheels or brake lockup |
If you see any of these, it’s a good reason to double-check your measurements before ordering new parts.
Got Your Axle Info? Here’s What to Do With It
Once you’ve pulled the serial number, description string, or your own measurements, you’re ready to actually order a replacement or get help.
Lippert’s customer support can look up your exact axle build if you give them the right details. Have these ready before you call or email:
- Your trailer’s full 17-character VIN
- Date of manufacture (from the axle label if visible)
- The 9-digit axle serial number
- A clear description of what’s failing
- Photos of any visible damage
You can reach Lippert’s team directly at 432-LIPPERT (432-547-7378), or email [email protected] through their contact page if you’d rather skip the phone queue. Their support site also has a live chat option for quick questions.
Giving them the serial number is honestly the fastest path. It links straight to the original build sheet, so there’s zero guesswork on hub face, spring center, or bracket layout.
Final Thoughts
Lippert axle identification isn’t as intimidating as it looks once you know where to check and what the codes actually mean. Start with the label on the rear-facing side of the tube. If that’s gone, look for the etched serial number, or grab a chalk stick to bring the stamp back to life. No luck there either? Measure the hub face, spring center, and spindle diameter yourself, and you’ll still land on the right specs.
Getting this right the first time saves you from ordering the wrong axle, dealing with rubbing tires, or worse, a suspension failure down the road. Take your time, double-check your numbers, and you’ll have the correct replacement part in hand without any guesswork.


