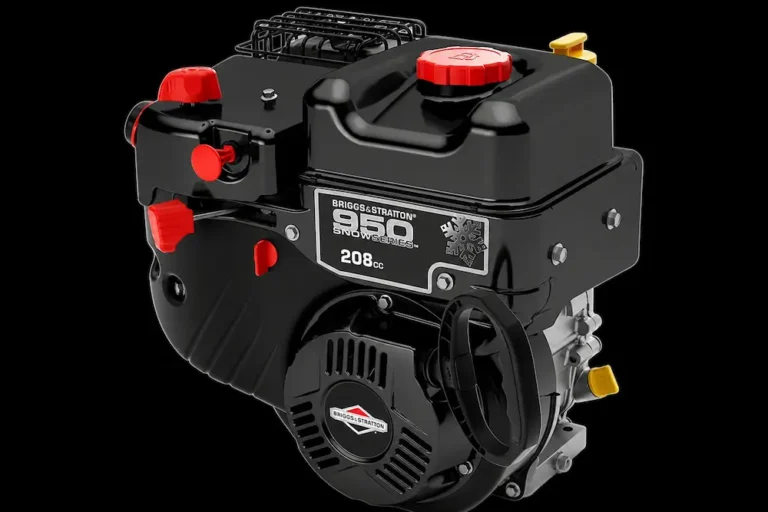
Think your mower’s hard to start, running rough, or making a ticking noise? A Briggs and Stratton valve adjustment might be all it needs. This guide walks you through exactly what to do, why it matters, and how to avoid the mistakes that wreck engines. Stick around — the compression release section alone could save you from buying parts you don’t need.
What Is Valve Lash and Why Does It Matter?
Valve lash is the tiny gap between the valve stem and the rocker arm (or tappet on older engines). It sounds minor, but this gap is precision-engineered to handle how metal expands as the engine heats up.
Too tight? The valve never fully closes. Combustion gases leak past it, burn the valve face, and kill compression fast.
Too loose? The valvetrain hammers, power drops, and the automatic compression release stops working — which makes your engine feel like it’s seized solid.
Neither outcome is good. Both are preventable with a basic annual adjustment.
OHV vs. L-Head Engines: Know What You’re Working With
Briggs and Stratton engines split into two main valve designs, and your approach changes completely depending on which one you have.
Overhead Valve (OHV): Valves sit in the cylinder head above the combustion chamber. The camshaft drives a pushrod, which moves a rocker arm to open the valve. Adjustments are quick, reversible, and done with simple hand tools.
L-Head (Flathead/Side-Valve): Valves run inside the engine block itself. The camshaft pushes tappets directly against the valve stems. Adjusting clearances here requires physically removing the valve and grinding the stem tip — it’s permanent and labor-intensive.
Most engines made in the last 30 years are OHV. If yours is older, check the block casting before you grab any tools.
Why Your Briggs Has One Aluminum and One Steel Pushrod
This trips up a lot of DIYers. Pop the valve cover on most Briggs OHV engines and you’ll find two different pushrod materials — one aluminum, one steel. That’s not a mistake.
The engine block and cylinder head are aluminum. Aluminum expands fast when it heats up. If both pushrods were steel, they wouldn’t lengthen fast enough to keep up with the expanding head — and your valve lash would go loose every time the engine got hot.
The engineering logic:
- Aluminum pushrods expand at roughly the same rate as the aluminum block, keeping cold lash settings stable at operating temperature
- Steel pushrods go where heat and mechanical stress demand greater rigidity — usually the exhaust side on Intek engines, where combustion temperatures are highest
- Vanguard V-Twin engines use a different pairing depending on the displacement and thermal mapping of that specific model
Never substitute a broken aluminum pushrod with a steel one. The thermal dynamics break down, clearances go loose at operating temp, and the valve can drop out of the rocker cup entirely. Always match OEM specs.
The Automatic Compression Release: Why Loose Valves Kill Starting
Here’s something most people don’t know: a loose exhaust valve is the number-one reason a Briggs engine suddenly feels impossible to crank.
The automatic compression release (ACR) is a tiny spring-loaded pin built into the camshaft gear. At low RPM (like when you’re cranking), this pin bumps the exhaust tappet slightly, cracking the exhaust valve open just enough to bleed off compression. That lets your small starter motor spin the engine past TDC without fighting full cylinder pressure.
Once the engine fires and reaches idle speed, centrifugal force retracts the pin. Full compression returns. The engine runs normally.
The problem: If exhaust valve lash becomes too loose, the pin can’t reach the tappet. The exhaust valve stays shut. Your starter slams into a wall of unrelieved compression and stalls.
Operators regularly replace batteries and starter motors chasing this symptom — and the engine still won’t turn over. The fix is a valve adjustment, not new electrical parts.
Symptoms of Incorrect Valve Clearance
| Symptom | Condition | What’s Happening |
|---|---|---|
| Starter stalls, engine won’t crank | Too loose (exhaust) | ACR can’t reach tappet — full compression locks the engine |
| Rhythmic ticking from cylinder head | Too loose | Rocker arms hammering valve stems violently |
| Loss of power under load | Too loose | Valves open late and close early — poor airflow and combustion |
| Bent or dislodged pushrods | Too loose | Impact forces hammer pushrod ends flat or knock them out of seating cups |
| Zero compression | Too tight | Valve held slightly open — gases blow past the seat constantly |
| Burned exhaust valve | Too tight | Valve never seats fully — can’t transfer heat — exhaust gases torch the face |
| Backfire through air filter | Too tight | Intake valve held open — combustion flames shoot backward into the carburetor |
Tools You Need Before You Start
Don’t improvise here. The right tools make this job clean and accurate.
- Socket set — 3/8″, 7/16″, and 10mm for shrouds and valve cover bolts
- Torx drivers — T20 and T40 for rocker locking screws on modern OHV engines
- Open-end wrenches — 10mm or 1/2″ to hold rocker adjuster nuts
- Blade-style feeler gauges — 0.002″ to 0.015″ range in fine increments
- Torque wrench — calibrated in inch-pounds (not foot-pounds)
- Wooden dowel or long screwdriver — for finding TDC through the spark plug hole
- Absorbent rag — oil drains from the rocker chamber the moment you pull the valve cover
How to Find Top Dead Center Correctly
The engine must be completely cold before you measure anything. Hot metal gives false readings. Let it sit for several hours minimum.
Here’s the exact process:
- Remove the engine hood, air cleaner, and any shrouding blocking the cylinder head
- Pull the spark plug — this lets you rotate the crankshaft freely by hand
- Remove the valve cover and place a rag underneath to catch oil drainage
- Slowly rotate the flywheel clockwise (as viewed from the flywheel end)
- Watch the intake valve — it’s the one connected to the carburetor side
- After the intake valve opens fully and closes again, the piston starts rising on the compression stroke
- Insert a clean wooden dowel through the spark plug hole until it rests on the piston crown
- Continue rotating clockwise — watch the dowel rise as the piston climbs
- When the dowel reaches its highest point, that’s TDC
Now here’s the critical step most guides miss:
Don’t adjust at exact TDC. Keep rotating clockwise until the dowel drops exactly 1/4 inch below its highest point.
Why? At exact TDC, the ACR pin on the camshaft may still contact the exhaust tappet slightly. Measuring while the lifter sits on that elevated pin gives you a false reading — you’ll think clearance is correct when it’s actually way too loose once the engine runs and the pin retracts.
Dropping 1/4 inch past TDC guarantees the lifter rests on the true base circle of the cam. On V-Twin engines, repeat this entire procedure independently for each cylinder.
OHV Valve Adjustment: Step-by-Step
Step 1 — Check the Clearance Specs for Your Engine
Clearances vary by engine family. Here are the most common specs:
| Engine Series | Intake Clearance | Exhaust Clearance |
|---|---|---|
| Intek Single Cylinder OHV | 0.004″ – 0.006″ | 0.004″ – 0.006″ |
| Intek V-Twin OHV | 0.004″ – 0.006″ | 0.004″ – 0.006″ |
| Vanguard V-Twin (standard) | 0.004″ – 0.006″ | 0.004″ – 0.006″ |
| Vanguard V-Twin (high heat) | 0.004″ – 0.006″ | 0.007″ – 0.009″ |
| 120000 Series OHV | 0.005″ – 0.007″ | 0.007″ – 0.009″ |
| L-Head Opposed Twin | 0.004″ – 0.006″ | 0.007″ – 0.009″ |
Always cross-check against your specific model number. These specs are your baseline, not a substitute for the actual service manual.
Step 2 — Measure the Gap
Select the correct feeler gauge blade for the valve you’re checking. Slide it into the gap between the flat top of the valve stem and the striking pad of the rocker arm.
What you’re feeling for: A slight, consistent drag — like pulling a single sheet of heavy paper from under a book. Smooth and resistant, but not locked.
- Gauge won’t enter the gap? Too tight.
- Gauge falls through with zero drag? Too loose.
- Rocker arm wiggles up and down with the gauge inserted? Way too loose.
Step 3 — Adjust the Rocker Arm
Most modern Briggs OHV engines use a concentric nut-and-setscrew system on the rocker stud.
- Fit a 10mm or 1/2″ box wrench on the outer hex nut
- Insert a T20 or T40 Torx driver into the center of the stud
- Loosen the inner locking setscrew — the outer nut is now free to turn
- Clockwise = tighter (threads deeper, pushes rocker toward head)
- Counter-clockwise = looser (raises rocker pivot, increases gap)
- Adjust until the feeler gauge has the correct drag feel
Step 4 — Lock and Torque
Hold the outer hex nut completely still. Don’t let it rotate even slightly. While holding firm, tighten the inner Torx setscrew clockwise.
Torque specs for the locking setscrew:
| Component | Torque Spec | Notes |
|---|---|---|
| Rocker ball setscrew (most single-cylinder) | 45 in-lbs | Hold outer nut stationary while torquing |
| Rocker pivot nut (Intek variants) | 60 in-lbs | Verify against model-specific manual |
| Valve cover bolts | 65–80 in-lbs | Don’t overtighten — you’ll crush the gasket |
| V-Twin OHV cylinder head bolts | 220–300 in-lbs | Three-pass crisscross sequence required |
Stripping threads in an aluminum cylinder head means a full head replacement or threaded insert repair. A $15 torque wrench prevents that problem completely.
After torquing, pull the feeler gauge out, wipe it, and re-insert it to confirm the clearance didn’t shift during final tightening. If it changed, loosen and repeat the entire sequence.
L-Head Valve Adjustment: The Permanent Method
L-head engines have no rocker arms to adjust. The only way to increase clearance is to grind metal off the valve stem tip — and that’s irreversible.
Process overview:
- Find the 1/4″ past TDC position using the same method as OHV
- Remove the side breather cover to expose the valve springs and tappets
- Insert the feeler gauge between the tappet face and the bottom of the valve stem
- If clearance is too tight, use a valve spring compressor to compress the spring and extract the retainer
- Pull the valve straight out of the block
- Grind the stem tip on a bench grinder or with a fine file — remove only a tiny amount at a time
- Reinstall the valve, compress the spring, seat the retainer, and re-check the gap
- Repeat until the spec is met — grind, check, grind, check
Critical warning: Remove too much metal and the clearance is permanently loose. You can’t add material back. Go slow. Check constantly.
Before final assembly, lightly coat the valve stem and guide with valve guide lubricant. Keep it completely off the stem tip and tappet face — trapped fluid changes the gap reading and can cause hydraulic damage on startup.
Dropped Valve Guides: The Hidden Killer
While you’ve got the valve cover off, check for this. It’s especially common on Briggs Intek V-Twin engines in riding mowers.
The valve guides are steel tubes pressed into the aluminum cylinder head. They keep the valve stems aligned. Under normal conditions, they stay put permanently.
But when an engine overheats — usually from packed grass clippings blocking the cooling fins under the shroud — the aluminum head expands faster than the steel guide. The press-fit loosens. The guide starts moving.
How to spot it: Look at the height of both valve guides protruding from the cylinder head. If one sticks up significantly higher than the other, it’s migrated. A bent pushrod alongside this is the dead giveaway.
A migrated guide acts as an unintended mechanical stop. The valve retainer hits the protruding guide before the valve reaches full lift. The cam keeps pushing. The pushrod buckles or snaps.
Standard repair: Replace the cylinder head. The aluminum bore is permanently stretched.
Advanced field repair: Press the guide back to correct depth, then drill a dimple into the guide through the side of the casting and thread in a hardened set-screw. This physically pins the guide and prevents future migration.
Valve Lapping: When to Do It and What Changes Afterward
Any time you remove valves for a head gasket job, guide repair, or deep inspection, lap the valves before reassembling.
The process:
- Apply silicon carbide lapping compound to the valve face
- Insert the valve into its guide
- Attach a suction cup lapping tool to the valve head
- Spin it back and forth, lifting and rotating 90° periodically
- A uniform dull gray ring on both the valve face and seat confirms a proper seal
One thing most guides skip: Lapping grinds metal off both surfaces. That means the valve sits slightly deeper in the head than before. The stem tip now protrudes further toward the rocker arm, tightening your valve lash.
Always perform a full valve adjustment from scratch after any lapping procedure. The clearances you set before won’t be valid anymore.
Also — clean every trace of lapping compound out of the head before assembly. Abrasive grit in the oil circuit destroys bearings and cylinder walls within minutes of startup.
Maintenance Intervals: How Often Should You Adjust?
Briggs and Stratton recommends checking and adjusting valve clearances every year or every 200–300 hours, whichever comes first.
For commercial equipment — zero-turn mowers, generators, pressure washers running under heavy loads — inspect every 250 hours as a preventive measure. High operating temperatures accelerate valve seat wear and lash deviation faster than light residential use.
Annual adjustments on residential mowers typically take under an hour once you’ve done it a few times. Skipping it for several seasons usually means a repair bill — not just a maintenance bill.
FAQ: Briggs and Stratton Valve Adjustment
How do I know if my Briggs and Stratton engine needs a valve adjustment?
Watch for hard starting (especially if the starter stalls), a ticking sound from the cylinder head, loss of power under load, or backfiring through the air filter. Any one of these symptoms points to valve lash that’s out of spec.
Can I adjust the valves on a warm engine to save time?
No. Thermal expansion in a warm engine changes all your measurements. The engine must be completely cold — several hours minimum. Hot measurements will produce adjustments that are incorrect once the engine cools back down.
My engine suddenly feels impossible to crank over — is the engine seized?
Probably not. This is the classic symptom of excessive exhaust valve lash disabling the automatic compression release. Before replacing the battery or starter motor, check the exhaust valve clearance. Nine times out of ten, that’s the fix.
Why does my Briggs engine have one aluminum pushrod and one steel pushrod?
It’s a thermal expansion design choice, not random. Aluminum pushrods expand at the same rate as the aluminum engine block, keeping lash stable across temperature ranges. Steel goes where strength matters most — usually the exhaust side on Intek engines. Never substitute aluminum with steel without confirming OEM specs.
Why do I need to position the piston 1/4 inch past TDC instead of exactly at TDC?
At exact TDC, the automatic compression release pin on the camshaft may still be slightly elevated against the exhaust lifter. Measuring there gives a false clearance reading. Dropping 1/4 inch past TDC ensures the lifter rests on the true base circle of the cam, giving you an accurate measurement.
What happens if I over-torque the rocker setscrew?
You’ll strip the aluminum threads in the cylinder head. That requires either a full head replacement or a threaded insert repair (Heli-Coil). Use a torque wrench and stay within the 45–60 in-lb range specified for your engine model.
How do I adjust valves on a Briggs V-Twin engine?
The process is identical to a single-cylinder — but you do it twice. Find TDC for cylinder one, drop 1/4 inch, adjust both valves, lock and torque. Then rotate the engine to find TDC for cylinder two, drop 1/4 inch again, and repeat the full adjustment for that cylinder’s valves independently.
I lapped my valves — do I need to re-adjust the clearances?
Yes, absolutely. Lapping removes metal from the valve face and seat, causing the valve to sit deeper in the head. This pushes the stem tip closer to the rocker arm, tightening the clearance from your previous setting. Always perform a fresh valve adjustment after any lapping work.
Can I use a steel pushrod to replace a bent aluminum one temporarily?
No. This isn’t a safe temporary fix. A steel pushrod in an aluminum-spec position will run too short at operating temperature as the aluminum block expands faster than the steel rod. This causes dangerous lash loosening at temp, potential valve dropout from the rocker cup, and engine damage. Use the correct OEM material.
My Briggs V-Twin keeps bending pushrods — what’s really causing it?
Check the valve guide height in the cylinder head before anything else. A migrated valve guide protruding above the casting blocks the valve retainer before full lift — the camshaft keeps pushing and the pushrod buckles. Pushrods don’t bend from weakness. They bend because something stopped the valve before the cam did.