Your Honda’s hitting 100,000 miles and someone mentioned a valve adjustment. You’re probably wondering if it’s actually necessary or just another upsell. It’s necessary — and skipping it can turn a $600 service into a $4,500 cylinder head rebuild. Here’s everything you need to know before your appointment.
What Is a Honda Valve Adjustment (And Why Do You Need One)?
Most car brands switched to self-adjusting hydraulic lifters decades ago. Honda didn’t. Nearly every Honda and Acura built in the last 30 years uses solid mechanical lifters — small metal components that can’t compensate for wear on their own.
Here’s the deal: your engine runs hot. Steel valves and aluminum cylinder heads expand at different rates as they heat up. Honda engineers deliberately build a tiny gap — called valve lash or valve clearance — into the cold engine to account for this expansion.
Over time, the valve face grinds against the valve seat. Both surfaces wear down microscopically, and the valve slowly sinks deeper into the cylinder head. That shrinks the gap. Too tight, and the valve never fully closes — heat builds up, combustion gases escape, and you get a burnt valve.
The kicker? Tight valves make zero noise. You won’t hear a warning. The engine just quietly destroys itself.
The Six Stages of Valvetrain Neglect
Missing your Honda valve adjustment doesn’t cause instant failure. It’s a slow progression — but each stage gets more expensive.
| Stage | Mileage Past Due | What’s Happening | Cost to Fix |
|---|---|---|---|
| 1 | 10k–30k miles | Minor power and fuel economy loss | ~$600–$900 (valve adjustment) |
| 2 | 30k–50k miles | Ticking noise on cold starts | ~$600–$900 (valve adjustment) |
| 3 | 50k–75k miles | Noticeable sluggishness, 1–3 mpg drop | ~$600–$900 (valve adjustment) |
| 4 | 75k+ miles | Misfire codes, Check Engine Light | ~$1,500–$2,500 (may need valve job) |
| 5 | Far past due | Cylinder head damage | ~$2,500–$4,500 (head rebuild) |
| 6 | Catastrophic | Valve breaks, drops into combustion chamber | ~$5,000–$8,000 (engine replacement) |
The painful truth: stages 1 through 3 are fully reversible with a standard valve adjustment. Stage 5 and beyond require the cylinder head to come off and go to a machine shop. Don’t let a $700 service become an $8,000 engine replacement.
When Does Honda Recommend a Valve Adjustment?
Honda uses the Maintenance Minder system — an onboard computer that tracks oil life, driving conditions, engine load, and trip duration to tell you exactly when service is due.
Watch your dashboard for Sub-Code 4. That’s your valve adjustment trigger, and it bundles several major services together:
- Replace spark plugs
- Replace the timing belt (on V6 belt-equipped engines)
- Inspect the water pump
- Inspect and adjust valve clearance
The general baseline interval across most Honda engines is around 110,000 miles. But turbocharged engines, high-RPM performance engines, and hard-use vehicles often need it earlier — sometimes by 80,000 to 90,000 miles.
Honda Valve Clearance Specs by Engine Family
Every Honda engine family has its own clearance specifications, and some have unique quirks worth knowing before your shop appointment.
L15B7 — 1.5L Turbocharged (2016+ Civic, 2017+ CR-V, 2018+ Accord)
This is Honda’s most common modern engine. The turbocharger adds heat and cylinder pressure, which accelerates valve seat wear.
- Intake: 0.007–0.009 inches
- Exhaust: 0.009–0.011 inches
Don’t wait for the 110,000-mile mark on these. Real-world data puts actual wear-out closer to 80,000–90,000 miles on turbocharged L-Series engines. Cold-climate drivers doing lots of short trips also deal with fuel dilution — raw gasoline seeping past the piston rings into the oil — which compounds wear.
K24 — 2.4L DOHC (Accord, CR-V, Element, Civic Si)
The K-Series is Honda’s legendary workhorse. These engines routinely hit 200,000 to 300,000 miles. Clearances stay stable remarkably well.
- Intake: 0.008–0.010 inches
- Exhaust: 0.010–0.011 inches
Standard K24 applications often hold factory clearances until 130,000 to 180,000 miles. High-performance K20 variants (Civic Si) see faster wear due to higher operating RPM — plan for adjustment at 80,000 to 100,000 miles. One watch-out: CR-V variants with a K24 have a known timing chain tensioner weakness. A loose chain can mimic valvetrain noise, so a good technician will verify both issues.
J35 — 3.5L V6 (Pilot, Odyssey, Ridgeline, Accord V6)
This engine needs extra attention — and more labor time. Because the engine sits sideways in the bay, there’s a front bank facing the grille and a rear bank tucked against the firewall.
- Intake: 0.008–0.009 inches
- Exhaust: 0.011–0.013 inches (per J-Series adjustment specs)
The rear bank runs significantly hotter because it gets no airflow from the grille. Exhaust valves on cylinders 4, 5, and 6 tighten much faster than the front. Skipping adjustments on the J35 is the number one cause of rear bank burnt valves and expensive cylinder head failures.
Accessing the rear valve cover requires removing the entire upper intake manifold, throttle body, and associated sensors — pushing labor time to four to six hours.
R18 — 1.8L SOHC (2006–2015 Civic, HR-V)
The R-Series is impressively stable. Technicians regularly find these engines still in spec past 150,000 miles.
- Intake: 0.008–0.009 inches
- Exhaust: 0.011–0.013 inches
If you drive an older Civic with an R18, don’t skip the inspection just because the engine feels fine. Check it — but don’t be surprised if it’s still perfect.
F20C / F22C — S2000 High-Performance Engines
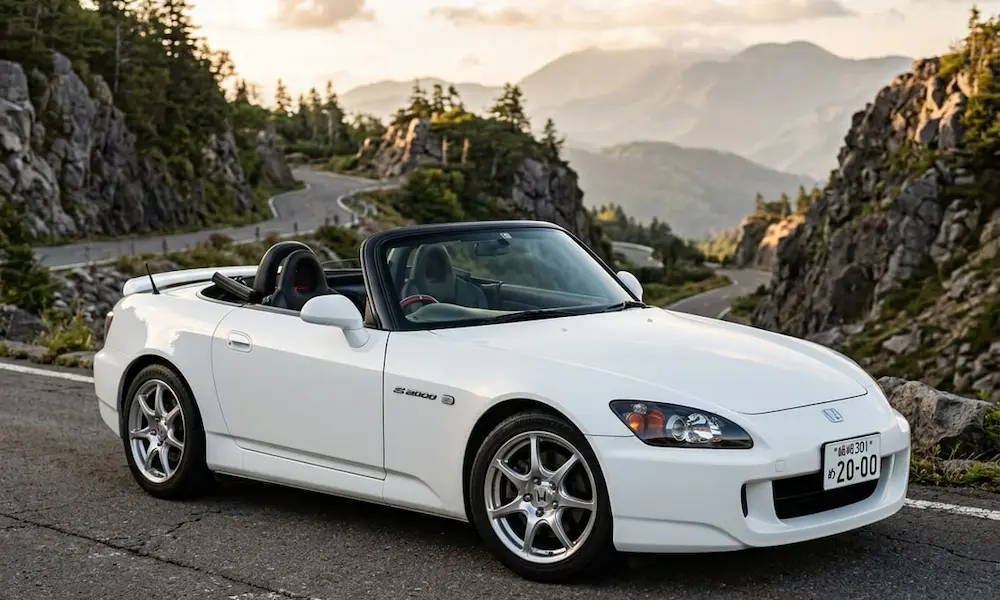
The S2000’s engine revs to 9,000 RPM. That violent mechanical stress causes faster valve seat wear than any standard passenger car engine.
- Intake: 0.008–0.010 inches
- Exhaust: 0.010–0.011 inches
For track use, experienced tuners recommend setting exhaust clearances toward the looser end of spec — 0.011 inches — to give maximum thermal safety margin under sustained high loads.
Hybrid 2.0L Atkinson Cycle (Accord Hybrid, CR-V Hybrid)
Here’s a misconception worth correcting: hybrid owners often assume the electric motor reduces wear enough to skip valve adjustments. It doesn’t.
The 2.0L Atkinson cycle engine uses solid mechanical lifters just like every other Honda. When the gas engine runs on these hybrids, it often carries heavy loads to charge the battery and drive the wheels simultaneously. Honda requires valve adjustment at the 100,000-mile interval on all hybrid platforms, alongside spark plug replacement. Don’t skip it.
How a Honda Valve Adjustment Actually Works
Rule #1: The Engine Must Be Cold
Factory specs require a cylinder head temperature below 100°F before measuring anything. Adjusting a warm engine gives you flawed measurements — set the gap hot, and it’ll be dangerously tight once the engine cools.
Professional shops have customers drop their car off the night before for exactly this reason.
Getting to the Valves
For four-cylinder engines (K, L, R-Series), the process is fairly direct:
- Remove the plastic engine cover
- Unplug ignition coils and wiring harnesses
- Disconnect PCV hoses
- Unbolt the valve cover
For the J35 V6, add: removing the upper intake manifold, throttle body, coolant hoses, vacuum lines, and multiple sensors before even touching the rear valve cover.
Finding Top Dead Center
Every cylinder must be at Top Dead Center (TDC) on the compression stroke before you measure its valves — that’s the only position where both cam lobes point away from the rockers and the valves are fully closed.
You rotate the crankshaft manually with a 19mm socket until the timing marks on the cam gears align. For four-cylinder engines, the firing order is 1-3-4-2, and the crank rotates 180° between each cylinder. For the J-Series V6, the firing order is 1-4-2-5-3-6 across both banks.
Measuring With a Feeler Gauge
A feeler gauge is a precision steel blade of exact thickness. You slide it into the gap between the rocker arm and the valve stem tip. Straight gauges don’t work well in the tight engine bay — you need angled or pre-bent gauges to get an accurate reading.
Use the go/no-go technique: the target-spec gauge should slide through with light resistance. A thicker “no-go” gauge shouldn’t fit. If the no-go gauge slides in freely, the gap is too wide. If the target gauge won’t fit at all, it’s too tight.
Making the Adjustment
A specialized 10mm combo tool — socket on the outside, flathead screwdriver in the center — loosens the lock nut while you turn the adjustment screw. Clockwise tightens the gap, counterclockwise opens it.
These are tiny corrections. Often a tenth of a turn makes a significant difference. Once set, hold the screw still while torquing the lock nut to 14 foot-pounds. Then re-check the gap — tightening the nut can shift the screw slightly, ruining your setting.
Repeat this for every valve: 16 adjustments on a four-cylinder, 24 on a V6.
Reassembly: Where Mistakes Get Expensive
Torque Specs Matter a Lot Here
- Lock nuts: 14 ft-lbs (some older intake applications: 10 ft-lbs)
- Valve cover bolts: 7.2 ft-lbs (86 inch-lbs)
That valve cover spec sounds absurdly low — because it is. The rubber gasket creates the seal, not bolt force. Over-tighten those bolts and you’ll snap them or strip the aluminum threads. Either repair costs more than the valve adjustment itself.
Replace the Gaskets — All of Them
A valve cover gasket that’s been heat-cycled for 100,000 miles is hard and brittle. It will leak if reused. Replace the main perimeter gasket and the circular spark plug well seals every time. Oil in the spark plug wells kills ignition coils and causes misfires.
Apply Sealant in the Right Spots
Hondabond or equivalent RTV silicone goes in two specific places where the rubber gasket can’t seal sharp transitions:
- Camshaft arch corners — where the rounded cam arches meet the flat cylinder head surface
- Timing cover seams — where the timing cover meets the engine block
Miss these spots and you’ll have an oil leak before the week is out.
Don’t Miss This on J35 V6 Engines: The Spool Valve Leak
When you’ve got the intake manifold off for a J35 valve adjustment, check the spool valve on the front cylinder head. This is a VCM (Variable Cylinder Management) oil control valve with a figure-eight rubber gasket that hardens and fails with age.
When it leaks, pressurized oil runs down the engine block directly into the alternator. Oil destroys the alternator’s electrical windings and internal brushes — and you end up stranded with a dead charging system on top of your repair bill.
Since the manifold is already off, replacing this gasket or the entire spool valve assembly costs almost nothing in added labor. Skip it, and you might be replacing a $300–$500 alternator in six months.
The P0300 Misfire Code and Valve Clearances
A severely tight valve causes compression loss in that cylinder. The ECM detects the RPM fluctuation and logs a P0300 (random misfire) or P0301–P0306 (specific cylinder). But don’t assume tight valves are the only explanation.
Three other common Honda-specific culprits produce identical codes:
Carbon buildup on intake valves — Direct-injected engines (like the L15B7) don’t get fuel washing over the intake valves. Oil vapor bakes onto the valves and creates carbon deposits. Honda has issued service bulletins extending coverage to 10 years/150,000 miles for valve cleaning procedures and software updates on affected models.
Stuck piston rings from oil sludge — Certain V6 and four-cylinder models have documented piston ring issues where rings stick in the grooves and allow oil into the combustion chamber, fouling the plugs and triggering misfires.
Fuel dilution — Short-trip cold-weather driving in turbocharged L15B7 engines lets unburnt fuel slip into the oil. Thin, diluted oil means poor lubrication and erratic combustion, which shows up as a misfire code.
A proper diagnosis checks spark plug condition, oil quality, and intake port cleanliness before blaming the valves. That said — if the car is near 100,000 miles and has never had a valve adjustment, that inspection is always the mandatory first step.
Honda Valve Adjustment Cost: What to Expect
Pricing varies by engine and shop, but here’s a realistic range:
| Engine | Approximate Labor Time | Typical Shop Cost |
|---|---|---|
| R18, K24 (4-cylinder) | 2–3 hours | $350–$600 |
| L15B7 (1.5T) | 2.5–3.5 hours | $400–$700 |
| J35 V6 | 4–6 hours | $600–$1,000 |
| F20C/F22C (S2000) | 2–3 hours | $400–$650 |
These prices typically include a new valve cover gasket and spark plug well seals. Always confirm that’s included — a shop that skips new gaskets is handing you an oil leak.
Compare those numbers to a cylinder head rebuild at $2,500–$4,500 or an engine replacement at $5,000–$8,000. The math on preventive maintenance writes itself.
The Bottom Line on Honda Valve Adjustments
Honda’s insistence on solid mechanical lifters isn’t stubbornness — it’s a deliberate trade-off for lighter valvetrain components, higher RPM capability, and fewer failure points. The 2023 Pilot finally moved to hydraulic lifters in its revised V6, but tens of millions of older Hondas on the road still require this service.
Watch for the Maintenance Minder Sub-Code 4 on your dashboard. On turbocharged engines, don’t wait for it — check in at 80,000 miles. On the J35 V6, treat every adjustment appointment as an opportunity to fix the spool valve gasket while access is easy. And on any engine, make sure the shop replaces all gaskets and applies sealant properly — a correct valve adjustment done with a reused gasket is just a delayed oil leak.
Your Honda’s reputation for lasting 200,000-plus miles isn’t an accident. It’s the result of owners who actually follow through on the services most people skip.