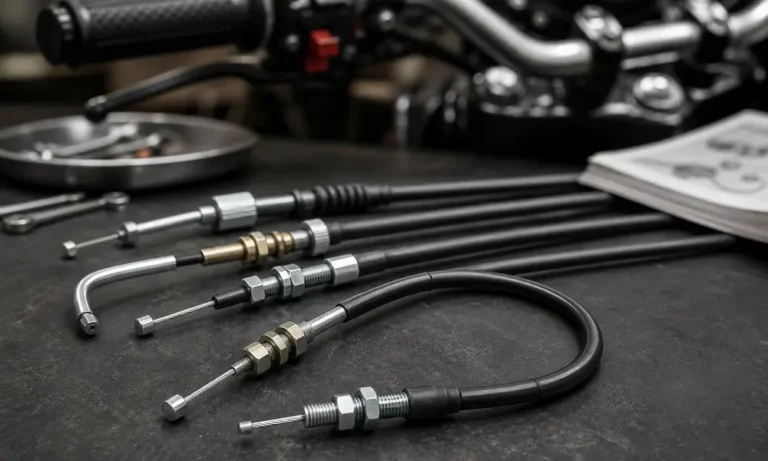
Got a sluggish throttle, a high idle that won’t quit, or a grip that snaps back wrong? This guide covers how to adjust throttle cables across motorcycles, cars, boats, ATVs, and small engines. Stick around — the fix is simpler than you think, and getting it wrong can wreck more than just your ride.
What Is Throttle Cable Freeplay (And Why It Matters)
Before you touch anything, you need to understand freeplay. It’s the small amount of slack in the cable before it starts pulling the throttle open.
Every throttle system needs a specific amount of freeplay built in. Here’s why:
- Too little freeplay: Steering movement, heat expansion, or suspension flex can accidentally pull the throttle open. That’s unintended acceleration — a serious safety hazard.
- Too much freeplay: The throttle feels sluggish, and the engine may never reach full power.
Cables also stretch over time. The housing compresses into its ferrules, slack builds up, and the whole system feels disconnected. That’s why periodic adjustment keeps everything dialed in.
How to Adjust Throttle Cables on a Motorcycle
Motorcycles use a dual push-pull cable system. One cable opens the throttle, the other physically forces it shut. This design exists because a single cable relies entirely on the return spring — and if that spring fails at speed, you’re in serious trouble.
The Standard Freeplay Spec
The factory spec for most street and dirt bikes is 2–3 mm of freeplay, measured at the flange of the twist grip.
Step-by-Step Adjustment
1. Measure your current freeplay
Roll the throttle forward to its resting position. Gently rotate it back until you feel resistance. That gap is your freeplay. Stick two small pieces of masking tape — one on the grip, one on the housing — as reference markers.
2. Adjust the deceleration cable first
Loosen the locknuts on the inline barrel adjusters near the grip. Tighten the deceleration cable until zero slack exists with the throttle fully closed. Lock it down.
3. Set the acceleration cable
Turn the barrel adjuster on the acceleration cable until you hit that 2–3 mm sweet spot at the grip. Lock the nut.
4. Running out of adjuster range?
If you’ve run out of threads on the inline adjuster, reset it to mid-range. Then do a major adjustment at the engine-side bracket by loosening the lock nuts at the bell crank, repositioning the cable, and re-tightening.
The Steering Sweep Safety Check
This step isn’t optional. After every adjustment:
- Engine off — turn bars hard left, then hard right. The throttle must snap back instantly at both extremes.
- Engine on at idle — repeat the sweep. If idle climbs during the movement, your acceleration cable is too tight or routed wrong. Shut off immediately, add slack, and recheck routing.
Skipping this check is how riders end up with a stuck throttle mid-U-turn.
How to Adjust a TV Cable on an Automatic Transmission
This one’s critical and often misunderstood. GM overdrive transmissions like the 700R4 and 200-4R use a Throttle Valve (TV) cable that does far more than trigger a downshift. It directly controls internal hydraulic line pressure based on engine load.
Get this wrong and you’ll destroy the transmission clutch packs in a matter of miles.
What Happens When It’s Misadjusted
| Problem | Cause | Result |
|---|---|---|
| Soft, stacked shifts at low speed | Cable too loose | Low line pressure, slipping clutches |
| Harsh shifts, delayed upshifts | Cable too tight | Excessive pressure, gear wear |
| No kickdown at full throttle | Insufficient tension | Transmission won’t downshift |
Step-by-Step TV Cable Adjustment
1. Engine off, transmission in Park or Neutral.
2. Find the slider bracket near the carburetor or throttle body on the intake manifold.
3. Depress the locking tab on the adjuster. Push the cable housing fully toward the firewall to introduce maximum slack. Release the tab.
4. Manually push the throttle linkage to wide-open throttle (WOT). You’ll hear the ratchet mechanism click as it self-adjusts. Stop when the linkage hits its physical stop.
5. Road test. Under light throttle:
- 1st-to-2nd shift should happen around 15 mph
- 2nd-to-3rd shift around 28 mph
6. Fine-tune by feel:
- Shifts too early or feel soft → pull the housing back one click to increase pressure
- Shifts too late or feel harsh → push the housing forward one click
7. Verify kickdown. At moderate speed in second gear, floor it. The transmission must immediately downshift. If it doesn’t, add one more click of tension.
Note on aftermarket carbs: Holley, Edelbrock, and Carter carbs often require a TV cable geometry correction bracket. Without it, the cable pulls at non-linear rates, causing erratic shifts at mid-throttle.
How to Adjust Marine Throttle and Shift Cables
Boats add a twist — one control handle at the helm manages both throttle position and gear engagement simultaneously. The stakes are high because marine dog clutches have no synchronizers. Force them into gear at high RPM and you’ll wreck the lower unit.
The Golden Rule: Shift Cable First, Always
Never touch the throttle cable until the shift cable is perfectly set. If throttle tension is applied before the clutch is fully engaged, you’ll spike engine speed during gear engagement — and that destroys gearing fast.
Setting the Shift Cable
- Disconnect both cables at the engine.
- Move the engine’s manual shift lever by hand until it clicks positively into neutral. The prop should spin freely in both directions.
- Have someone hold the helm control in neutral.
- Thread the barrel connector on the shift cable until it drops onto the engine shift lever stud with zero force — no pushing, no pulling.
- Test forward and reverse. Both directions must engage with equal, positive resistance.
If engagement is uneven, adjust the shift arm position inside the control box to increase or decrease cable stroke.
Setting the Throttle Cable
- Hold the helm lever firmly in neutral/idle.
- Confirm the engine throttle linkage rests against its idle stop.
- Adjust the throttle barrel to align with the linkage stud — with 1–2 mm of gentle freeplay. Don’t pull it tight against the stop.
- Push the helm control to wide-open throttle. Check that the throttle plates physically contact the WOT stop on the engine.
- Start the engine and verify idle sits between 650–750 RPM. Shift into forward and reverse — engagement should be smooth with no grinding.
How to Adjust Throttle Cables on ATVs, UTVs, and Snowmobiles
Off-road machines run through mud, ice, and extreme vibration. Cables freeze, clog, and bind. That’s why manufacturers like Polaris integrate a Throttle Safety Switch (TSS) directly into the throttle housing.
How the Safety Switch Works
The switch monitors cable tension. If the cable hangs up while the operator releases the lever, the ECU cuts spark immediately to prevent a runaway vehicle. It’s a smart system — but it means cable tension must be spot-on.
- Too tight: The switch triggers prematurely. You’ll get misfires and sudden cutouts during turns.
- Too loose: Throttle response lags dangerously behind input.
Polaris ATV/UTV Adjustment Procedure
Standard freeplay spec: 1.6–3.2 mm (1/16″ to 1/8″) at the thumb lever or pedal.
- Shift to neutral, apply the parking brake.
- Slide back the rubber boot to expose the adjuster.
- Loosen the jam nuts.
- Turn the adjuster sleeve to dial in the freeplay spec.
- Tighten jam nuts to spec — don’t guess on torque here.
| Fastener Location | Torque Spec |
|---|---|
| Pedal-side jam nut | 43 in-lbs (5 Nm) |
| Engine-side jam nut | 10 ft-lbs (13 Nm) |
| Pedal adjuster jam nut | 14 ft-lbs (19 Nm) |
- Start the engine. Confirm idle sits at 1,200 ± 100 RPM.
- Depress throttle fully for up to 10 seconds. Peak output should hit approximately 3,850 ± 50 RPM without safety switch interference.
How to Adjust Throttle Cables on Small Engines
Lawnmowers, generators, and utility pumps work differently. The throttle cable doesn’t connect directly to the carburetor — it adjusts the governor spring tension, which tells the internal governor how hard to work.
Adjusting the Cable
- Move the operator lever on the handle to the maximum speed position.
- At the engine, loosen the cable clamp screw.
- Physically push the speed control bracket to its maximum tension point.
- Tighten the clamp firmly.
If clamped with too little tension, the engine won’t reach rated speed. Too much tension, and it won’t idle down when you back off.
Throttle Cable Freeplay Quick Reference
| Application | Freeplay Spec | Measurement Point | Safety Check |
|---|---|---|---|
| Street/Dirt Motorcycle | 2–4 mm | Twist grip flange | Lock-to-lock steering sweep at idle |
| ATV / Snowmobile | 1.6–3.2 mm | Thumb lever or pedal | Safety switch function test |
| GM 700R4 / AOD (TV Cable) | Zero slack at WOT | Slider bracket | Road test shift points |
| Marine Outboard | 1–2 mm at idle stop | Engine throttle lever | Forward/reverse engagement test |
How to Lubricate Throttle Cables Properly
A dry or contaminated cable increases friction beyond what the return spring can overcome. If the spring loses that battle, the throttle stays open. Lubrication isn’t cosmetic — it’s a safety task.
What to Use (And What to Skip)
Modern cables use polymer inner liners engineered for low-friction performance. Heavy greases and standard WD-40 are both bad choices:
- Heavy grease attracts grit and forms a grinding paste that destroys the liner
- Water-displacement sprays evaporate and leave almost no lubrication behind
Use a synthetic, ultra-light cable-specific lubricant instead. Motion Pro’s Cable Luber V3 is a widely-used tool that injects fluid under pressure through the full cable length.
The Lubrication Process
- Disconnect the cable at the control lever end.
- Place absorbent pads under the engine-side cable exit to catch dirty fluid runoff.
- Clamp the luber tool over the inner wire and seal it tight against the outer housing ferrule.
- Inject lubricant in short bursts. Gently push and pull the inner wire to break up internal sludge.
- Continue until clean fluid exits the bottom end of the cable.
- Apply waterproof grease to the cable barrel ends, lever pivot bolts, and all metal-on-metal contact points before reassembly.
Dry barrel ends cause the steel wire to flex sharply at the connection point on every pull. That metal fatigue will snap strands — often at the worst possible moment.
Diagnosing Common Throttle Cable Problems
| Symptom | Most Likely Cause | Fix |
|---|---|---|
| Stiff, gritty throttle pull | Contaminated or dry housing | Flush and lubricate, replace if kinked |
| High idle that won’t drop | Cable too tight, holding butterfly open | Add freeplay at inline adjuster |
| Idle surges during turns | Improper cable routing | Reroute with adequate slack at headstock |
| Sluggish or delayed throttle response | Too much freeplay | Reduce slack to spec |
| Transmission shifts soft and early (700R4) | TV cable too loose | Ratchet housing back, test road shift points |
| ATV cuts out mid-corner | Safety switch triggering early | Reduce cable tension to spec |
Getting to the bottom of a throttle issue is mostly about isolating whether the problem sits in the cable itself or the throttle body. Disconnect both ends and pull the inner wire manually. If it slides freely when disconnected, the binding is in the carburetor or throttle body — not the cable. If it resists, the housing is compromised and needs replacing or flushing.
One final thing: cable routing is as important as cable tension. Every bend past a tight radius adds friction. Marine specs call for no bend tighter than an 8-inch radius. Keep cables clear of exhaust headers, rotating steering components, and sharp frame edges — and you won’t be chasing mystery problems six months from now.