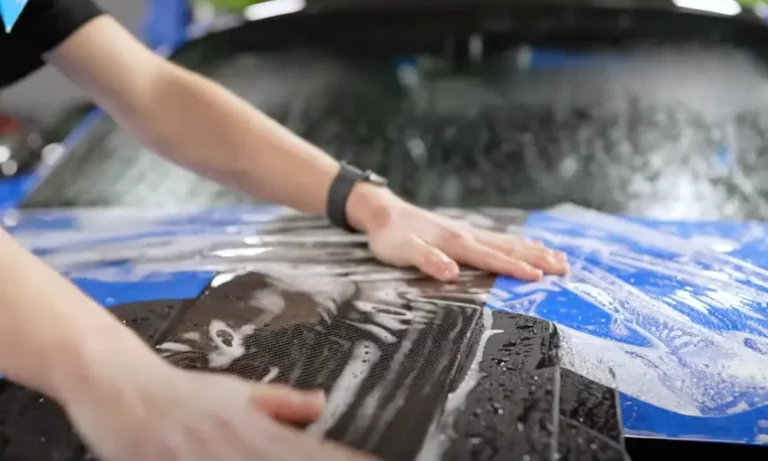
Thinking about removing that aging paint protection film yourself? You’re in the right place. Whether your PPF is yellowing, bubbling, or just past its prime, this guide walks you through exactly how to remove PPF from a car safely — step by step. Stick around, because skipping even one part of this process can cost you a full repaint.
What Happens When PPF Gets Old
PPF doesn’t last forever. Most high-quality films last between five and ten years before they start breaking down. After that, UV radiation, heat cycles, and general wear cause real problems.
Here’s what to watch for:
| Degradation Sign | What It Means |
|---|---|
| Extreme yellowing | UV is destroying the film’s polymers — adhesive is likely baking into your paint |
| Edge lifting or curling | Dirt and moisture are trapped underneath, scratching your clear coat |
| Surface cracking | The film has lost elasticity and will shatter during removal |
| Sub-surface bubbling | Adhesive has failed — moisture may be oxidizing your paint underneath |
Don’t wait too long. The longer degraded PPF sits on your car, the harder the adhesive fuses to your clear coat — and the messier the removal gets.
Factory Paint vs. Aftermarket Paint: Know the Difference
Before you touch that film, you need to understand what’s underneath it.
Factory paint gets baked at extreme temperatures in controlled conditions. It bonds tightly to the metal. The adhesive from PPF almost never bonds stronger than factory paint — so removal is generally safe with proper technique.
Aftermarket and collision repair paint is a completely different story. Body shops can’t replicate factory oven temperatures. The result is a weaker bond between the new clear coat and the car body. If PPF adhesive has baked into aftermarket paint, the glue can bond more strongly than the paint itself — and you’ll pull chunks of clear coat right off the car.
Check your vehicle’s paint history before you start. Use a paint thickness gauge if you’re unsure. If the car has had bodywork, treat every panel as high-risk.
Tools You’ll Need Before You Start
Don’t improvise here. Using the wrong tools causes permanent damage. Here’s what actually works:
For heat:
- Industrial vapor steamer (best option — naturally caps heat near boiling point)
- Variable heat gun (fast, but dangerously easy to overheat with)
- Hot water poured directly over flat panels (safe but messy)
- Infrared lamp (hands-free, but expensive and requires careful calibration)
The vapor steamer is widely considered the safest professional tool because it keeps the film hydrated and flexible. Dry heat from a heat gun can bake out whatever moisture remains in aged film and make it shatter faster.
For lifting and scraping:
- Plastic razor blades (never metal — ever)
- Flexible plastic squeegees with felt edges
- Heavy-duty nitrile gloves (PPF edges will tear your hands over a long session)
For adhesive removal:
- Rapid Remover (citrus-based, water-soluble, safe on paint)
- 3M Specialty Adhesive Remover (fast-acting, great for spot work)
- Koch-Chemie Eulex (aggressive, fast — preferred by pros)
- 70–99% isopropyl alcohol (light residue and final cleanup only)
- Goo Gone Automotive (slow but safe for sensitive areas)
- Kitchen plastic wrap (for the dwell technique — more on this below)
⚠️ Never use acetone, brake cleaner, or industrial degreasers on painted surfaces. They’ll melt your clear coat instantly.
Step 1: Wash and Prep the Car
Start with a thorough decontamination wash. Years of grit accumulate along the edges and seams of the film. If you skip this step, that abrasive debris drags across your newly exposed clear coat during removal — and you’ll spend hours fixing swirl marks afterward.
After washing, dry the car completely with an electric blower or quality microfiber towels. Moisture interferes with both heat tools and chemical solvents.
Work indoors in a climate-controlled space. The ideal ambient temperature sits between 70°F and 100°F. Cold makes the film brittle. Direct sunlight causes uneven heating and flashes off your solvents before they can work.
Step 2: Apply Heat and Lift the Edge
Start at a corner or edge of the panel. Keep your heat gun 6 to 8 inches from the surface and keep it moving in slow, sweeping arcs. Never hold it still. You’re aiming for a panel temperature that feels warm — not scalding — to the touch. That’s roughly 140°F to 160°F.
Once the corner is warm, slide a plastic razor blade gently under the edge. Get just enough film lifted to pinch firmly between your thumb and forefinger.
Step 3: The Low-Angle Peel (This Is Everything)
Here’s where most DIY attempts go wrong. The angle you pull at determines everything.
Don’t pull straight up (90 degrees). This puts direct perpendicular stress on your clear coat and tears it right off.
Don’t peel it backwards like a banana. Same problem — abrupt separation leaves massive glue deposits behind.
Do pull at less than 45 degrees, keeping the motion as close to parallel with the panel surface as possible. This shallow angle forces the film to stretch and elongate, which mechanically shears the adhesive bond away from the paint. Most of the glue stays with the film — not your car.
Use a rhythm: one hand applies continuous heat just ahead of where you’re pulling, the other hand maintains a slow, steady pull at the shallow angle. If the film snaps or resists suddenly, stop immediately and reheat that section.
What to Do When the Film Shatters
If your PPF is heavily cracked and yellowed — especially if it’s over seven years old — the standard peel won’t work. The film will crumble into tiny fragments, and you’ll be picking bits off the car for days.
Try the laminate reinforcement technique first. Lay a strip of high-tack vinyl wrap tape or heavy packaging tape directly over the shattered film. Press it down firmly. Apply heat over the laminate. The new layer bridges all the micro-cracks and gives you a unified surface to pull. Large pieces come up together instead of flaking apart.
For extreme cases, try high-pressure steam. Aim a commercial steam nozzle directly at the shattered film edges. The heat and pressure force the film to blister and curl away from the paint. You’ll still have adhesive residue left behind, but you’ll get the film off.
Step 4: Remove the Adhesive Residue
Even a perfect removal leaves glue behind. Don’t try to scrape dry adhesive — you’ll gouge the paint. Chemical removal is the only safe approach.
The Plastic Wrap Dwell Technique
This is the move that separates pros from amateurs. Don’t spray solvent and immediately wipe — that just smears everything around.
- Saturate the glued area with your chosen adhesive remover
- Immediately cover it with a sheet of plastic wrap or a cut trash bag
- Leave it for 10 to 30 minutes
- Peel back the plastic — the glue is now soft, gelatinous, and easy to remove
This traps the fumes against the adhesive instead of letting them evaporate into the air, giving the solvent time to actually break down the acrylic bonds. A plastic squeegee pushes the softened glue into a pile, and one pass with a microfiber towel cleans it up with zero scrubbing.
Special Rules for Sensitive Surfaces
PPF doesn’t just go on body panels. Here’s how to handle the tricky spots:
Headlights: Polycarbonate lenses warp under dry heat and dissolve under aggressive solvents. Use only light steam or hot water. Clean any residue with diluted isopropyl alcohol and gentle pressure — nothing stronger.
Plastic trim and rubber seals: These are porous. Aggressive heat dries them out and causes cracking. Solvents soak in and leave permanent white stains. Mask everything with automotive painter’s tape before you start working nearby.
Glass: Glass is tough. It handles heat, chemicals, and even metal razor blades (held at a shallow angle). You can use ammonia-based cleaners or acetone on glass surfaces. Just stay away from the rubber window seals and rear defroster lines at the edges.
A Note on the Eraser Wheel
Some detailers use a rubber eraser wheel (also called a stripe-off wheel) for large sections of fossilized adhesive. It works fast on metal panels — but it’s one of the highest-risk tools in the shop.
The friction generates intense localized heat. Too much pressure, even for a second, burns straight through your clear coat. On plastic bumpers and fascias, it will melt and rip the paint away in chunks.
If you’re not an experienced detailer, skip this tool entirely.
Step 5: Polish and Restore the Paint
Once the film and adhesive are gone, your paint needs attention. Here’s what to expect and what to do:
Wash thoroughly first. Solvent residue left on paint prevents new coatings from bonding. Use an alkaline automotive shampoo to strip away all oily hydrocarbon residue.
Clay bar the surface. A detailing clay bar pulls out microscopic adhesive fragments and environmental contaminants embedded in the clear coat pores. It makes the surface feel smooth as glass.
Machine polish the panel. Years of dirt accumulation along PPF edges leaves visible “ghosting” lines etched into the surrounding paint. A dual-action orbital polisher with a foam pad and refining compound levels the clear coat, removes micro-marring from solvent wiping, and restores uniform gloss.
Wipe with diluted IPA. A final wipe with 70% isopropyl alcohol removes any polishing oils and leaves the surface chemically clean — ready for a new PPF installation, ceramic coating, or paint sealant.
How Long Does PPF Removal Actually Take?
Expect 2 to 4 hours for a front bumper and hood on a film that’s in reasonable condition (under 5 years old). If the film is heavily degraded, cracked, and fighting you at every edge, that same job can stretch into a multi-day project. Professional removal costs can rival the original installation price when the film has fully failed — which is exactly why replacing PPF on schedule (before it bakes in completely) saves you real money in the long run.