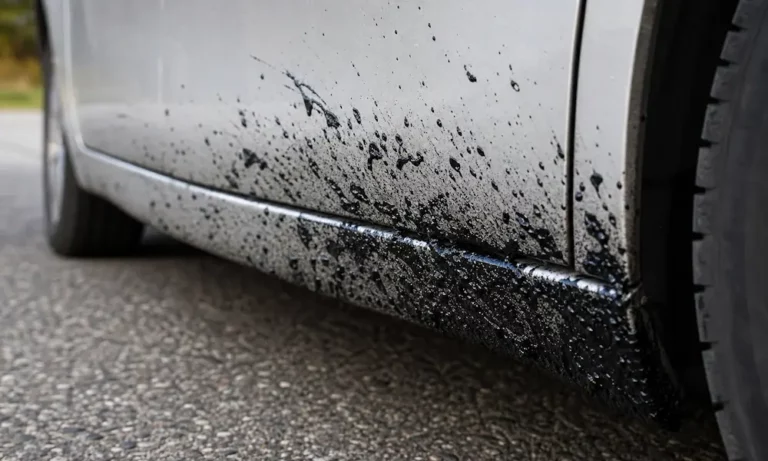
Got black, sticky spots on your rocker panels or bumper after driving through a construction zone? That’s road tar — and it’s more damaging than it looks. This guide walks you through exactly how to remove tar from a car safely, which products actually work, and how to stop it from coming back.
Why Road Tar Is So Bad for Your Paint
Road tar isn’t just ugly. It’s actively destroying your clear coat the longer you leave it.
Here’s what’s happening under the surface:
- Hot tar from road surfaces sticks to your panels and bonds with the clear coat as it cools
- Sun and heat cause it to harden and bake in, which makes it harder to remove
- Tar is acidic — it chemically etches the clear coat over time
- Long-term exposure leads to permanent staining, oxidation, and clear coat failure
The worst part? Road tar isn’t just a chemical threat. It carries abrasive grit — silica sand, gravel, brake dust — suspended right inside it. Scrub that without dissolving it first, and you’ll drag those particles across your paint like sandpaper.
The golden rule: chemical dissolution first, wiping second. Always.
Which Products Actually Remove Car Tar
You’ve got two categories: dedicated automotive tar removers and household alternatives. Both work — they just take different amounts of time and carry different risks.
Commercial Tar Removers
| Product | Chemistry | Dwell Time | Key Limitation |
|---|---|---|---|
| Stoner Tarminator | Heavy petroleum distillates | 30–60 seconds | Avoid clear plastics, headlights, decals |
| Meguiar’s Heavy Duty Bug & Tar Remover | Foaming surfactants + alkaline builders | 5 minutes | Avoid raw matte surfaces |
| Goo Gone Automotive Spray Gel | Citrus oil (d-Limonene) | 2–5 minutes | Don’t leave on raw rubber trim |
| Turtle Wax Bug & Tar Remover | Emulsified solvents and waxes | 1 minute | Safe on paint, metal, plastic, glass |
Household Alternatives
Don’t have a dedicated product on hand? These work in a pinch — but give them more time.
| Product | Dwell Time | Risk | Cleanup |
|---|---|---|---|
| WD-40 | 10–30 min | Strips wax, softens uncured paint | Double wash with car shampoo |
| Smooth peanut butter | 10–30 min | Scratching if crunchy variety used | Soapy water to remove oil |
| Vegetable / cooking oil | 12–24 hours | Attracts dust during dwell | Hot water + concentrated soap |
| Baking soda paste | 2–5 min | High scratch risk if scrubbed | Thorough rinse to remove grit |
One firm warning: skip the lacquer thinner, gasoline, and mineral spirits. They’ll eat through your clear coat just as fast as the tar does.
How to Remove Tar from a Car Step by Step
This is a four-phase process. Skip a step and you risk scratching or leaving residue behind.
Step 1: Pre-Wash the Whole Car First
Don’t skip this. Applying solvent to a dirty panel turns road dust into an abrasive slurry the moment you wipe it.
- Wash the entire car with a pH-neutral car shampoo
- Use the two-bucket method with a clean microfiber wash mitt
- Rinse completely and dry with a plush microfiber towel — standing water dilutes solvents and kills their effectiveness
- Put on nitrile gloves and eye protection before you touch any chemicals
- Work in the shade — hot panels speed up solvent evaporation and cause chemical spotting
Step 2: Apply Your Chosen Tar Remover
Now pick your product and follow the right method for it.
Stoner Tarminator:
Shake the can and spray it 8–10 inches from the panel. Work in small sections. Let it dwell for exactly 30–60 seconds — you’ll see the tar liquefy and run. Wipe immediately with a clean microfiber, then rinse with a strong water stream. Don’t leave it past 60 seconds. Sensitive trim? Spray the product onto the towel, not the panel.
Meguiar’s Heavy Duty Bug & Tar Remover:
Apply an even coat of foam and let it sit for 5 full minutes. If it dries before then, reapply — don’t let it cure on the panel. Follow up with a wash mitt and shampoo, then dry immediately.
Goo Gone Automotive Spray Gel:
Spray directly onto the tar. The thick gel clings to vertical panels without dripping. Dwell for 2–5 minutes, wipe with a clean white cloth, then wash the area with hot soapy water — citrus oil leaves a film.
Turtle Wax Bug & Tar Remover:
Hold the bottle 6–7 inches from the paint, spray to saturate the spots, and let it penetrate for 1 minute. Wipe off with a microfiber, flip to a clean side, and buff the panel dry.
WD-40:
Spray or apply with a saturated microfiber cloth. Give it 10–30 minutes to break down the tar. Wipe away the dissolved residue, then wash the panel twice with car shampoo to strip the oily residue.
Smooth Peanut Butter:
Spread a generous layer over the tar spots and wait 10–30 minutes. Wipe gently in small circles with a damp microfiber, then wash thoroughly to remove grease and any odor.
For every product: use a lifting motion, not a scrubbing motion. You’re scooping the dissolved tar off the surface. Fold your microfiber to a clean section every few passes — reusing a tar-soaked towel drags grit back across the paint.
Step 3: Clay Bar Treatment for Stubborn Residue
Heavy or old tar deposits sometimes leave microscopic bonded residue even after chemical treatment. If your paint feels rough or gritty after washing, it needs a clay bar decontamination.
Quick tip: do the plastic bag test first. Slip a clean sandwich bag over your hand and glide it across the washed panel. If it drags or catches, clay bar treatment is needed.
Pick the right clay grade:
- Light-duty — routine maintenance, thin clear coats, well-kept vehicles
- Medium-duty — annual decontamination prep, moderate buildup
- Heavy-duty — severe fallout, embedded asphalt, neglected paint (expect to follow with a machine polish)
How to do it correctly:
- Tear off a chunk of clay and knead it warm and flat
- Spray clay lubricant generously over a 2×2 foot section
- Glide the clay in straight, overlapping passes — don’t press down hard
- Keep the surface wet with lubricant throughout; if the clay drags, add more
- Fold the clay to expose a clean face as it picks up debris
- If you drop the clay bar, throw it away. It picks up floor grit that will scratch paint on contact
- Wipe residual lubricant with a clean, dry microfiber when done
Step 4: Restore Your Protective Layer
This step gets skipped constantly — and it really shouldn’t be. Chemical solvents and clay bars strip away your wax, sealant, and any other protective coating during the process. Bare clear coat is immediately vulnerable to oxidation and re-contamination.
First, do a final wash with pH-neutral shampoo to neutralize any remaining solvent or lubricant residue.
Then apply fresh protection right away:
- Spray wax — fast, easy, short-term gloss and water sheeting
- Liquid paint sealant — longer-lasting synthetic barrier that handles heat and wash cycles
- Ceramic-based protectant — the most durable option; its hydrophobic surface reduces surface tension so future tar deposits can’t bond as strongly — making future cleanups much faster
How to Stop Tar from Sticking in the First Place
The best tar removal is the one you don’t have to do. Here’s how to make your paint a hostile environment for road tar.
Apply a sacrificial barrier. A synthetic paint sealant or ceramic coating creates a slick, low-adhesion surface. When tar hits a ceramic-protected panel, it sits on top rather than bonding chemically. A standard car wash usually removes it without needing solvents at all.
Stay current on wax or sealant. Reapply every six months minimum. A degraded protective layer is just as exposed as bare paint.
Know your materials. Modern cars mix polycarbonate headlights, soft plastic bumpers, vinyl wraps, and clearcoated metal. Strong petroleum-based solvents can crack or haze polycarbonate and damage vinyl decals. Use citrus-based or pH-neutral products near sensitive substrates.
Separate your towels. Any microfiber cloth you use for tar removal is permanently retired from paint polishing. Heavy petroleum distillates and embedded road grit don’t wash out fully. Color-code them and keep them for wheels, door jambs, and rocker panels only.
Treat it early. Fresh tar is soft and lifts easily. Tar that’s baked on through summer heat for several weeks has chemically bonded with the clear coat — that’s when you’re dealing with potential etching and permanent damage rather than a simple cleaning job.