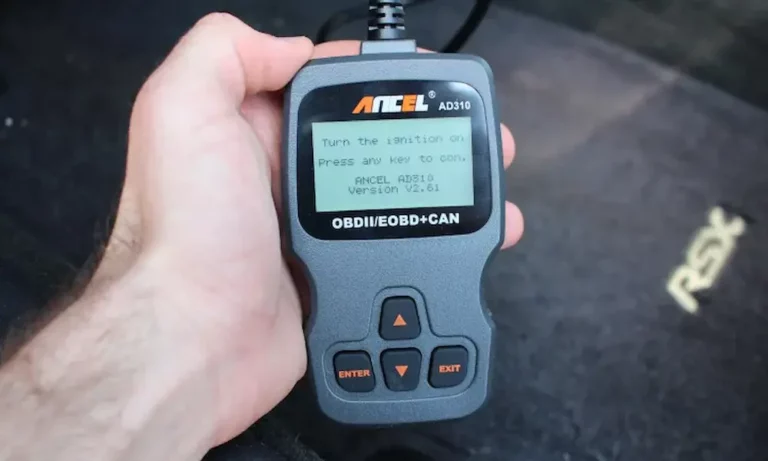
That check engine light just came on, and you have no idea why. Good news — the ANCEL AD310 can tell you exactly what’s wrong in minutes. This guide walks you through everything: setup, reading codes, clearing faults, and interpreting live data. Stick around to the end for some tips most people miss.
What Is the ANCEL AD310 and What Can It Do?
The ANCEL AD310 is a compact OBD2 scanner that plugs directly into your car’s diagnostic port. It reads fault codes, shows real-time sensor data, and checks emissions readiness — all without needing a phone, Wi-Fi, or a subscription.
It works on any petrol or diesel car sold in the US after 1996, plus most European and Asian vehicles built to the OBD2 standard.
Here’s what it can do:
- Read and clear diagnostic trouble codes (DTCs)
- Stream live sensor data while the engine runs
- Capture freeze frame snapshots of engine conditions at fault time
- Check emissions monitor readiness before an MOT or state inspection
- Run an evaporative leak test on the fuel vapor system
- Pull vehicle identification data directly from the ECU
- Look up any code definition offline without internet access
It runs on Linux, draws power directly from your car’s OBD port, and weighs just 8.4 ounces. No batteries needed.
Before You Start: Safety Rules You Can’t Skip
Working near a running engine has real risks. Follow these rules every single time.
Ventilation is non-negotiable. Carbon monoxide is colorless and odorless. If your diagnostic process requires a running engine, do it outside or in a garage with active exhaust extraction.
Immobilize the vehicle first. Automatic transmission? Shift into Park. Manual? Put it in Neutral. Always engage the parking brake and chock the wheels.
Never drive and scan simultaneously. Looking at the scanner screen while driving is a serious collision risk.
Keep clear of moving parts. When the engine is running, serpentine belts, fans, and pulleys can cause severe injuries. Tie back loose hair, remove jewelry, and tuck in loose clothing.
Don’t connect or disconnect the scanner with the ignition on. Plugging or unplugging the cable while current flows can spike voltage through your car’s control module and destroy it.
Keep the scanner dry and clean. Oil, coolant, or moisture inside the unit causes permanent damage.
How to Connect the ANCEL AD310 to Your Car
Getting connected takes about 60 seconds.
Step 1: Turn your ignition completely off before touching anything.
Step 2: Find your Data Link Connector (DLC). Federal law requires this port to sit within 12 inches of the center of your dashboard. On most cars, it’s under the driver’s side dash, just above the pedals. On some Asian and European models, it may hide behind a plastic panel under the center console, or behind the ashtray.
Step 3: Plug the scanner’s cable firmly into the DLC port. The trapezoidal shape only fits one way, so you can’t wire it incorrectly.
Step 4: Turn the ignition to the ON position. Don’t start the engine yet — just power on the electronics.
The scanner boots automatically and displays the main menu. It then cycles through communication protocols (CAN, KWP2000, ISO-9141, J1850) until it finds the one your car uses. Once matched, you’re connected.
Setting Up the Scanner for First Use
Before running any diagnostics, spend two minutes configuring the settings. It makes a real difference.
| Setting | How to Change It | Why It Matters |
|---|---|---|
| Language | Main Menu → Language → Select from list → Enter | Translates all menus and code definitions into your preferred language |
| Display Contrast | Main Menu → Contrast → Scroll to adjust → Enter | Makes the screen readable in direct sunlight or dim garages |
| Unit of Measure | Main Menu → Unit of Measure → English or Metric | Prevents misreading Celsius as Fahrenheit — a mistake that could mask an overheating engine |
The four navigation buttons work like this:
- Up/Down arrows — scroll through menus or pages
- Enter — confirm a selection or advance a sequence
- Exit — go back one level without resetting anything
How to Read Diagnostic Trouble Codes
This is the core function. Here’s how to use the ANCEL AD310 to pull codes:
- From the main menu, select Diagnostics
- Select Read Codes
- The scanner queries the ECU and displays any stored faults
You’ll see up to three types of codes:
Stored Codes — Confirmed, repeating faults that have triggered your check engine light. These need attention now.
Pending Codes — Intermittent issues the computer has flagged once. The light isn’t on yet, but it could come on soon if the fault repeats.
Permanent Codes — Serious emissions faults that the scanner cannot delete. Only disappear after the vehicle’s own systems verify the physical repair is complete.
Each code appears with a plain-text definition on screen. No manual flipping required.
Decoding the Code: What Those Five Characters Mean
Every OBD2 code follows the same structure. Once you understand it, you can diagnose faster.
| Character | What It Represents | Examples |
|---|---|---|
| 1st (Letter) | Vehicle system | P = Powertrain, B = Body, C = Chassis, U = Network |
| 2nd (Digit) | Code type | 0 = Universal/generic, 1 = Manufacturer-specific |
| 3rd (Digit) | Subsystem | 1–2 = Fuel/air, 3 = Ignition/misfire, 4 = Emissions, 7–9 = Transmission |
| 4th–5th (Digits) | Specific component | Pinpoints the exact sensor or circuit that failed |
So P0118 breaks down as: Powertrain (P), generic (0), fuel/air metering (1), engine coolant temperature sensor circuit fault (18).
How to Clear Codes and Reset the Check Engine Light
Once you’ve repaired the fault, here’s how to erase the code:
- Turn ignition to ON — engine must be off
- Select Diagnostics → Erase Codes
- Confirm YES when prompted
- The scanner deletes all stored and pending codes and turns off the check engine light
Important: Clearing codes without fixing the problem does nothing. The ECU re-tests every component on the next drive cycle. If it still finds the fault, the code comes straight back.
Erasing codes also resets all non-continuous emissions monitors to “Incomplete.” More on that below.
Using Live Data to Diagnose Real-Time Problems
Live data turns the AD310 into a real-time engine monitor. Select Live Data from the diagnostics menu with the engine running.
You’ll see continuous updates on:
- Engine RPM
- Vehicle speed
- Coolant temperature
- Ignition timing advance
- Oxygen sensor voltages
- Throttle position
This is incredibly useful for catching faults that don’t yet have a code. If your car hesitates under acceleration, watch the throttle position sensor voltage in real time while pressing the pedal. Any erratic drops tell you exactly which sensor is failing — before it leaves you stranded.
Reading Freeze Frame Data
When your car logs a fault code, it also captures a snapshot of engine conditions at that exact moment. Select Freeze Frame to view it.
The snapshot includes:
- Engine load at fault time
- RPM and vehicle speed
- Coolant temperature
- Fuel trim status
This matters when diagnosing intermittent faults. If the freeze frame shows a misfire only at 5,000 RPM under heavy load, you know exactly how to replicate the conditions during a test drive. No guesswork.
Checking Emissions Monitor Readiness (I/M Readiness)
Many US states check more than just the check engine light during emissions testing. They read the vehicle’s internal monitor status directly from the OBD port. Select I/M Readiness to check yours before heading to an inspection.
| Monitor Type | Status Shown | What It Tests |
|---|---|---|
| Continuous Monitors | Almost always “OK” while engine runs | Misfires, fuel system, electrical components |
| Non-Continuous Monitors | May show “INC” (Incomplete) after code erasure | Catalytic converter, O2 sensors, evap system, EGR |
If any non-continuous monitor shows “INC,” your car will fail emissions testing — even with no active faults. You’ll need to complete a manufacturer-specific drive cycle to reset them: typically a mix of city driving, highway cruising, specific deceleration patterns, and sometimes an overnight cold soak.
Using the Offline DTC Lookup Function
The AD310 has a built-in code library that works without internet access. This is a lifesaver in underground parking garages or rural locations with no signal.
To use it:
- Select DTC Lookup from the main menu
- Use the scroll buttons to build the five-character code character by character
- Press Enter to retrieve the definition
- Use the down arrow to scroll through longer definitions
You don’t need to be connected to a vehicle to use this function.
How to Update the ANCEL AD310 Firmware
Car manufacturers release new codes and tweak communication protocols constantly. Keeping the firmware updated ensures the scanner stays accurate on newer vehicles.
Here’s the update process:
- Download the update package from ANCEL’s official site
- Extract the compressed file using 7-Zip or WinRAR
- Connect the scanner to your PC using the USB port at the base of the unit
- Run the Update.exe file from the extracted folder
- The software flashes the new firmware directly to the scanner — takes 1–2 minutes
- Disconnect safely and you’re done
Don’t disconnect the USB cable mid-update. It can corrupt the firmware and brick the device.
Keeping the AD310 in Good Shape
The maintenance side is simple but worth doing:
- Clean the screen with a soft, dry cloth only — no solvents or alcohol
- Store it somewhere dry — moisture causes internal corrosion
- Handle the cable carefully — sharp bends or heavy coiling fractures the internal copper wiring over time
- Check the fuse if the scanner won’t power on — the DLC port often shares a fuse with the cigarette lighter circuit
If the scanner shows a “LINKING ERROR,” work through this checklist:
- Confirm ignition is in the ON position (not Start, not Off)
- Check the cable connection at the DLC — reseat it firmly
- Check the vehicle’s fuse for the diagnostic port
- Verify your car is 1996 or newer and OBD2-compliant
- Turn ignition off, wait 10 seconds, turn back to ON, and retry
A vehicle battery below 12V can also prevent the scanner from powering up entirely.
ANCEL AD310 vs. AD410 PRO: Which One Do You Need?
| Feature | AD310 | AD410 PRO |
|---|---|---|
| Display | Monochrome LCD | Full-color LCD |
| Battery testing | No | Yes (with clamp leads) |
| I/M readiness hotkey | No | Yes |
| Repair suggestions | No | Yes |
| Offline code lookup | Yes | Yes |
| Firmware updates | Yes | Yes |
| Price point | Budget | Mid-range |
The AD310 is the right tool if you want fast, reliable OBD2 diagnostics without extra features driving up the cost. The AD410 PRO adds battery testing and color display for users who want a bit more.
The AD310 does exactly what most car owners need: reads codes, shows live data, and clears faults — quickly and accurately.