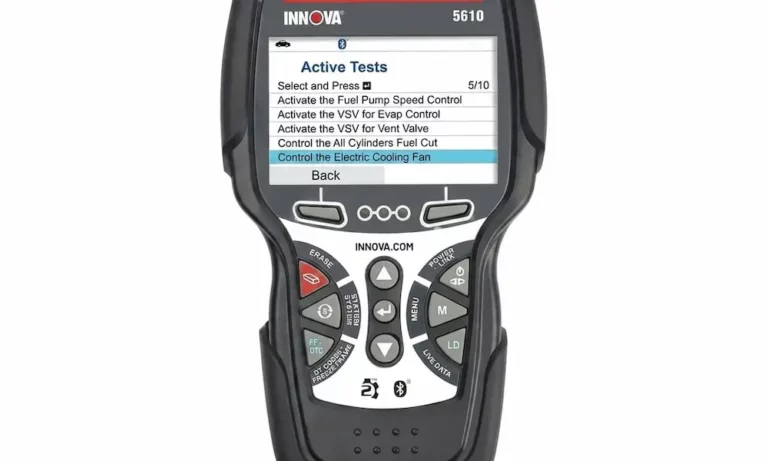
That check engine light just popped on, and now you’re staring at your Innova code reader wondering where to start. This guide walks you through every step — from plugging in the tool to reading codes, understanding what they mean, and clearing them safely. Stick around to the end, because the section on emission monitors alone could save you a failed smog test.
What You Need Before You Start
Before you touch the scanner, run through this quick checklist:
- Your Innova code reader (fully charged or with fresh batteries)
- Your vehicle parked on a flat surface
- Parking brake firmly engaged
- Automatic transmission in Park, manual in Neutral
- Wheel chocks placed behind the tires
Also, always work in a well-ventilated area. Your engine produces carbon monoxide — it’s odorless and deadly in an enclosed garage. Keep sparks and flames away from the battery too, since it emits flammable hydrogen gas while charging.
Remove loose jewelry and baggy clothing before leaning into the engine bay. Fan belts and pulleys don’t forgive careless mistakes.
Where to Find Your OBD2 Port
Your car’s Data Link Connector (DLC) is a 16-pin rectangular socket. Federal regulations require it to sit within 12 inches of your dashboard’s centerline, usually under the driver’s side dash.
Most of the time, it’s right there in plain sight. If you can’t find it, check your owner’s manual or use Innova’s online port locator tool.
Pro tip: Always turn your ignition OFF before plugging in the scanner. Connecting with the ignition on can damage both the tool and your car’s electronic modules.
Plugging In the Innova Code Reader
The DLC connector is keyed — it only fits one way. If you feel resistance, rotate the connector 180 degrees instead of forcing it. Bending those tiny internal pins means an expensive fix.
Once it’s firmly seated, the scanner draws power directly from your car’s battery through the port. No batteries needed for the scan itself.
Turning On the Tool and Establishing a Connection
With the scanner plugged in, turn your ignition to the ON position. Don’t crank the engine yet — just switch the key to ON so the car’s computers wake up.
The Innova tool will automatically start its handshake with your vehicle’s computer. Within 10 to 60 seconds, it retrieves stored codes, emission monitor statuses, and freeze frame data.
If the screen stays blank: You’ve likely got a blown fuse for the OBD2 port. Check your fuse panel and replace the blown fuse before continuing.
If you get a communication error: Turn the ignition off, wait five seconds, turn it back to ON, then press the LINK button to retry the connection.
Understanding the Innova Display: Buttons and Icons
The Physical Buttons
| Button | What It Does |
|---|---|
| SYSTEM MENU | Switches between diagnostic modules (engine, ABS, SRS, battery) |
| UP / DOWN | Scrolls through menus, codes, and freeze frame data |
| ENTER | Confirms selections and launches tests |
| DTC/FF | Opens the trouble code screen and freeze frame data |
| ERASE | Clears codes from the vehicle’s memory |
| LD | Activates Live Data mode for real-time sensor readings |
| LINK | Forces the tool to reconnect to the vehicle’s computer |
The Screen Icons
Your display uses icons to tell you exactly what’s happening at a glance:
- Vehicle icon — Tool is receiving power from the OBD2 port
- Link icon — Active two-way communication with your car’s computer
- MIL icon — A stored code is commanding the check engine light to stay on
- Battery icon — Tool’s internal batteries need replacing
- Bluetooth icon (solid blue) — Connected to the RepairSolutions2 app
- Pending / History / Freeze Frame — Code classification labels
The LED Traffic Light System
Your Innova scanner has three LEDs that give you an instant health snapshot:
- 🟢 Green — No codes stored, all emission monitors complete. Your car will pass a smog check.
- 🟡 Yellow — Either a pending code exists, or one or more monitors haven’t finished running yet. A smog station will likely reject your car.
- 🔴 Red — A confirmed fault code is stored and the check engine light is on. Your car will fail an emissions test.
How to Read Diagnostic Trouble Codes
Once the tool links up, it displays your codes in order of priority. Code “01” always appears first — that’s your highest-priority fault. It’s also the only code your car stores freeze frame data for.
Codes display in color-coded text on modern Innova screens:
- Red text = Stored/Permanent code (check engine light is on)
- Yellow text = Pending code (anomaly detected, not yet confirmed)
- Green text = No codes stored
Decoding the Five-Character Code Structure
Every diagnostic trouble code follows the same format. Here’s how to read it:
Example: P0300
| Position | Character | Meaning |
|---|---|---|
| 1st | P | Powertrain (engine/transmission). B=Body, C=Chassis, U=Network |
| 2nd | 0 | Generic/universal code. “1” means manufacturer-specific |
| 3rd | 3 | Ignition system / misfire |
| 4th & 5th | 00 | Specific circuit or component (random/multiple cylinder misfire) |
Code Severity Levels
Your Innova tool also tags each code with a severity level so you know how urgently to act:
| Severity | Urgency | What to Do |
|---|---|---|
| Level 1 | Low | Schedule a repair when convenient |
| Level 2 | Moderate | Fix soon — poor drivability and risk of further damage |
| Level 3 | High | Stop driving immediately — catastrophic damage is imminent |
Reading Freeze Frame Data
When a code triggers, your car’s computer snapshots exactly what was happening at that moment. That’s your freeze frame data — engine speed, coolant temperature, fuel pressure, engine load, and more.
Press DTC/FF to scroll through the freeze frame for the priority code. This data is gold for diagnosing intermittent problems, because it lets you recreate the exact conditions that triggered the fault during a test drive.
How to Use Live Data Mode
Press the LD button to enter Live Data mode. The scanner streams real-time readings from your oxygen sensors, mass airflow meter, temperature sensors, and more.
This feature helps you confirm a repair worked, or catch a sensor misbehaving before it sets a full code. Watch for readings that spike or drop unexpectedly while the engine runs.
Understanding OBD2 Emission Monitors
This is where most people get tripped up before a smog test. Your car runs a series of internal self-diagnostic tests called monitors. If they haven’t completed, your car will fail the electronic portion of an emissions inspection — even with zero trouble codes.
Continuous Monitors (Always Running)
These three monitors never stop checking while the engine runs:
- Misfire Monitor (M) — Detects misfires by tracking crankshaft speed fluctuations. A rapidly flashing check engine light means a severe Type 2 misfire is destroying your catalytic converter. Stop driving immediately.
- Fuel System Monitor (F) — Watches fuel trim corrections. If your engine needs extreme adjustments to maintain the right air-fuel ratio, it triggers a fault.
- Comprehensive Component Monitor (CCM) — Supervises all electronic sensors and actuators for out-of-range readings and irrational data.
Non-Continuous Monitors (Run Once Per Drive Cycle)
These monitors only run when specific driving conditions are met:
| Monitor | What It Tests |
|---|---|
| Catalyst (C) | Catalytic converter efficiency |
| Oxygen Sensor (O) | Sensor response speed and accuracy |
| Oxygen Sensor Heater (OH) | Heating element integrity |
| EVAP (EV) | Fuel system for vapor leaks |
| EGR (E) | Exhaust gas recirculation flow |
| Secondary Air (2A) | Air injection pump and valves |
| Boost Pressure (BPS) | Turbocharger/supercharger function |
A solid green icon on your scanner means that monitor passed. A flashing red icon means it hasn’t run yet — your car hasn’t met the specific driving conditions required to trigger the test.
How to Safely Erase Codes
Only clear codes once you’ve confirmed the repair is complete. Here’s the right way to do it:
- Keep the scanner connected to the OBD2 port
- Engine OFF, ignition ON
- Press ERASE
- Confirm the deletion when prompted
- Press ERASE a second time to send the clear command
- Wait for the confirmation message
Critical warning: Clearing codes also wipes all freeze frame data and resets every emission monitor to “incomplete.” If the underlying problem isn’t fixed, the code returns within one or two drive cycles. And if you clear codes right before a smog check, the testing station’s system will automatically reject your car because all monitors show as incomplete. Don’t do it.
Running ABS and Airbag Diagnostics
Advanced Innova scanners reach beyond the engine. Press the SYSTEM MENU button to access these additional modules:
ABS diagnostics — The scanner talks to your braking control module and retrieves faults from wheel speed sensors, hydraulic pumps, and accelerometers. An illuminated dashboard brake light means your anti-lock function is disabled — a serious safety issue in emergency braking.
SRS diagnostics — Your airbag system monitors crash sensors and pretensioners. Use extreme caution here. Incorrect handling of SRS faults can cause airbags to deploy accidentally during the repair process.
Testing Your Battery and Alternator
Your Innova tool can also test your car’s electrical foundation directly from the system menu.
Battery Test:
- Turn on the headlights to remove the surface charge
- Crank the engine with the starter
- The tool measures voltage drop under starter load
- Result: Pass, Warning (weakening), or Fail (replace now)
Alternator Test:
- Engine must be running
- Hold engine speed at roughly 2,000 RPM
- The tool measures alternator output voltage
- Voltage Low = alternator failing | Voltage High = voltage regulator failed (can fry your modules) | Good = within spec
Connecting to the RepairSolutions2 App
Your Innova scanner pairs with the RepairSolutions2 app via Bluetooth Low Energy to turn raw codes into verified repair solutions.
The single most important rule: Never pair the scanner through your phone’s main Bluetooth settings menu. Always pair from inside the RepairSolutions2 app. Pairing from settings hides the tool from the app entirely.
Also, grant the app Location Services permission when asked. The app doesn’t track your location — it just needs that permission because iOS and Android bundle Bluetooth Low Energy scanning inside location services. Deny it, and the pairing fails.
Step-by-Step App Connection
- Plug the scanner into the OBD2 port with the ignition ON
- Let the tool complete its scan and display the first code
- Open RepairSolutions2 and log in (or create an account)
- Navigate to the connection menu and confirm location permissions are granted
- Select your scanner model from the Bluetooth discovery list
- The app displays “Scanning Vehicle” and pulls codes, freeze frame data, and monitor statuses
- Enter your odometer reading to generate a full diagnostic report with verified fixes
Bluetooth Pairing Not Working?
Try these fixes in order:
- Toggle your phone’s Bluetooth off and back on, then forget the device in your phone’s settings if you accidentally paired it there
- Make sure the scanner is firmly seated in the OBD2 port — no firm connection means no Bluetooth signal
- Check your car’s battery voltage; dead batteries leave the computer modules dormant and the scanner can’t communicate with them
Keeping Your Scanner Updated
Innova releases firmware updates to add compatibility with newer vehicles and expanded code libraries.
- Windows: Download the installer from Innova’s update portal and follow the setup wizard
- Mac: Download the package file and install the updater application
- Advanced tablets: Connect via WiFi — an update icon appears on the main screen when a patch is available
Connect your scanner via USB cable, open the updater app, and let it flash the latest software into the tool’s memory. It takes a few minutes and keeps your scanner accurate for newer model years.