
Ever stared at a bouncing gauge needle and had no idea what it was telling you? Vacuum gauge readings are actually speaking a clear language — you just need to know how to listen. Whether you’re diagnosing a sick engine, evacuating a refrigeration system, or managing an industrial furnace, this guide breaks it all down. Read to the end — the diagnostic tables alone are worth bookmarking.
What Is a Vacuum Gauge Actually Measuring?
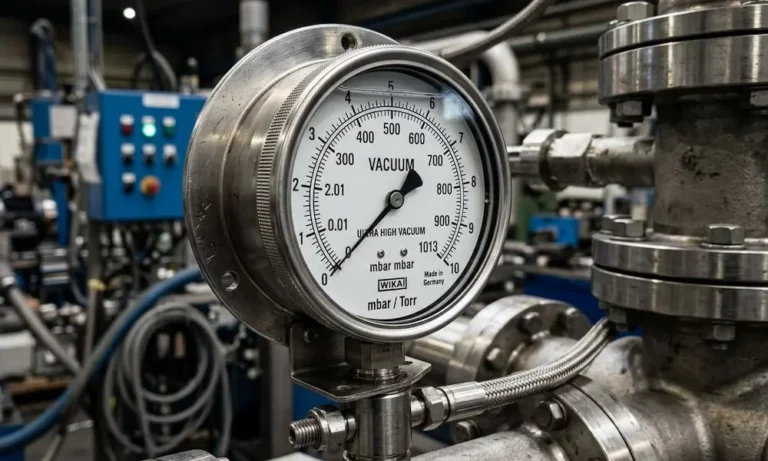
A vacuum gauge doesn’t measure something that’s there. It measures something that isn’t there — specifically, how far below atmospheric pressure a system has dropped.
Measuring a vacuum means quantifying the absence of air, gas molecules, or matter within a confined space. Since there’s no physical substance to grab onto, gauges instead detect the mechanical forces, thermal behavior, or electrical properties of whatever residual gas remains.
Different industries use different units to express vacuum gauge readings:
| Unit | Used By | Key Reference Point |
|---|---|---|
| Inches of mercury (inHg) | Automotive, meteorology | ~29.92 inHg = perfect vacuum |
| Torr | Industrial, scientific | 760 Torr = atmosphere |
| Micron (millitorr) | HVAC/R, heat treating | 1,000 microns = 1 Torr |
| PSI absolute / PSI gauge | Fluid power | 14.7 psia = atmosphere |
| Pascal / millibar | Scientific, European | 101,325 Pa = atmosphere |
The unit you use depends entirely on how deep the vacuum goes and which industry you’re working in.
Vacuum Levels: From Your Engine to Outer Space
Not all vacuums are equal. Vacuum quality splits into four distinct regimes based on gas density and the physics happening inside the system.
Rough vacuum (atmosphere to 25 Torr) is where automotive engines, food packaging, and basic industrial lifting operate. Gas molecules are still dense enough to push and pull like a fluid.
Medium vacuum (25 Torr to 1 micron) is the HVAC/R sweet spot. This is where refrigeration dehydration happens and where moisture starts boiling off under pressure.
High vacuum (1 micron to 10⁻⁹ Torr) is the semiconductor and metallurgy zone. Gas molecules are so sparse they stop colliding with each other and just shoot straight across the chamber.
Ultra-high vacuum (10⁻⁹ Torr and below) is particle accelerators and deep space simulation. At this level, even the metal chamber walls slowly “sweat” gas molecules out of their microscopic pores.
Each regime requires a completely different type of pump and a completely different type of gauge. A mechanical gauge that works great on your car is essentially blind in a semiconductor cleanroom.
How Vacuum Gauges Actually Work
No single gauge technology covers the full range from atmosphere to ultra-high vacuum. Different gauges measure completely different physical phenomena, which is why the right tool depends entirely on the pressure range you’re working in.
Mechanical Gauges: Feeling the Force
Bourdon tube gauges work by physically bending a curved hollow tube as pressure changes. The deflection moves a needle across a dial. They’re cheap, rugged, and accurate enough for rough vacuum work — but they lose reliability below about 1 Torr due to internal friction.
Capacitance manometers are the precision instruments of the gauge world. A microscopic flexible diaphragm separates the process chamber from a perfect reference vacuum. As pressure changes, the diaphragm bends. That bend shifts the electrical capacitance between the diaphragm and a fixed electrode. The electronics read that shift and output an exact pressure.
These gauges are completely independent of gas type — they don’t care whether your chamber holds argon or helium. Many are internally heated to 45°C or 100°C to prevent process gases from condensing on the diaphragm. They dominate semiconductor manufacturing for that exact reason.
Thermal Gauges: Measuring Heat Loss
Below about 1 Torr, there’s almost no physical force left to measure. Thermal conductivity gauges take over here, measuring pressure indirectly by tracking how well residual gas carries heat away from a heated wire.
The Pirani gauge is the workhorse of this category. A fine tungsten filament stays electrically heated to a set temperature. Gas molecules bump into it and steal heat. Fewer molecules equal less heat loss, which raises the filament’s temperature, which changes its electrical resistance. The gauge reads that resistance shift as a pressure value.
One critical catch: thermal gauges are gas-dependent. A Pirani calibrated for air reads incorrectly in a pure argon environment. You’ll need correction factors any time you’re working with non-air gases.
Thermocouple gauges work on the same heat-loss principle but use a direct thermocouple welded to the filament instead of resistance-measuring electronics. They’re simpler and tougher — popular in rugged industrial settings.
Ionization Gauges: Counting Molecules
Once you drop below about 0.0001 Torr, thermal gauges go blind. There simply aren’t enough molecules left to transfer measurable heat. Ionization gauges take over by stripping electrons off the remaining gas molecules to create a measurable electrical current.
Hot cathode gauges shoot electrons from a heated filament toward a grid. Those electrons knock electrons off gas molecules, creating positively charged ions. A collector wire gathers those ions. More ions equal more current equal higher pressure. They’re incredibly precise but will instantly burn out if exposed to atmosphere while energized.
Cold cathode gauges skip the fragile filament entirely. A massive voltage and a permanent magnet force electrons into long spiral paths, guaranteeing eventual collisions with sparse molecules to create a self-sustaining plasma discharge. They’re far more durable — the preferred choice anywhere an accidental venting to atmosphere might happen.
Reading Vacuum Gauges on Automotive Engines
This is where vacuum gauge readings get genuinely fun. A vacuum gauge on an engine acts like a mechanical oscilloscope — showing you real-time valve action, timing, and combustion health without pulling anything apart.
Here’s the core concept: an engine is a giant air pump. Pistons pull down during intake, trying to drag air in. The throttle plate restricts that airflow. That fight between piston pull and throttle restriction creates vacuum in the intake manifold. The gauge reads that vacuum directly.
Setting Up Your Baseline
Before diagnosing anything, get the engine fully warm and tap the gauge directly into the intake manifold plenum. Don’t tap into a single runner — you’ll isolate one cylinder and get wildly misleading data.
A healthy engine at steady idle reads 17 to 21 inches of mercury, steady and unwavering. Remember: manifold vacuum drops roughly 1 inch of mercury for every 1,000 feet of elevation, so compensate for your altitude.
Run the throttle snap test next. Snap the throttle wide open — the needle drops toward zero instantly. Snap it shut — the needle briefly spikes to around 25 inHg before settling back to normal idle. If it doesn’t spike on deceleration, that’s your first red flag.
Diagnostic Reading Chart
| Needle Behavior | What It Means | Why It Happens |
|---|---|---|
| Steady but low (under 15 inHg) | Late ignition or valve timing, or uniform wear | Late timing weakens the intake draw across all cylinders equally |
| Drops but won’t spike on decel | Severely worn piston rings | Blow-by prevents the engine from pulling hard vacuum during deceleration |
| Rhythmic drop every few seconds | Burnt exhaust valve | That cylinder bleeds pressure on every compression stroke cycle |
| Rapid, violent vibration | Sticking valves or ignition misfire | Valves fail to seal completely, destroying smooth airflow |
| Vibration only at high RPM | Weak or broken valve springs | Springs manage at idle but can’t close valves fast enough at speed |
| Slow, wandering float (13–17 inHg) | Incorrect air-fuel mixture or spark plug gap | Engine hunts for a stable idle, causing vacuum to rise and fall |
| Steady drop while holding RPM | Clogged catalytic converter or collapsed muffler | Exhaust backpressure slowly chokes intake vacuum |
| Wild swings (5–19 inHg) | Blown head gasket | Adjacent cylinders trade pressure through the breach |
The key insight from engine diagnostics: a steady but wrong reading means a global problem affecting every cylinder equally. A fluctuating or rhythmically dropping needle means a localized failure in one or two specific cylinders. That single distinction saves enormous diagnostic time.
Reading Vacuum Gauge Readings in HVAC/R Systems
HVAC/R technicians don’t just observe vacuum — they use it to actively change the state of matter inside refrigerant lines. Before any refrigerant goes in, every trace of moisture must come out.
Why Moisture Is a System Killer
If moisture stays in the copper lines, it reacts with modern refrigerants and compressor oils to produce hydrofluoric and hydrochloric acids. Those acids corrode copper walls and strip electrical insulation off compressor windings. Even a small amount of residual water can freeze solid at the expansion valve orifice and completely stop refrigerant flow.
Standard manifold gauges can’t measure deep enough to confirm moisture removal. You need a dedicated electronic micron gauge — essentially a digital Pirani gauge — to track the evacuation properly.
The Four Phases of a Proper Evacuation
Phase 1 — Bulk degassing: Pressure drops fast from atmosphere toward 5,000 microns. Nitrogen and oxygen rush out.
Phase 2 — Dehydration plateau: The descent suddenly slows to a crawl. The gauge appears to stall. This is water boiling. At 500 microns, water boils at -12°F — the pump is literally vaporizing liquid water at room temperature. This phase takes time. You can’t rush the physics.
Phase 3 — Target approach: Once all moisture is gone, pressure drops sharply again. The industry standard target is 500 microns, though some manufacturers require 200 microns or lower for warranty compliance.
Phase 4 — Isolation decay test: Close ball valves to trap the vacuum. Watch the micron gauge for 10–15 minutes.
Interpreting the Decay Test
- Gauge stabilizes below 1,000 microns: System is dry and leak-free. Charge it.
- Gauge rises slowly and plateaus around 3,000 microns: Residual moisture is still boiling. The system is tight but wet. Keep evacuating or run a triple evacuation with dry nitrogen.
- Gauge spikes quickly and holds around 2,000 microns: Likely outgassing from rubber hoses or ball valve bodies. Not a system failure.
- Gauge climbs continuously back to atmosphere: You have a leak. Pressurize with nitrogen and find it before touching the refrigerant.
Critical Setup Rules
Place the micron gauge as far from the vacuum pump as possible — at the end of the longest line set. A pump pulling 50 microns at its inlet can leave 3,000 microns at the far end of a 50-foot run. Gauge placement at the pump gives you a false pass every time.
Also remove Schrader valve cores before pulling vacuum. Those little cores create massive flow restriction. Use a core removal tool, oversized vacuum-rated hoses, and fresh pump oil. Milky pump oil from absorbed moisture destroys your pump’s ability to reach deep vacuum.
Vacuum Gauge Readings in Industrial Heat Treating
In a vacuum furnace, vacuum isn’t just preparation — it’s the working environment itself. Heating tool steel, titanium, or tungsten alloys above 2,000°F in open air causes instant, catastrophic oxidation. Vacuum eliminates oxygen entirely, producing clean, bright, structurally perfect parts.
The required vacuum level depends on how reactive the metal is. Carbon steel heat treating runs comfortably at 10–25 microns. Titanium and aerospace superalloys demand high vacuum in the 10⁻⁵ to 10⁻⁶ Torr range to eliminate every trace of atmospheric contamination.
The Partial Pressure Trick
Here’s a metallurgical problem that vacuum itself creates: as pressure drops, the boiling point of solid materials drops too. Pull too deep a vacuum at high temperature and chromium, zinc, or other volatile elements vaporize right out of the alloy, ruining the part and coating your furnace walls.
The solution is partial pressure. Operators pump the furnace to deep vacuum first to eliminate oxygen. Then they deliberately bleed ultra-pure argon or nitrogen back in, raising pressure to a stable plateau of 1,000–5,000 microns. That partial pressure suppresses metal evaporation while keeping the environment completely oxygen-free. It’s precise vacuum gauge readings that make this balance possible.
Semiconductor Manufacturing: The Extreme End of Vacuum Control
Chipmakers working at sub-7-nanometer scales run the most demanding vacuum systems on the planet. Chemical vapor deposition, plasma etching, and atomic layer deposition all require exact pressure stability to fractions of a Torr and absolute freedom from micro-contamination.
The corrosive process gases used to etch silicon wafers would instantly destroy Pirani filaments or hot cathode ionization gauges. Capacitance manometers with ceramic diaphragms dominate this sector — they’re chemically immune and gas-type independent. They account for over 75% of the gauge market in semiconductor applications.
Outgassing is a constant challenge. Metal chamber walls trap microscopic amounts of moisture and volatile compounds in their surface pores. As pressure drops, those materials slowly release into the vacuum. Semiconductor facilities bake chambers at elevated temperatures during initial pump-down to force outgassing before any wafer processing begins.
MEMS-based Pirani gauges are also entering this space, using porous silicon as a thermal isolation layer to survive the violent pressure shocks that would snap a traditional wire filament.
The One Number That Changes Everything
Whether you’re reading 18 inHg on a V8 at idle, watching a micron gauge stall at 4,000 microns on a damp line set, or monitoring partial pressure at 2 Torr inside a vacuum furnace — vacuum gauge readings tell you exactly what’s happening inside a sealed system without opening it up.
The needle behavior, the plateau shape, the decay rate — each one maps directly to a specific physical event. Learn the language and the gauge does the diagnostic work for you.

