That little tire pressure warning light just came on. Now you’re staring down a potential $400+ bill at the dealership. Good news — you don’t have to pay that. Here’s exactly how to find the cheapest way to replace a TPMS sensor, whether you’re a DIYer or just want a fair deal at a shop.
First, Figure Out Which System You Actually Have
Before you spend a single dollar, you need to know what type of system your car uses. This changes everything about your repair strategy.
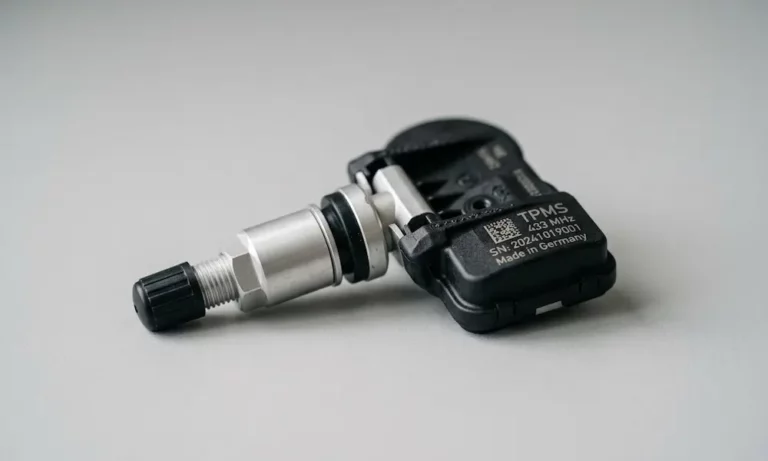
Direct TPMS uses a physical sensor inside each tire. It sends real-time PSI data to your car’s computer. This is the most common setup in the U.S., and it’s the one that costs money to fix when it fails.
Indirect TPMS uses your ABS wheel speed sensors — no hardware inside the tires at all. Many newer Honda Accords, CR-Vs, and Mazda crossovers use this system. If your car has indirect TPMS, the “fix” is usually just a free software reset through your dashboard menu after you inflate your tires correctly.
Check your owner’s manual or search “[your car year/make/model] + TPMS type” before buying anything.
What Makes Direct Sensors Fail
Direct sensors contain a sealed lithium battery that can’t be swapped out on its own. When it dies — usually after 5 to 10 years — you replace the whole unit. Road salt in northern states also eats through the aluminum valve stems, causing leaks even when the battery still works fine.
| System Type | Core Component | Why It Fails | Typical Cost |
|---|---|---|---|
| Direct TPMS | Internal radio sensor | Battery death, corrosion, impact damage | $20–$150 per wheel |
| Indirect TPMS | ABS wheel speed sensor | Software error, ABS hardware fault | $0 (software reset) |
The Smart Money Move: Replace All Four at Once
Here’s something most shops won’t tell you upfront. If one sensor dies from battery exhaustion, the other three are almost certainly close behind — they were all installed at the same time.
Replacing sensors one by one costs you four separate labor charges for dismounting and rebalancing. Replacing all four at once — especially during a scheduled tire change — saves you a significant amount on labor. The tires are already coming off. That labor is already paid for. Stack your repairs smartly.
Cheapest Professional Options Ranked
If you’d rather let someone else handle it, your choice of shop makes a dramatic difference. Dealerships routinely charge $250 to $340 per wheel. That’s not a typo. Luxury brands like Lexus, Audi, or Tesla can push the total bill for all four wheels past $1,000 because of proprietary software requirements.
Skip the dealership. Here’s where your money actually goes further:
Walmart Auto Care Centers
Walmart is the budget baseline. Their sensors run about $25 to $30 each. If you bring your own tires, mounting costs around $11, and their TPMS service pack is just $3 per wheel. Hard to beat for basic maintenance.
Sam’s Club
Sam’s Club charges roughly $35 per sensor and only $5 for installation. They use Schrader sensors — a reputable brand — and include the electronic system reset in that price. A full four-sensor replacement can come in under $190. That’s the sweet spot for most drivers who want professional service without the premium price tag.
Costco
Costco uses Dill-branded sensors, known for wide compatibility across domestic and import vehicles, and charges around $45 to $65 per wheel. Slightly more than Walmart or Sam’s Club, but their technicians handle the system reset well and the quality is consistently higher.
Discount Tire
Discount Tire charges about $60 per sensor, but that price includes installation and calibration. They also back their sensors with a 6-year or 72,000-mile warranty — something no budget option offers.
| Retailer | Sensor Cost | Install Fee | System Reset Included | Warranty |
|---|---|---|---|---|
| Walmart | $25–$30 | $3–$11 | Varies | Limited |
| Sam’s Club | $35 | $5 | Yes | Standard |
| Costco | $45–$65 | $15 | Yes | Standard |
| Discount Tire | $60 | Included | Yes | 6yr / 72k miles |
| Independent Shop | $30–$60 | $50–$100 | Yes | Standard |
The True Cheapest Way: DIY Replacement
If you’re comfortable with basic tools, DIY is where the real savings live. You’re cutting out labor entirely.
What You’ll Actually Need
You don’t need a full tire machine. You need a few affordable tools:
- Manual bead breaker — Vevor or Harbor Freight models run $50 to $80. These press the tire sidewall down enough to access the sensor.
- BeadBuster 450i — A more precise option at around $150 that won’t scratch your rims.
- Valve core removal tool — About $5. Fully deflates the tire before you break the bead.
- Torque wrench — Essential. Sensor retaining nuts need roughly 35 to 40 inch-pounds. Over-tighten and you crack the housing.
The Physical Swap (Step-by-Step)
- Jack the car and remove the wheel
- Fully deflate the tire with your valve core tool
- Use the bead breaker a few inches away from the valve stem — not directly on it
- Slide the sidewall down to expose the sensor
- Unscrew the old sensor, thread in the new one, torque it properly
- Reinflate — the bead pops back into place naturally
Critical tip: Breaking the bead directly on top of the sensor snaps the housing. Work a few inches away, then slide toward the stem once you have a gap.
Picking the Right Replacement Sensor
OEM vs. Aftermarket
OEM sensors from brands like Schrader, Huf, and Continental cost $50 to $100 each through official channels. They’re reliable, but you’re paying a brand premium.
Aftermarket sensors from Autel, Dill, and Schrader run $30 to $60 and match factory specs closely. These are what reputable independent shops use.
Pre-programmed sensors are the DIYer’s best friend. Sold on Amazon and eBay for $30 to $50 for a set of four, these come loaded with your vehicle’s specific protocol. No programming tool required — just install and sync.
Avoid no-name budget sensors under $10 each. Inconsistent battery quality causes premature failure, and weak radio transmitters cause intermittent warning lights. Many shops won’t install them either, since they’re frequently dead on arrival.
| Brand | Type | Avg. Price | Best For |
|---|---|---|---|
| Autel MX-Sensor | Programmable | $25–$35 | DIYers with tools |
| Schrader / Huf | Quality aftermarket | $30–$60 | Independent shops |
| Pre-programmed (Amazon) | Direct-fit | $30–$50 (set of 4) | Simple DIY installs |
| Dill | High compatibility | $45–$60 | European and import vehicles |
| SCITOO / ECCPP | Budget | $10–$15 | Extreme budget only |
The Electronic Relearn: Don’t Skip This Step
Installing the sensor is only half the job. Your car’s computer recognizes sensors by their specific radio IDs. A new sensor has a new ID. Until you sync them, your warning light stays on.
Three Types of Relearn Procedures
Stationary/Manual Relearn — Most common on GM and Ford vehicles. Cycle the ignition, press the brake a specific way, and the car chirps when it enters learn mode. Walk clockwise around the car and trigger each sensor with an activation tool. Done.
Auto Relearn — Common on BMW, Audi, Volvo, Subaru, and some newer domestic models. Just drive above 20 mph for 10 to 20 minutes. The car finds the sensors automatically. No tools needed.
OBD-II Relearn — Required for Toyota, Lexus, Honda (direct sensor models), and Nissan. You must write the new sensor IDs into the car’s memory through the diagnostic port. This needs a proper scan tool.
Which Tools Do You Need?
| Tool | Works On | Price |
|---|---|---|
| EL-50448 | GM vehicles (Chevy, Buick, GMC, Cadillac) | $10–$15 |
| OEC-T5 | Ford, Lincoln, Mercury | $10–$18 |
| Autel MaxiTPMS TS508 | Universal (99% of vehicles) | $220–$280 |
| ATEQ QuickSet | Toyota, Nissan, Honda | $85–$120 |
| Foxwell T1000 | Multi-brand | $130–$160 |
For GM or Ford owners, a $10 to $15 activation tool from Walmart or Amazon handles the relearn completely. Toyota and Lexus owners need the pricier scan tool — which is why Sam’s Club or Costco often makes more financial sense for those vehicles specifically.
When a Full Replacement Isn’t Even Necessary
Here’s something most drivers don’t know. If your sensor’s battery still works but the valve stem is leaking or corroded, a $3 to $15 service kit — a new rubber seal, nut, and valve core — often fixes the problem completely.
Replace the valve core with a nickel-plated version instead of standard brass to fight corrosion. Swap metal valve caps for plastic ones — metal caps fuse to corroded stems, and removing them can destroy an otherwise functional sensor.
The reCore System for Salt Belt Drivers
If you’re in a state where road salt is used heavily, check out the Ken-Tool reCore system. It drills out the corroded aluminum stem and installs a new nickel-plated brass stem into the existing sensor body — from outside the wheel. No tire removal required.
A DIY reCore kit runs about $110 and repairs two sensors. It also doesn’t change the sensor’s electronic ID, so no relearn is needed. For European cars where relearns require expensive tools, this saves real money.
One More Thing: Avoid Liquid Tire Sealants
Liquid tire sealants can permanently clog the pressure transducer port in your sensor, killing it entirely. If your car came without a spare and includes a sealant kit, check that it’s labeled “sensor-safe.” Even then, flush it out thoroughly during any subsequent tire repair.
Also, replace the sensor service kit every single time a tire comes off the rim. These rubber seals and valve cores cost less than $10 and prevent the slow leaks that make a functional sensor look like a dead one.
Your Cheapest Path, Based on Your Situation
- You drive a GM or Ford and don’t mind basic tools: Buy four pre-programmed sensors online ($40), grab a $15 activation tool, and a $50–$80 bead breaker. Total for all four wheels: around $105 to $135. On your next replacement, it drops to just $40.
- You want professional service without the dealership markup: Go to Sam’s Club. Four sensors, installed and synced, for under $190.
- You drive a Toyota or Lexus: Costco or Sam’s Club wins. The DIY OBD-II relearn tool costs as much as just paying the shop once.
- Your stem is corroded but the battery still works: Try a service kit first ($10), or the reCore system if the stem is beyond saving.
The TREAD Act mandated TPMS on all passenger vehicles under 10,000 lbs for good reason — properly inflated tires genuinely save lives and fuel. But maintaining that system doesn’t have to drain your wallet. Match your fix to your actual failure mode, choose your service provider wisely, and you’ll handle this for a fraction of what the dealership wants to charge.