Your check engine light is on, your gas mileage has tanked, or your engine’s running rough. A bad coolant temperature sensor could be the culprit. This guide walks you through everything — symptoms, DIY testing, step-by-step replacement, and what it’ll actually cost you. Stick around, because skipping one step at the end ruins the whole job.
What Does a Coolant Temperature Sensor Actually Do?
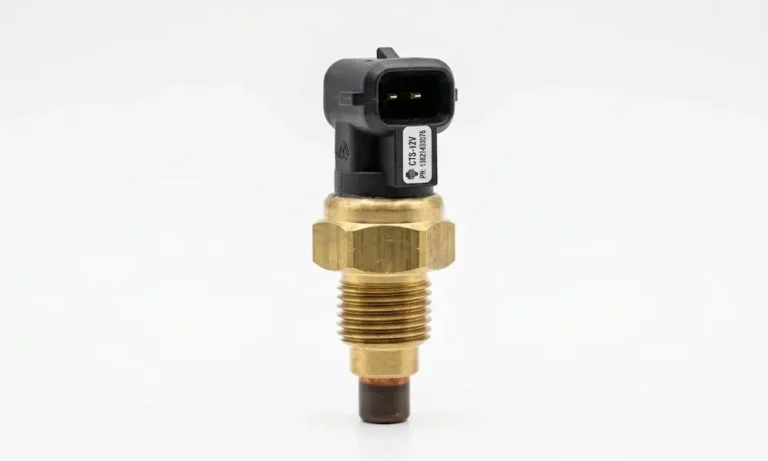
Think of the coolant temperature sensor as your engine’s thermometer. It measures the heat of the liquid circulating through your engine block and sends that data to your car’s computer (the PCM or ECM) constantly.
Your car’s computer uses that data to make big decisions:
- How much fuel to inject — cold engines need a richer mixture
- When to activate the radiator fans — to prevent overheating
- When to switch to closed-loop mode — for better fuel economy
- Emissions system timing — exhaust gas recirculation and canister purge
Without accurate temperature data, your engine is essentially guessing. And engines that guess tend to waste fuel, run rough, and sometimes overheat.
How the Sensor Actually Works
The sensor uses a negative temperature coefficient (NTC) thermistor inside. That’s a fancy way of saying its electrical resistance drops as temperature rises.
Your car’s computer sends 5 volts to the sensor. It reads how much voltage comes back based on the sensor’s resistance. Cold coolant = high resistance = low voltage returned. Hot coolant = low resistance = higher voltage returned. Simple physics, big consequences when it fails.
| Operating State | Coolant Temp | Electrical Resistance | What the Computer Does |
|---|---|---|---|
| Cold start | ~32°F | High | Rich fuel mix, advanced timing |
| Normal operation | ~200°F | Low | Lean mix, optimized emissions |
| Overheating | 230°F+ | Very low | Fan activation, power scaling |
One important note: the sensor tip must stay submerged in coolant to read accurately. Low coolant or air pockets in the system will give you false readings even if the sensor itself is fine.
Signs Your Coolant Temperature Sensor Is Failing
These symptoms don’t always mean the sensor’s bad — but they’re strong hints it’s worth checking.
- Check engine light — most common trigger
- Poor fuel economy — engine stays in rich “open-loop” mode too long
- Black smoke from the exhaust — unburned fuel from an over-rich mixture
- Hard cold starts or rough idle — computer gets wrong temperature data
- Engine overheating — fans don’t activate because the sensor reports a false low temp
- Cooling fans running constantly — sensor reports false high temp
Reading the Diagnostic Codes
Plug in an OBD-II scanner before you buy any parts. These are the codes you’ll most likely see with a failing coolant temperature sensor:
| Code | Meaning | What It Suggests |
|---|---|---|
| P0115 | ECT Sensor Circuit Malfunction | General signal failure |
| P0116 | ECT Sensor Circuit Range/Performance | Erratic or out-of-range signal |
| P0117 | ECT Sensor Circuit Low Input | Short to ground (reads extremely hot) |
| P0118 | ECT Sensor Circuit High Input | Open circuit (often reads -40°F) |
| P0119 | ECT Sensor Circuit Intermittent | Loose wire or failing connection |
| P0128 | Coolant Temp Below Thermostat Regulating Temp | Usually a stuck thermostat, not the sensor |
| P2185 | ECT Sensor 2 Circuit High | Issue with the secondary radiator sensor |
Pro tip: A reading of -40°F almost always means an open circuit — a broken wire or disconnected plug. A reading of 300°F on a cold engine usually points to a short in the sensor or harness.
How to Test the Sensor Before Replacing It
Don’t replace parts you don’t need to. Test the sensor first with a multimeter.
The Overnight Cold Test
Let the car sit overnight until everything is stone cold. Then check the sensor reading with a scan tool. The coolant temp, intake air temp, and transmission fluid temp should all match ambient air temperature within a few degrees. If the coolant sensor reads wildly different from the others, it’s likely skewed.
The Resistance Bench Test
Remove the sensor and grab an ohmmeter:
- Cold test — submerge the tip in ice water. You should see high resistance.
- Heat test — submerge the tip in boiling water. Resistance should drop significantly.
- Compare results to your vehicle’s service manual spec.
Use a blow dryer if you want to test it while it’s still installed. Never use a propane torch — you’ll destroy the sensor’s internal components and get useless readings.
Check the Connector First
A lot of “bad sensors” are actually just corroded connectors. This is especially common on vehicles in humid climates or areas with road salt. Wiggle the wiring harness while watching the sensor voltage on a scan tool. If the voltage jumps around, you’ve got a wiring issue, not a sensor issue. Clean the connector and apply a small amount of dielectric grease — that fix costs almost nothing.
Sensor Locations by Vehicle
Where your sensor lives determines how hard this job is. Here’s a quick reference:
| Vehicle | Engine | Sensor Location | Difficulty |
|---|---|---|---|
| Ford F-150 (2.7L EcoBoost) | 2.7L Turbo | Under the intake manifold | Hard |
| Ford F-150 (5.0L) | 5.0L V8 | Front passenger side | Moderate |
| Chevy Silverado (2015–2023) | 5.3L / 6.2L V8 | Driver’s side front, near thermostat | Easy |
| Toyota Camry (2018–2023) | 2.5L 4-cyl | Driver’s side, near upper radiator hose | Easy |
| Honda Civic (2016–2023) | 1.5L Turbo | Cylinder head, near thermostat | Moderate |
Ford F-150 owners take note: Ford issued Technical Service Bulletin 21-2168 for 2018–2020 F-150s with the 2.7L EcoBoost. Instead of fighting to reach the buried sensor, the fix involves installing a relocation kit — a new heater hose and jumper harness that moves the sensor to a much more accessible spot. It’s the smarter long-term fix.
Toyota Camry owners: Toyota often uses two separate units — one sensor talks to the computer, and one sender feeds the dashboard gauge. Make sure you’re replacing the right one. Replacing the sender won’t fix a check engine light.
Step-by-Step Coolant Temperature Sensor Replacement
Tools You’ll Need
- 19mm deep socket (most common sensor size)
- Ratchet with extensions
- Drain pan
- Torque wrench
- Compressed air
- Fresh coolant (matching your vehicle’s spec)
- Spill-proof funnel (highly recommended)
Step 1: Let the Engine Cool Completely
Never open a hot cooling system. Coolant is pressurized and sits well above boiling temperature. Removing a sensor from a hot engine sends scalding fluid straight at your face. Wait at least two hours after the engine last ran.
Step 2: Release System Pressure
Remove the radiator cap and the overflow reservoir cap. This releases residual pressure and breaks the vacuum in the system before you start wrenching.
Step 3: Drain Coolant If Needed
If the sensor sits low on the engine block, drain enough coolant into a pan to drop the level below the sensor port. If it’s high on the engine, you can often swap it quickly without draining much at all — have the new sensor ready in your other hand to minimize spillage.
Environmental reminder: Ethylene glycol coolant is toxic to animals. Never pour it on the ground or down a drain. Take it to a recycling center.
Step 4: Clear the Area and Prep
- Remove any covers, intake tubes, or brackets blocking the sensor
- Blow compressed air around the sensor base to clear debris — you don’t want dirt falling into the water jacket
- Press the connector tab and pull the electrical harness free
- If the plastic tab is brittle, use a flathead screwdriver to gently pry it loose
Step 5: Remove the Old Sensor
Use your deep socket and turn counter-clockwise. If you’re doing a quick swap, have the new sensor ready to install immediately to limit coolant loss.
Step 6: Install the New Sensor
Most quality replacement sensors come with a dry thread sealant already applied. If yours is bare, apply a thin coat of liquid thread sealant (RTV or pipe dope). Skip the Teflon tape — it can shred into the cooling system and may prevent a proper electrical ground on single-wire sensors.
Torque matters here. Many modern engines use plastic thermostat housings. Over-tightening a tapered-thread sensor cracks the housing, which turns a $30 repair into a $400 one. Most sensors torque to 15–18 foot-pounds — check your service manual for the exact spec.
Bleeding the Air Out — Don’t Skip This
This step is where most DIY coolant jobs go wrong. Air trapped around the sensor tip gives your computer false readings. Your temperature gauge might look fine, but the engine could be struggling.
The Manual Burp Method
- Park on a slight incline or jack up the front end — air travels toward the radiator (the high point)
- Fill the radiator or expansion tank slowly with fresh coolant
- Attach a spill-proof funnel to the radiator neck and fill it a quarter of the way
- If your engine has a bleeder screw on the thermostat housing, loosen it until steady coolant flows out, then tighten it
- Start the engine and set the cabin heater to max heat, lowest fan speed — this opens the heater core and circulates coolant through everything
- Let the engine run until the upper radiator hose gets hot, which means the thermostat has opened
- Watch for bubbles rising through the funnel — that’s trapped air escaping
- Once bubbling stops and the coolant level holds steady, shut the engine off and let it cool
- Remove the funnel and reinstall the radiator cap
| Bleeding Method | Tools Required | Best For |
|---|---|---|
| Manual burp | Funnel, drain pan | Most DIY repairs |
| Bleeder screw | Wrench | Engines with high-point air traps |
| Vacuum fill | Vacuum pump, shop air | Complex engines with multiple heater cores |
The cabin heater blowing hot air at the end is your confirmation the system is full and circulating properly. Cold air from the vents means there’s still air locked in the heater core.
What Does Coolant Temperature Sensor Replacement Cost?
Costs vary a lot depending on your vehicle and where the sensor lives.
| Repair Scenario | Labor Hours | Part Cost | Total Estimated Cost |
|---|---|---|---|
| Easy access (Silverado V8) | 0.5–0.8 hrs | $25–$50 | $150–$250 |
| Standard access (Camry) | 0.8–1.2 hrs | $30–$60 | $250–$390 |
| Difficult access (F-150 2.7L) | 2.5–4.0 hrs | $40–$70 | $600–$900+ |
Shop labor rates across the US run from $50 to $220 per hour depending on your location and whether you go to an independent shop or a dealership. Most shops also charge a $100–$150 diagnostic fee to confirm the sensor is actually the problem — though many apply that fee toward the repair if you proceed.
On parts: spend a little more for OEM or OEM-equivalent parts. Brands like ACDelco for GM vehicles and Denso for Toyota are precision-calibrated to match your computer’s expected resistance curve. A cheap sensor with a slightly off resistance profile can cause the engine to run poorly without ever setting a code — a frustrating problem to chase down.
Smart Timing for This Repair
The coolant temperature sensor isn’t a scheduled maintenance item, but if you’re already replacing the thermostat or water pump, swap the sensor at the same time. It’s often sitting right there, accessible without any extra labor cost. You’re only paying for the part, and you’re buying yourself peace of mind against a future repair.
Keeping your coolant fresh also extends sensor life. Acidic or contaminated coolant eats away at the sensor’s protective coating over time, leading to slow response or internal shorts. Toyota and Honda long-life coolants are rated for 5–10 years, but test your coolant annually if the car has high mileage or has sat for a while.