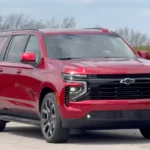
Look, you’re here because a detailer just quoted you over a grand to ceramic coat your ride. You’re wondering if you can tackle this yourself with a $100 kit and some elbow grease. Here’s the truth: you absolutely can—but only if you know what you’re getting into. This isn’t spray wax. It’s a semi-permanent chemical bond that’ll either look incredible or become your most expensive mistake. Let’s break it down.
What’s Actually in That Bottle? (It’s Not Magic)
The Chemistry You’re Working With
Don’t let the marketing fool you. That “ceramic” coating isn’t actually ceramic—it’s a silica-based polymer called polysiloxane. Think of it as liquid glass in a bottle.
Here’s what makes it work:
Silicon Dioxide (SiO₂): This is your coating’s backbone. When it cures, it creates a glass-like shield that’s harder than your clear coat. It’s why ceramic coatings resist acid rain and UV rays better than any wax ever could.
Titanium Dioxide (TiO₂): The UV blocker. This compound stops sun damage before it starts and keeps the coating crystal clear so your paint’s depth shines through.
The particles in your coating are 5-20 nanometers small—so tiny they fill the microscopic pores in your clear coat. That’s how you get a chemical bond instead of just another layer sitting on top.
The Graphene Hype: Marketing or Miracle?
Every bottle screams “graphene” these days. Real talk? It’s mostly marketing.
Expert testing shows graphene-coated panels running hotter in the sun and getting the same water spots as regular ceramic. One chemist admitted the graphene does nothing for slickness—that’s all from the polysiloxane base. You’re paying for a buzzword, not better protection.
Why Ceramic Beats Wax (And When It Doesn’t)
The Durability Game-Changer
Your carnauba wax looks gorgeous. It also lasts about as long as a carton of milk. Here’s the breakdown:
| Protection Type | Lifespan | Bond Type | Best For |
|---|---|---|---|
| Carnauba Wax | 2-12 weeks | Sits on top | Show cars, warm glow |
| Polymer Sealant | 1-6 months | Synthetic layer | Better protection than wax |
| Hybrid Ceramic Spray | 3-12 months | Chemical/topical | Easy application |
| DIY Ceramic Coating | 2-4 years | Covalent bond | Daily drivers |
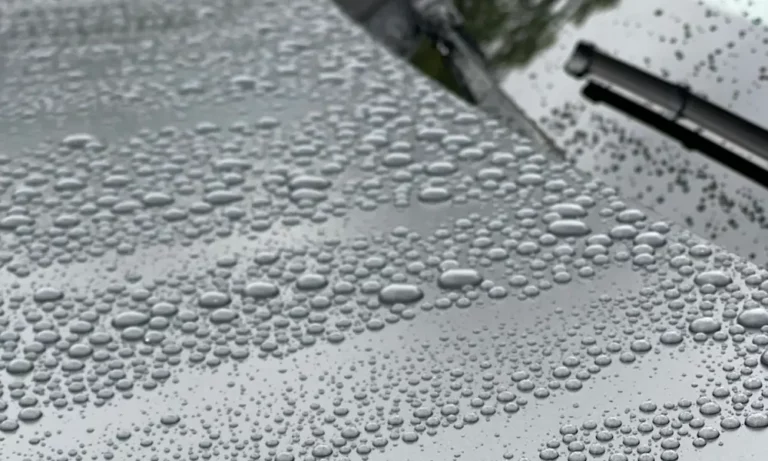
A do it yourself ceramic coating creates a hard, glass-like barrier that shrugs off bird droppings, road salt, and UV damage. Water beads off like it’s hitting Teflon.
The Classic Car Exception
Here’s the catch: once ceramic coating cures, you can’t just wipe it off. Removal requires aggressive polishing—meaning you’re grinding through your paint’s clear coat.
For numbers-matching classics? Stick with wax. You can’t risk the original paint. But for your daily driver? Ceramic’s the move.
The Real Cost: $300 vs. $3,000 (And What You’re Actually Paying For)
Breaking Down the Professional Price Tag
A professional ceramic coating installation runs $500 to $3,000. Your DIY kit costs $50-$300.
But that professional price isn’t for the bottle. You’re paying for:
8-10 hours of paint correction: This is the expensive part. A pro removes every swirl and scratch before coating.
Pro-only products: Shops use certified installer-only coatings like XPEL Fusion+ that you can’t buy retail.
Legal warranty protection: If it fails, they fix it. Your DIY kit? Zero warranty.
The Hidden DIY Costs
That $100 kit doesn’t include the tools you actually need:
- Dual-action polisher: $150+
- Polishing pads and compounds: $50+
- Iron remover and clay bar: $40+
- Panel prep spray: $20+
- 10-20 quality microfiber towels: $50+
First-time total? $400-$500 minimum.
And then there’s your time. This is a full weekend project—not a Saturday afternoon.
Where DIY Goes Wrong (And How to Avoid It)
The High Spot Nightmare
This is the #1 DIY failure. High spots are streaky, hazy patches where excess coating didn’t get buffed off before curing.
Once it’s cured? You can’t just towel it away. You need to machine polish it off and start over. That’s 10+ hours of prep work down the drain.
Your Garage is Your Enemy
Pros work in climate-controlled bays. You’re stuck with whatever Mother Nature gives you.
Humidity: High moisture during application causes bonding failure and hazy finishes.
Heat: Applying in direct sun or on hot panels is catastrophic. The coating dries too fast, leaving you zero time to level it. Guaranteed streaks.
Dust: Outdoor application? Don’t even think about it. Any debris that lands on wet coating gets permanently trapped.
Ideal temperature range: 50°F-85°F in a clean, dust-free garage.
Safety Isn’t Optional
These aren’t car care products—they’re serious chemicals with volatile organic compounds.
Required PPE:
- Nitrile gloves: Mandatory
- VOC-rated respirator mask: Non-negotiable
- Safety goggles: Protect your eyes
Work in a well-ventilated area. The fumes can cause headaches and nausea.
Prep Work is 90% of the Battle
Here’s the hard truth: do it yourself ceramic coating application takes 10 minutes. Preparation takes 8-10 hours. Skip a step and you’ve wasted both.
Step 1: Strip Wash
Use a high-pH stripping soap like Chemical Guys Clean Slate. This removes all old wax, sealants, and road grime. Any residue left behind blocks the chemical bond.
Step 2: Chemical and Mechanical Decontamination
Iron remover first: Spray it on and watch it turn purple as it dissolves embedded brake dust.
Clay bar second: Using clay lubricant, physically pull out remaining contaminants—tar, tree sap, industrial fallout. Your paint should feel smooth as glass.
The order matters. Iron remover first dissolves sharp particles so your clay bar doesn’t drag them across the paint.
Step 3: Paint Correction (Yes, Even on New Cars)
This is the step beginners skip. Don’t.
Why it’s mandatory:
A ceramic coating is transparent. It magnifies every underlying flaw. Swirls and scratches get locked in for 2-4 years.
The new car myth: Brand new doesn’t mean perfect. Dealership prep inflicts fine scratches from improper washing.
Chemical bonding: Polishing removes the oxidized top layer, exposing fresh clear coat for superior adhesion.
You’ll need a dual-action polisher and compounds. This is what creates the flawless canvas.
Step 4: Panel Wipe
Final step before coating: wipe every panel with panel prep spray or 15-30% isopropyl alcohol. Polishes leave behind oily residues that block the coating’s bond. This chemical wipe strips everything, leaving sterile paint.
Application Day: Tools and Technique
After a full day of prep, the actual application is fast—but it requires precision.
Essential Gear
Applicators: Foam block wrapped in suede microfiber cloth. These spread coating evenly without absorbing it.
Lighting: This is critical. Bright direct light blinds you to high spots. You need diffused, indirect LED lighting to spot the subtle rainbow effect of flashing coating.
Microfiber towels: You’ll need 10-20 brand new towels:
- Low-pile 300-350 GSM for leveling (first wipe)
- Plush 350+ GSM for buffing (final wipe)
The leveling towels get ruined. The coating crystallizes in the fibers and you’ll have to trash them.
The Application Process
Work panel by panel in 2’x2′ sections:
Apply: A few drops on your applicator. Spread in a cross-hatch pattern—up and down, then left and right.
Watch for the flash: This is the rainbow or oily sheen that appears as solvents evaporate. Flash time varies from 30 seconds to 5 minutes depending on temperature and humidity. Don’t watch the clock—watch the paint.
Level immediately: When it flashes, wipe with your low-pile leveling towel to remove 80% of excess.
Buff: Follow with a plush towel for the final shine.
Inspect: Use your diffused lighting from multiple angles. Fix any smudges now—once it cures, you’re polishing it off.
Fixing Mistakes Before They’re Permanent
The 10-Second High Spot Fix
Spot a smudge within the first hour? Don’t buff harder—that makes it worse.
The fix: Apply a small amount of fresh coating to the high spot. The solvents re-activate the tacky residue, letting you level it again. Problem solved in 10 seconds.
The Next-Morning Disaster
Catch a high spot after it’s cured? You’re in for work.
The only fix: Machine polish it off. You’ll need to grind away the coating and re-do the entire panel—prep, polish, panel wipe, and re-apply. That 10-second fix just became a 1-hour penalty.
The Critical First 24 Hours
Your coating isn’t finished when you buff the last panel. It’s in its most vulnerable state.
The Curing Timeline
Initial cure (24-48 hours): The coating becomes dry to touch. Keep the car inside. Don’t drive it. Don’t let it get wet.
Full cure (7-21 days): The coating cross-links to full hardness. You can drive, but don’t wash with soap yet.
The Rain Emergency
If your freshly coated car gets rained on before cure? Bad news.
Water destabilizes the bonding process and leaves permanent mineral deposits inside the coating. You’ll see water spots that can’t wash off.
Prevention: Check the forecast. Plan your project around clear weather.
Maintaining Your Investment
A do it yourself ceramic coating isn’t “set it and forget it”—it’s low-maintenance with the right routine.
The Clogged Coating Problem
After a year, water might stop beading. Don’t panic—the coating hasn’t failed. It’s clogged with mineral deposits and road film.
Washing the Right Way
Use the two-bucket method: One bucket for soap, one for rinsing your mitt. This prevents swirl marks from dirty wash water.
Frequency: Every 2-3 weeks.
Tools: High-quality microfiber wash mitts and drying towels only.
The Soap That Ruins Everything
Here’s the counter-intuitive truth: don’t use “ceramic” car soap.
Use pure pH-neutral soap: CarPro Reset or Optimum No Rinse. These clean without leaving residue.
Avoid “Wash & Wax” formulas: These clog your coating with inferior waxes, hiding its hydrophobic properties. You’ll blame the coating when it’s actually your soap.
Quarterly Topper Maintenance
Every 2-3 months, apply a ceramic-infused detail spray. This sacrificial layer restores the like-new beading and reinforces protection.
Product Recommendations for 2025
All DIY coatings perform similarly—2-3 years with proper care. The real difference? Ease of application.
CarPro CQuartz UK 3.0
Best bang for your buck. It’s user-friendly enough for first-timers with solid 2-3 year durability.
Downside: Not the slickest feel, and it ruins microfiber towels.
Gtechniq Crystal Serum Light + EXO
Best overall DIY kit. Application is effortless with 3-5 year protection.
Critical detail: This is a two-part system. CSL alone has poor water beading—you need the EXO topper.
Adam’s Graphene Ceramic Coating Advanced
Most complete kit. Includes coating, prep spray, booster, and applicators.
Real-world durability: Despite 9-year claims, expect 2-3 years.
AvalonKing Armor Shield IX
Best for beginners. It’s the easiest DIY kit with comprehensive instructions.
Trade-off: Strong chemical smell during application.
Where to Buy in Chicago
Skip the big-box stores for serious coatings. AutoZone carries hybrid ceramic sprays, not the real deal.
Car Supplies Warehouse in Romeoville is your spot. They stock Gtechniq, CarPro, and DIY Detail with local pickup for Chicagoland. One trip gets you the polisher, pads, iron remover, and coating kit.
For pro-only stuff like XPEL Fusion+? Chicago Auto Pros and Ceramic Pro Elite Chicago only sell through installation—no retail.
The Final Call: Should You DIY?
A do it yourself ceramic coating can save you $1,300. But it’s not for everyone.
You’re ready to DIY if:
- You’ve got a full weekend to commit
- You have a clean, climate-controlled garage
- You’re willing to invest in proper tools
- You can handle a steep learning curve
Pay the pro if:
- You don’t have the right environment
- Your time is worth more than the savings
- You want guaranteed results with warranty protection
The coating in the bottle is the easy part. Success depends on 8-10 hours of meticulous prep work before you ever open it. Rush that, and you’ll be polishing off a streaky mess wishing you’d just paid the pro.
But nail the prep, work in the right conditions, and use proper technique? You’ll drive away with a finish that rivals any $1,600 job—and the satisfaction of doing it yourself.