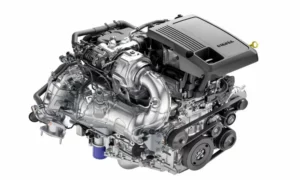
If you’re trying to maintain your Duramax Diesel Engine, finding and changing the fuel filter can seem daunting. The fuel filter is located between the frame rails in front of the fuel tank on models like the 2017-2021 Chevrolet Silverado 2500HD. Understanding how to do this yourself can save you time and money. Stick around to learn more about keeping your truck running smoothly.
Location of the Duramax Fuel Filter
The Duramax fuel filter is positioned in strategic spots depending on the model of your truck. Knowing where these locations are will make it easier for you to find and replace the filter quickly and efficiently.
Accessing the Fuel Filter under the Hood
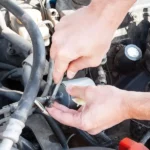
To access the fuel filter under the hood, you will need to open the hood and locate the engine compartment. The fuel filter is often found near the firewall or close to the inner fender.
It’s important to ensure the engine is cool before you begin. Look for a cylindrical component with fuel lines attached to it. This is your fuel filter housing. Some models may require you to remove other components to gain better access.
Fuel Filter Position in the Engine Compartment
Inside the engine compartment, the fuel filter is usually mounted on the passenger side. It is often located near critical engine components.
Make sure you are looking near the base of the engine block where it meets the transmission. This area is typically cluttered with other parts, so having a good light source can help you spot the filter more easily. Remember, the filter housing is usually held in place with clips or a bracket.
Finding the Filter on the Frame Rail
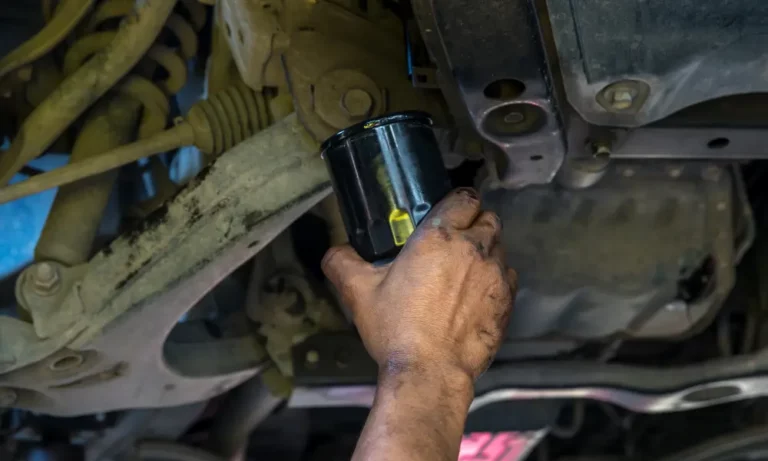
For many Duramax models, the fuel filter is located along the frame rail, which runs under the truck. To find it, you may need to crawl under the vehicle.
The filter is commonly situated near the fuel tank and before the fuel lines reach the engine compartment. The housing is usually a canister type, secured between the frame rails. Use a flashlight to get a clear view. Make sure you have a drain pan ready as some fuel may spill during the replacement process.
The Replacement Process
To change your Duramax fuel filter, you’ll need to get the right tools and follow some precise steps. This guide will help you prepare, replace the filter, and check for leaks effectively.
Preparing for Fuel Filter Replacement
Before you begin, ensure you have all necessary tools and parts. You’ll need a new fuel filter, a 36mm socket, a ratchet, and a drain pan. Make sure your truck is parked on a level surface, and the ignition is off.
Locate the fuel filter housing between the frame rails in front of the fuel tank. Having a clean workspace helps prevent dirt from contaminating the filter assembly. It’s also a good idea to watch a video tutorial if you’re a visual learner.
Step-by-Step Fuel Filter Replacement
First, place the drain pan below the fuel filter housing to catch any fuel that may spill. Using the 36mm socket and ratchet, carefully loosen the canister.
Remove the old filter from the housing. Pay attention to the o-ring, as it should be replaced with the new filter to ensure a snug fit.
Install the new filter into the housing. Make sure you properly lubricate the new o-ring. Tighten the canister back into place using the 36mm socket and ratchet, ensuring it is secure but not over-tightened.
Reassembly and Checking for Leaks
After replacing the filter, pump the primer button on top of the filter housing until it becomes firm. This will help remove air pockets. Then, start the engine and let it run for a few minutes.
Check around the filter housing for any signs of leaks. If you notice any, tighten the canister a bit more. Watch for any warning lights on your dashboard, which might indicate a problem.
By following these steps, you can efficiently replace your Duramax fuel filter, ensuring your vehicle runs smoothly. Regular maintenance like this helps extend the life of your truck and can prevent costly repairs.
Maintenance Tips and Best Practices
Proper maintenance of your Duramax fuel filter is essential for the longevity and efficiency of your engine. This section will cover replacement intervals, choosing the right replacement, and the importance of clean fuel and regular servicing.
Determining Replacement Intervals
Regularly replacing your fuel filter is crucial. The recommended interval for changing the fuel filter on a 6.6L L5P Duramax is typically every 22,500 miles or 34,000 kilometers. This ensures that your engine remains free from contaminants that could cause damage.
If you often drive in dusty or harsh conditions, you might need to replace it more frequently. Always check your owner’s manual for specific guidance related to your vehicle model. Regular intervals help maintain engine performance and can prevent costly repairs down the line.
Choosing the Right Fuel Filter Replacement
When it’s time to replace your fuel filter, selecting the right one is essential. Popular brands like ACDelco, Racor, and AFE offer high-quality filters that fit Duramax engines.
Make sure the filter meets OEM (Original Equipment Manufacturer) specifications. Using inferior filters can lead to fuel contamination and engine issues. The stock filter is often praised for its reliability and effectiveness at filtering out water and impurities. Always consider filters that are well-reviewed and tested for your specific engine model.
Importance of Clean Fuel and Regular Service
Clean fuel is vital for your Duramax diesel engine. Contaminated fuel can clog your filter and damage the engine. This is why it’s important to refuel at trusted stations and avoid old or poorly maintained pumps.
Regular service, such as scheduled inspections and maintenance checks, helps keep the engine running smoothly. During these services, a professional can also reset the fuel filter life in the Driver Information Center (DIC) and prime the filter correctly. These steps are particularly important as deviations can cause engine performance issues.
Ensuring that your fuel remains clean and regularly serviced enhances your vehicle’s performance and extends the lifespan of your Duramax engine.
Tools and Equipment for Fuel Filter Service
When servicing a Duramax fuel filter, it is important to have the correct tools and take necessary safety precautions. This will ensure a smooth and safe process.
Required Tools for Changing the Fuel Filter
To change a Duramax fuel filter, you will need a specific set of tools:
- 36mm socket: This is essential for loosening the fuel filter canister.
- Ratchet: Helps you turn the socket.
- Drain pan: Place this under the filter to catch the old fuel and prevent spills.
- Gloves: Protect your hands from fuel and dirt.
- New fuel filter: Make sure it is compatible with your Duramax model.
- Shop towels: Use these to clean up any spills and wipe down parts.
Using these tools correctly will make the job easier and faster. Make sure they are in good condition before starting the task.
Safety Considerations When Working on Fuel Filters
Safety should be your top priority when working on fuel filters.
- Work in a well-ventilated area: Fuel fumes can be harmful if inhaled, so it’s best to work outside or in a garage with open doors.
- Wear gloves: These will protect your skin from diesel fuel, which can be irritating.
- Keep a fire extinguisher nearby: Diesel fuel is flammable, so it’s crucial to have a fire extinguisher within reach.
- Disconnect the battery: This prevents accidental sparks.
- Use safety glasses: These will shield your eyes from fuel splashes.
Following these safety tips will help keep you safe while you work on your vehicle.
Procedure Specifics for Duramax Models
When changing the fuel filter on your Duramax engine, it’s essential to follow precise steps. This guide covers procedures specific to L5P engines and how to reset the fuel filter life on the Driver Information Center (DIC).
Fuel Filter Replacement on L5P Engines
To replace the fuel filter on a Duramax L5P engine, start by parking your truck on a flat surface. Ensure the ignition is off.
Locate the fuel filter housing, which is between the frame rails near the fuel tank. Use a 36mm socket and ratchet to loosen the canister.
Place a drain pan under the housing to catch any fuel. Once the canister is off, remove the old filter and dispose of it properly.
Install the new filter, ensuring it is seated correctly. Tighten the canister back onto the housing using the socket and ratchet.
Next, locate the primer button on top of the filter housing and pump it until you feel resistance. This will help remove air from the fuel system.
Once done, start the engine and check for any leaks. If everything is good, you’re all set.
Resetting the Fuel Filter Life on the DIC
After replacing the fuel filter, you need to reset the fuel filter life indicator on your DIC. Begin by turning on the ignition but don’t start the engine.
Navigate to the “Fuel Filter Life” display using the DIC controls. Once there, press and hold the “check” or “reset” button until it displays 100%.
This step ensures your truck’s computer knows that you’ve installed a new filter, helping you stay on top of future maintenance intervals.