
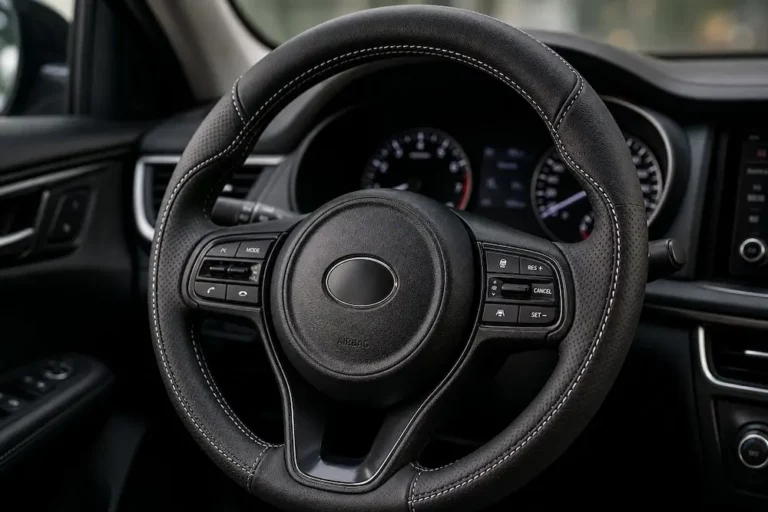
Struggling to stretch that cover over your steering wheel without ripping it? You’re probably skipping one critical step. This guide walks you through exactly how do you put on a steering wheel cover — whether it’s a friction-fit stretch style or a stitch-on wrap. Stick around, because the difference between a safe install and a dangerous one comes down to a few key details.
Why Getting This Right Actually Matters
A loose steering wheel cover isn’t just annoying — it’s a genuine safety hazard. If it rotates independently from your wheel during a sharp turn or emergency maneuver, you lose control instantly. That’s why sizing, surface prep, and proper technique aren’t optional extras. They’re the whole job.
Step 1: Pick the Right Cover Type
Before you buy anything, know what you’re dealing with. There are two main types:
Stretch-style (friction-fit) covers — elastic loops that grip the wheel through tension. Quick to install. No tools beyond a heat source and maybe a plastic spatula.
Stitch-on (lace-up) covers — flat leather panels you hand-sew around the rim. Low-profile finish that looks close to factory. Takes 1–2 hours but looks incredible.
| Feature | Stretch-Style | Stitch-On |
|---|---|---|
| Install time | 5–20 minutes | 60–150 minutes |
| Tools needed | Heat source, plastic spatula | Needles, waxed cord, scissors, lighter |
| Adds grip thickness | Yes (noticeably) | Minimal |
| Removable | Yes | Semi-permanent |
| Skill level | Beginner | Intermediate |
Choose based on how much time you have and how permanent you want the result. Most people go stretch-style first.
Step 2: Measure Your Steering Wheel (Don’t Skip This)
A cover that’s too big will slip. One that’s too small won’t go on without tearing. You need two measurements:
Overall diameter — stretch a flexible measuring tape straight across the center of the wheel, edge to edge. Most US passenger cars measure 14.5 to 15.5 inches. Trucks run bigger — 18 to 22 inches.
Grip circumference — wrap the tape around the cross-section of the rim at the top center. This usually lands between 2 and 5 inches.
Don’t measure over ergonomic thumb bumps at the 10 and 2 o’clock positions. Quality covers stretch over those naturally during install.
Step 3: Clean the Wheel Thoroughly
Years of hand oils and skin residue coat your steering wheel like an invisible lubricant. Install a stretch cover over that, and it’ll spin under your hands. A clean surface is non-negotiable.
Here’s what to do:
- Park safely, apply the parking brake, and lock the steering column
- For polyurethane or plastic wheels: wipe down with isopropyl alcohol on a microfiber cloth
- For factory leather wheels: use a pH-balanced leather cleaner only — alcohol strips the protective coating
- Dry completely with a separate cloth before touching the cover
Any moisture left on the wheel acts as a lubricant at first and then traps mold in porous covers later.
Step 4: Heat the Cover Before Installing (This Is the Big One)
This step is what most people miss. Cold rubber and leather are stiff and almost impossible to stretch. Heat temporarily loosens the molecular structure, making the cover dramatically easier to work with — and far less likely to tear.
Here are your four options:
Solar Heating (Best Method)
Place the cover on your dashboard under the windshield on a sunny day. Leave it for 1–2 hours. The car’s greenhouse effect heats it evenly without any risk of scorching. This is the method most professionals prefer.
Hair Dryer or Heat Gun
Hold a hair dryer about 1 inch from the interior lining. Keep it moving constantly — 5 to 10 seconds per section. Never hold it in one spot or you’ll blister the material or melt stitching.
Hot Water Submersion
Seal the cover in a watertight plastic bag. Submerge it in hot (not boiling) water for several minutes. Great for thick rubber or silicone covers that resist air heating.
Heater or Radiator
In winter, set the cover next to a wall heater or under a forced-air heating vent. Leave it for 10–20 minutes. Safe and steady.
One exception: faux fur, sheepskin, and lambskin covers must NOT be heated. The synthetic fibers melt. Install these at room temperature using pure muscle.
Once the cover feels warm and pliable, move fast — you have minutes before it cools and stiffens again.
Step 5: Install a Stretch-Style Cover
Now the fun (and frustrating) part. Here’s the step-by-step sequence:
1. Sit in the driver’s seat. You need direct access and body leverage.
2. Anchor the top first. Hook the inner lip of the cover over the 12 o’clock position. Push it as far down as it’ll go. This is your foundation — everything else pulls from here.
3. Work both sides down evenly. Pull the left side down a few inches, then the right side down a few inches. Alternate back and forth. Don’t pull one side all the way — uneven tension will shift your 12 o’clock anchor.
4. Push past the 3 and 9 o’clock positions. Press the cover firmly against the wheel as you go, molding the lining to the rim.
5. Force the bottom over. The hardest part. By the time you reach 6 o’clock, the cover will look way too small to bridge the gap. That’s normal. Grab both sides of the bottom edge and pull down with everything you’ve got.
Stuck? Try These Tricks
Plastic spatula method: Slide a flat plastic trim tool between the rim and the inner lip. Use a seesaw prying motion to pop the edge over the rim. Never use a metal screwdriver directly — it’ll gouge the wheel or tear the cover. If you must use a screwdriver, wrap the shaft in a microfiber cloth.
Peel-forward technique: Push the top half of the already-installed cover slightly toward the windshield. This displaces a few millimeters of slack down to the bottom where you need it.
Zip tie anchor: Wrap a cable tie tightly around the cover and wheel at 12 o’clock. It locks the top in place so you can pull hard at the bottom without the whole thing slipping. Snip it off once the bottom is seated.
If the cover ends up slightly off-center, grip the perimeter with both hands and twist to correct it. If it’s badly off, remove it, reheat it, and start over.
Step 6: Install a Stitch-On Cover
Stitch-on covers reward patience. The process takes 1 to 2.5 hours but produces a finish that looks factory-installed.
Dry Fit First
Stretch the cover over the wheel before committing. Check that spoke cutouts align perfectly. Verify the edges meet evenly with a consistent gap all the way around. Look for an “F” (front) or “B” (back) tag — orientation matters.
Use Adhesive Tape Strategically
Turn the cover inside out. Apply double-sided tape at the 12, 3, 6, and 9 o’clock positions, plus inside any thumb grip recesses. Flip it right-side out and press the taped sections onto the wheel.
Important: don’t tape the entire interior edge. Too much tape locks the leather rigidly and causes wrinkles when you pull the stitches tight.
Tuck Spoke Edges Cleanly
Push excess leather into the gaps between the rim and spoke bezels using a plastic trim tool. If the gap is too tight, slightly loosen the bezel screws from behind, tuck the leather in, then retighten.
The Stitching Process
Cut 3–5 feet of waxed lacing cord. Start at 6 o’clock — imperfections in your starter knot stay hidden there.
Two stitch patterns work well:
Criss-cross (baseball stitch): Needle alternates between front and rear flap, forming X shapes. Pull tight after every stitch.
Shoelace method: Pass through every other loop on the first circuit, fill in the skipped loops on the return pass. Creates a clean interlocking pattern.
The rule is simple: pull tight after every single stitch. The pre-punched holes can handle serious tension — use it.
Around spokes: Use “dummy stitches” — weave only through the front flap loops across the spoke face. Resume normal crossing stitches once you’re past it.
Finishing knots: Wind the thread 5–6 times around inner stitching to form a dense knot. Snip the tail. Then briefly touch a lighter flame to the cut end — the synthetic fibers melt into a hard bead that prevents unraveling.
How to Check Your Work
Run through this quick checklist before you drive:
- ✅ Cover doesn’t rotate when you twist it firmly
- ✅ No visible bunching or raised ridges around the seam
- ✅ The 12 o’clock position is centered (check your steering wheel logo if there is one)
- ✅ No loose thread ends visible on stitch-on covers
- ✅ Cover sits flush with no air pockets
Keeping Your Cover in Good Shape
Synthetic and rubber covers: Wipe down with a damp cloth or mild cleaner. Simple.
Genuine leather covers: Use only water and a soft sponge, or a dedicated pH-neutral leather conditioner. Skip alcohol-based hand sanitizer and harsh interior sprays — they strip the protective finish fast.
Memory foam covers: They’ll feel tight for the first 24–48 hours. That’s normal. The foam expands and conforms to the wheel shape on its own.
Check your stretch cover every few months. If it starts rotating independently from the wheel at all — even slightly — replace it immediately. A cover with worn-out elastic tension is a serious driving safety risk. For stitch-on covers, inspect the lacing cord periodically and re-suture any frayed or broken stitches right away.
Knowing how do you put on a steering wheel cover properly comes down to three things: the right size, a clean surface, and enough heat to make the material cooperative. Skip any of those and you’re either fighting a losing battle with a stiff cover or ending up with something that slips when you need it most. Follow these steps and you’ll have a cover that stays locked in place, feels great in your hands, and actually lasts.


