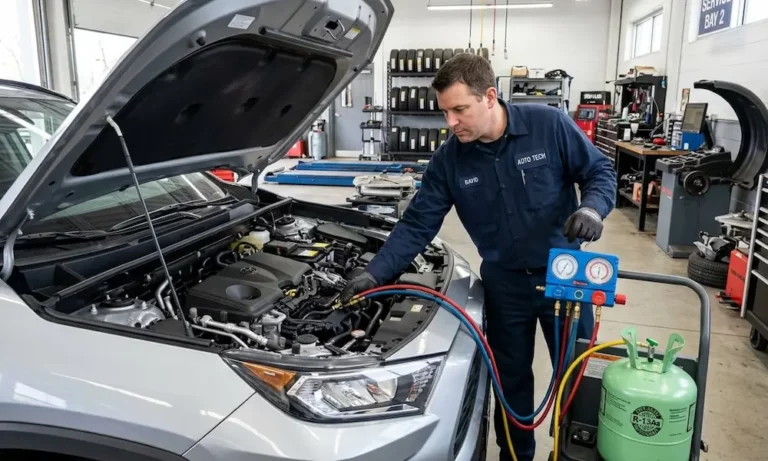
Your car’s AC is blowing warm air, and you’ve just replaced a component. Now what? Before you recharge anything, you need to know how to evacuate a car AC system properly. Skip this step, and you’re looking at compressor damage, frozen expansion valves, and a very expensive repair bill. This guide covers everything — tools, steps, troubleshooting, and the legal stuff that could save you from a nasty fine.
Why Evacuating Your Car AC System Actually Matters
Pulling a vacuum on your AC system isn’t just a formality. It’s a chemical extraction process that removes two serious threats hiding inside your AC lines.
Threat #1: Non-condensable gases
Air contains nitrogen and oxygen. These gases don’t condense under normal AC operating pressures. Instead, they collect inside the condenser, restrict refrigerant flow, spike discharge pressures, overheat the compressor, and destroy lubricant. Your AC stops cooling. Your compressor starts failing.
Threat #2: Moisture
This one’s worse. When water vapor mixes with synthetic refrigerant oils and fluorinated refrigerants under high heat, it creates hydrochloric and hydrofluoric acids. These acids corrode aluminum and copper passages, erode compressor seals, and produce a thick sludge that clogs your expansion valve or orifice tube. Any leftover water can also freeze solid inside the expansion device and completely disable your AC.
The fix? Drop the internal pressure so low that water’s boiling point plummets. At 500 microns of vacuum pressure, water boils at -12°F — well below room temperature. The vacuum pump pulls that water vapor right out of the system.
| Vacuum Level (Microns) | Water’s Boiling Point (°F) | What It Means |
|---|---|---|
| 762,000 (atmospheric) | 212 | Standard sea-level pressure |
| 3,000 | ~23 | Close gas ballast valve here |
| 1,000 | 1 | Sign of moisture or micro-leak |
| 500 | -12 | Target for complete dryness |
| 300 | ~-20 | Target for nitrogen sweeping |
| 37.5 | ~-45 | Dual-stage pump’s ultimate depth |
The Legal Side You Can’t Ignore
Before you touch anything, understand the law. Sections 608 and 609 of the Clean Air Act govern every motor vehicle AC repair in the United States.
Knowingly venting refrigerant is illegal. Full stop. It doesn’t matter if it’s R-134a, R-12, or R-1234yf — venting any of these carries civil penalties up to $44,539 per day per violation. Willful violations can mean criminal prosecution, corporate fines up to $1,000,000, and up to five years in prison.
Here’s the quick breakdown of what’s legal for who:
- Certified technicians can purchase any size container of mobile refrigerant, including bulk containers of R-134a, R-12, and R-1234yf. They must pass an EPA-approved Section 609 exam with a minimum score of 84%.
- DIYers can only legally purchase small containers of substitute refrigerant weighing under two pounds — retail cans only.
- Everyone must recover refrigerant before evacuating. Never run a vacuum pump on a pressurized system.
One more thing: a single 12-ounce can of R-134a has the same climate-warming footprint as burning 150 gallons of gasoline. That’s why the EPA isn’t playing around with enforcement.
Tools You Need to Evacuate a Car AC System
Don’t cut corners on equipment. Cheap tools mean leaks, inaccurate readings, and contaminated oil.
Dual-stage vacuum pump: A pump rated at least 4.5 CFM is your minimum for efficient evacuation. Dual-stage rotary vane pumps can reach down to 37.5 microns, far deeper than single-stage units, which often stall above 100–150 microns. Look for models with an integrated sight glass to monitor oil clarity.
Manifold gauge set: The blue (low-side) gauge reads both pressure and vacuum in inches of mercury. The red (high-side) gauge reads positive pressure only. Use reinforced multi-layer hoses — thin hose walls let atmospheric moisture diffuse in and contaminate your vacuum.
Digital micron gauge: This is non-negotiable. Analog gauges aren’t accurate enough to confirm a proper vacuum. A digital micron gauge tells you exactly where you are and whether moisture is still present.
PPE: OSHA Section 1910.133 requires eye protection whenever you connect or disconnect service hoses. Wear safety glasses with side shields or a full face shield. Use heavy chemical-resistant gloves — butyl, neoprene, or nitrile. Liquid refrigerant flash-freezes skin on contact.
How to Evacuate a Car AC System: Step-by-Step
Park on a flat surface inside a well-ventilated garage. Turn the engine off. Make sure the AC is completely powered down.
Step 1: Calibrate and Inspect Your Equipment
Check your analog manifold gauges. Both needles must point exactly to zero under atmospheric pressure. If they don’t, pop off the clear plastic lenses and adjust the calibration screws. Inspect the vacuum pump oil — if it’s cloudy, milky, or dark, drain it and refill with fresh vacuum pump oil before you start. Clean both service ports on the vehicle.
Step 2: Connect the Hoses
Close all hand valves on the manifold set completely. Connect the blue coupler to the blue hose and the red coupler to the red hose. Run the yellow utility hose from the manifold center port to the vacuum pump’s intake. Pull back the quick-connect sleeve on each coupler, push firmly onto the correct service port, and release the sleeve to lock it. Turn the coupler knobs clockwise to depress the internal Schrader valves.
The service ports are sized differently by design: the low-pressure port is larger, sitting on the suction line between the compressor and evaporator. The high-pressure port is smaller, located on the discharge line between the compressor and condenser.
Step 3: Recover Refrigerant First
Check the gauges. If they show positive pressure, refrigerant is still in the system. Connect the yellow hose to an EPA-certified recovery machine and pull the system into a slight vacuum before touching the vacuum pump. Running a vacuum pump on a pressurized system destroys the pump instantly and vents refrigerant illegally. Once recovery is complete, reconnect the yellow hose to your vacuum pump.
Step 4: Start the Vacuum Pump
Turn on the pump. Open both the red and blue manifold hand valves slowly. If you know the system has been exposed to high humidity, open the gas ballast valve. This introduces a controlled flow of dry air into the pump’s cylinder, preventing extracted water vapor from condensing back into the pump oil and ruining it.
Watch the blue low-side gauge drop below zero. The pump’s tone will shift as it starts moving air and boiling off moisture.
Step 5: Run the Pump Long Enough
This is where most DIYers rush and fail. Once the micron gauge reads around 3,000 microns, close the gas ballast valve to allow the pump to pull a deep vacuum.
- Minor repairs (system open briefly): Run for 30–45 minutes minimum.
- Major overhauls or extended exposure to humidity: Run for 60–90 minutes, or even overnight.
Liquid moisture needs sustained negative pressure over time to transition into vapor. Rushing this step leaves water in the system.
Step 6: Isolate and Test
Once evacuation is done, close both manifold hand valves. Turn off the pump. Now watch the digital micron gauge for 15–30 minutes.
- Pressure rises fast and keeps climbing: You have a physical leak in the system.
- Pressure rises slowly and stabilizes above 1,000 microns: Moisture is still present. Restart the pump.
- Pressure holds below 500 microns: The system is dry and leak-free. You’re ready to charge.
Step 7: Disconnect Safely
Turn all coupler knobs counter-clockwise until they stop. This retracts the plungers and closes the Schrader valves. Slide the quick-connect sleeves up and lift the couplers off the ports. Cap both service fittings immediately with their protective plastic caps. Purge any residual refrigerant trapped in the hoses into an EPA-compliant recovery container before storage.
Troubleshooting a Failed Evacuation
Your Equipment Might Be the Problem
Before you blame the vehicle, isolate your tools. Disconnect both couplers from the car and seal them with brass plugs. Run the pump with the manifold valves open. If the micron gauge can’t pull below 50 microns, your hose gaskets, coupler seals, or manifold O-rings are leaking. Replace worn seals and retest.
Contaminated Vacuum Pump Oil
If the pump is running but won’t reach a deep vacuum, check the oil. Milky or emulsified pump oil is saturated with moisture. Drain it while warm, flush with a small amount of clean oil, and refill. Fresh oil makes a significant difference in how deep the pump can pull.
The Triple Evacuation Method (Nitrogen Sweeping)
For systems that suffered a major failure — like a ruptured line that sat open in the rain — a single evacuation won’t cut it. Use the triple evacuation method:
- Pull a vacuum to 1,000–2,000 microns.
- Close the manifold valves, turn off the pump, and introduce dry nitrogen into the low-side port until the system reaches 3–5 PSI. Let it sit for five minutes. The dry nitrogen absorbs trapped moisture.
- Recover the nitrogen, restart the pump, and pull to 500 microns.
- Repeat the nitrogen break, then pull a final vacuum to 300 microns.
- Run a final 10-minute decay test. If it holds, you’re done.
Replace the Receiver-Drier or Accumulator
Any time you open the AC system for major repairs, replace the receiver-drier or accumulator. These components contain desiccant material that absorbs trace moisture during normal operation. Leave them open to the atmosphere for even a short time and the desiccant saturates completely. A vacuum pump can’t extract moisture that’s chemically bonded to a saturated desiccant bag. A saturated accumulator will contaminate your fresh refrigerant and oil immediately.
Refrigerant Reference: Know What’s in Your System
| Refrigerant | Ozone Depletion | Global Warming Potential | Venting Status |
|---|---|---|---|
| R-12 (CFC-12) | High | 10,000 | Strictly prohibited |
| R-22 (HCFC-22) | Moderate | Moderate | Strictly prohibited |
| R-134a (HFC) | Zero | 1,400 | Strictly prohibited |
| R-1234yf (HFO) | Zero | 4 | Strictly prohibited |
| CO₂ (natural) | Zero | 1 | Legally exempt |
Most vehicles built before 2021 use R-134a. Newer models increasingly use R-1234yf, which carries a global warming potential of just 4 compared to R-134a’s 1,400. Whatever refrigerant your system uses, the evacuation process itself is identical — but you must use recovery equipment certified for that specific refrigerant type.
Knowing how to evacuate a car AC system properly protects your compressor, keeps you on the right side of federal law, and ensures your recharge actually holds. Take your time with the vacuum, trust your micron gauge over the analog dial, and don’t skip the decay test. Your AC — and your wallet — will thank you.