
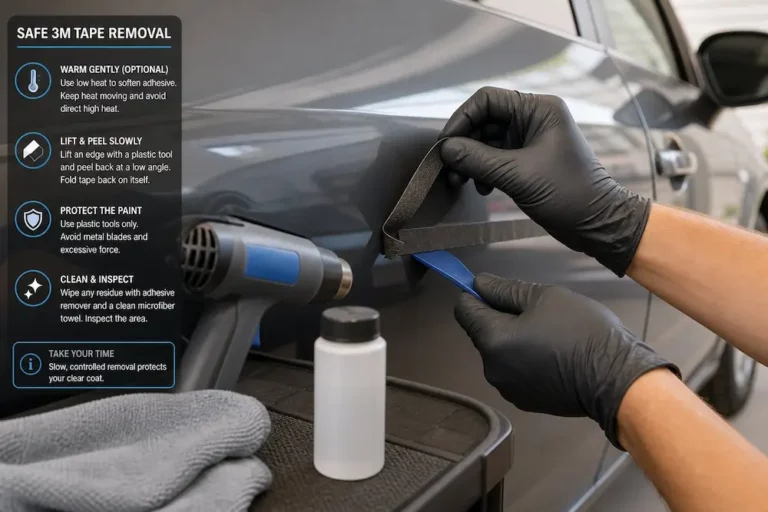
Stuck dealing with stubborn foam tape residue on your car’s paint? You’re probably frustrated — and one wrong move could mean a costly repaint. The good news? With the right tools and approach, you can remove 3M adhesive tape from your car cleanly and safely. Read this all the way through before you touch anything.
Why 3M Adhesive Tape Is So Hard to Remove
3M acrylic foam tape isn’t your average sticky tape. It’s engineered to bond permanently to automotive surfaces — withstanding UV radiation, extreme heat, cold, and constant vibration.
The foam core is viscoelastic, meaning it behaves like both a liquid and a solid. Push a scraper at it, and it just compresses and springs back. That’s why brute force alone never works.
There’s also a nasty surprise waiting after removal: even when all the tape is gone, a ghostly outline of the badge or molding can remain visible in the paint. More on that later.
Check Your Paint Before You Do Anything
This step saves cars. Not all paint is equal, and attacking the wrong surface with the wrong method causes irreversible damage.
Factory clear coat is tough. It’s baked at high temperatures and handles heat and solvents well.
Aftermarket repaints are fragile. Lower-temperature curing means the clear coat can delaminate easily under heat or mechanical stress. Look for masking tape lines along panel edges or subtle color mismatches — dead giveaways of prior bodywork.
Unpainted plastic trim is the most vulnerable of all. Aggressive solvents will permanently bleach and streak the material. No fixing that easily.
Exterior glass tolerates almost everything — but never use metal scrapers on tinted glass or rear windows with defroster grids. You’ll sever the electrical lines instantly.
| Surface Type | Heat Tolerance | Chemical Tolerance | Biggest Risk |
|---|---|---|---|
| Factory Clear Coat | High | High | Burning from sustained friction |
| Aftermarket Repaint | Low | Moderate | Clear coat delamination |
| Unpainted Plastic Trim | Low | Very Low | Permanent bleaching |
| Exterior Bare Glass | Very High | Very High | Grit micro-scratches |
| Tinted/Defroster Glass | Moderate | Moderate | Severing defroster lines |
Step 1: Cut Through the Tape — Don’t Pry
Most people’s first instinct is to jam a scraper under the trim and lever it off. That instinct will dent your sheet metal and crack your clear coat.
The right move? Cut through the foam core with braided fishing line.
Here’s exactly how to do it:
- Slip the line behind one corner of the trim piece
- Wrap each end around a small wooden block — this protects your fingers and gives you grip
- Saw back and forth in a rapid, reciprocating motion
- Maintain slight outward pressure to keep the line away from the paint
- Slowly advance along the full length of the tape
Pro tip: tie small, tight knots every inch along the cutting section of the line. Those knots act like teeth and chew through dense foam much faster than smooth line.
Dental floss works on small emblems but snaps constantly on longer moldings. Braided fishing line is the better choice every time.
Step 2: Remove the Bulk Foam Residue
With the trim piece off, you’ll see a thick, sticky layer of torn foam still bonded to your paint. This is where heat becomes your best friend.
Use a Heat Gun or Hair Dryer
Heat softens acrylic adhesives by reducing their shear strength, turning a rigid nightmare into something pliable and workable.
Keep the heat source moving constantly — never hold it stationary on one spot. A few seconds of focused heat on clear coat will blister it. Aim for warm to the touch, not scorching hot.
Once the adhesive softens, use the thumb roll technique: press your thumb or a folded terry cloth firmly against the leading edge of the residue and push forward. The foam will roll up into a sticky ball and peel away from the paint. It’s slow, it’s tedious, and it genuinely works.
Use a 3M Stripe Off Wheel for Large Areas
For long body side moldings or big decal removals, the thumb roll method will shred your fingers. This is where the 3M Stripe Off Wheel changes the game.
It’s a solid rubber disc that mounts to a drill or die grinder. It generates friction that disintegrates adhesive instantly — the rubber itself is designed to slowly ablate away, like an eraser, so the energy destroys the glue instead of your paint.
Critical operating rules:
- Never exceed 4,000 RPM — structural failure risk above this speed
- Optimal working speed: around 2,500 RPM
- Always keep the wheel moving — hovering stationary for even a few seconds burns straight through the clear coat
- Apply light pressure only — let the tool do the work
- Never use this on unpainted plastic trim. It will melt and gouge it instantly
Step 3: Dissolve the Remaining Adhesive Film
After the bulk removal, a thin, incredibly tacky film remains. You need chemistry for this part.
Professional Solvents (Best Results)
3M Specialty Adhesive Remover is the benchmark product. Spray it on, let it dwell for a few minutes, and wipe away. It flashes dry quickly and leaves almost no residue.
Application steps:
- Spray or dab the solvent onto the residue
- Let it sit for several minutes — this dwell time is critical
- Scrape gently with a plastic razor blade at a shallow angle
- Wipe clean with a microfiber towel
Keep these products away from unpainted plastic trim. Even accidental splash contact can permanently bleach the material.
Citrus-Based Removers (Safer, Slower)
Products like Goo Gone work well but need longer dwell time. They also leave a heavy, greasy film behind — you’ll need a thorough wash with automotive shampoo or dish soap afterward to strip the oils completely before polishing or waxing.
Household Alternatives That Actually Work
WD-40 is genuinely effective on automotive clear coat. Soak a paper towel in it, press it over the residue, and let it sit for several minutes. The light petroleum oils penetrate the adhesive and break it down into a soft slurry.
Isopropyl alcohol (90%+) is ideal for the final wipe-down. It cuts through residual adhesive traces and oily films left by WD-40 or citrus cleaners — and it flashes completely dry with zero streaking. Use pure IPA, not branded rubbing alcohol that contains skin moisturizers like lanolin — those leave an unwanted film on the paint.
Solvents to Avoid at All Costs
| Solvent | Why You Must Avoid It |
|---|---|
| Acetone / Nail Polish Remover | Dissolves automotive clear coat — guaranteed paint damage |
| Lacquer Thinner | Formulated to dissolve paint — ruins finish within seconds of contact |
Scraping Tools: Plastic vs. Steel
You need mechanical agitation alongside chemistry. The tool you choose depends entirely on what you’re scraping.
Plastic razor blades are the gold standard for painted surfaces. They’re sharp enough to get under softened adhesive but soft enough that they’ll deform before they scratch your clear coat. Hold them at under 45 degrees and push gently.
Steel razor blades are only acceptable on bare, untinted, uncoated exterior glass — and only with a liquid lubricant applied first. Glass cleaner, soapy water, or WD-40 all work. The lubricant suspends dirt particles and prevents the blade from dragging grit across the glass surface and scratching it permanently.
Never use steel blades on paint, plastic, rubber, or any glass with tint film or defroster grids.
Fixing the Ghost: Paint Correction After Removal
You’ve removed every trace of adhesive. The surface is smooth. But the silhouette of the old badge or molding is still clearly visible in the paint. This is called ghosting, and it’s extremely common.
Ghosting happens because the paint under the tape was protected from UV radiation and environmental damage for years. The surrounding paint faded, oxidized, and dulled. The protected paint stayed factory-fresh. That contrast creates a visible outline.
Cleaning won’t fix this. You need to level the surrounding oxidized paint down to match the vibrant protected paint underneath.
The two-step correction process:
- Compounding — Apply a rubbing compound with a foam cutting pad on a dual-action orbital polisher. This removes a microscopic layer of oxidized clear coat from the surrounding area, eliminating the visible contrast line
- Polishing — Follow up with a finishing polish on a soft foam pad to remove any micro-marring left by the compound and restore full gloss
Always start with the least aggressive approach first. Try a finishing polish by hand before escalating to machine compounding. Be especially careful near sharp panel edges where the clear coat is naturally thinner — aggressive compounding near edges risks burning through to bare paint.
Use the Right Microfiber Towels
Every wipe-down during this process matters. Standard cotton rags and paper towels are microscopically abrasive and will inflict swirl marks into your clear coat with every pass.
Use microfiber towels with the right GSM (grams per square meter) rating for each task:
| GSM Range | Best Use | Safe for Clear Coat? |
|---|---|---|
| 200–350 GSM | Glass cleaning, hard interior plastic | Low — minimal cushioning |
| 350–500 GSM | Wiping solvent residue, general adhesive removal | Moderate to High |
| 600+ GSM | Final polish buffing, wax removal | Very High |
Also use edgeless towels — the stitched borders on standard towels are hard friction points that scratch warm, soft paint during buffing. And never reuse a towel that’s been soaked in adhesive remover for buffing polish or drying a clean car — it’ll smear invisible residue everywhere.
Wash microfiber towels with dedicated microfiber detergent. Never use fabric softener — it clogs the microscopic fibers and permanently destroys their ability to absorb and trap contaminants.
Reapplying New Tape Correctly
If you’re replacing the trim piece with fresh 3M tape, surface prep is everything. Any invisible trace of oil, solvent, or wax will completely prevent the new adhesive from bonding — and you’ll be back to square one at highway speed.
Follow these three steps without skipping any:
- Sterilize the surface — Wipe down multiple times with 90%+ isopropyl alcohol until the paint squeaks under your finger and flashes dry immediately with zero streaking
- Temperature control — Both the panel and the tape should be at approximately 70°F. Cold panels make for brittle bonds that fail quickly
- Apply firm pressure — Use a hard rubber seam roller across the entire length of the molding. This forces the adhesive to fully contact the paint surface with zero air pockets. Leave the car dry at room temperature for 24 hours before washing


