Got a wheel nut that won’t budge? You’re dealing with rust, over-torqued hardware, or a swollen two-piece nut — and this guide covers all three. Follow these steps in order, and you’ll get it off without destroying your stud or ending up in an emergency room.
Why Wheel Nuts Get Stuck in the First Place
Before you grab a wrench and go full gorilla on it, know what you’re fighting. Seized wheel nuts fail for four main reasons:
| Failure Type | What Happens | Warning Sign |
|---|---|---|
| Rust/Oxidation | Iron oxide expands inside the threads, locking them together | Loud crack when turning, visible rust |
| Over-torquing | Impact gun stretched the stud past its limit | Smooth but immovable resistance |
| Cross-threading | Nut was driven on at an angle, cutting false threads | Nut sits crooked on the stud |
| Swollen bi-metal nut | Two-piece cap nut corrodes and bulges outward | Your socket won’t even fit over it |
Road salt speeds up rust-based seizures dramatically. If you drive anywhere near winter roads, you’ve probably already met this problem.
Step 1: Check If Your Nut Is Swollen First
Here’s the thing many people miss — if your socket won’t slide over the nut at all, you don’t have a stuck nut problem. You have a swollen bi-metal nut problem, and it needs a different tool entirely.
How to Spot a Swollen Nut
Two-piece capped lug nuts are common on Ford F-Series, Chrysler/Dodge SUVs, Ford Fusion, and several Volkswagen models. They look identical to solid nuts, but over time moisture sneaks between the steel core and the decorative outer cap. Rust expands the cap outward, sometimes adding half a millimeter or more to the hex size.
A standard 21mm nut can swell to 21.5mm. Your 21mm socket refuses to sit on it. Forcing a tight socket onto a swollen nut jams the socket permanently — and now you’ve got two problems.
The Half-Size Socket Fix
You need a thin-wall half-size flip socket set. These are machined in half-millimeter increments specifically for this situation.
| Factory Size | Extraction Socket | Common Vehicles |
|---|---|---|
| 19mm | 19.5mm | Ford Fusion, VW Amarok, crossovers |
| 21mm | 21.5mm | Ford F-Series, Chrysler/Dodge SUVs |
| 22mm | 22.5mm | Heavy-duty trucks, large luxury SUVs |
Once you remove swollen two-piece nuts, throw them away. Replace all of them — the entire vehicle — with solid one-piece steel alternatives. Don’t reinstall the same defective hardware.
Step 2: Apply Penetrating Fluid (and Actually Wait)
If the nut fits the socket but won’t turn, your first move is chemical — not mechanical. Spray the threads with a genuine penetrating fluid like Kroil or PB Blaster. These have extremely low surface tension, which lets them creep into microscopic rust-filled gaps through capillary action.
Don’t use WD-40, grease, or silicone spray here. These lubricants are too thick to penetrate rusted threads. They sit on the surface and do almost nothing useful.
Saturate the exposed threads and the seat where the nut meets the wheel. Then — and this is the part most people skip — wait at least 15 minutes. For badly rusted hardware, apply it again and leave it overnight. Patience here saves you from snapping a stud later.
Step 3: Use a Breaker Bar, Not a Ratchet
Your tire iron is too short. Your ratchet handle is too short. Both will slip, round the nut, or hurt your hands. You need a breaker bar — solid steel, no ratchet mechanism, at least 24 inches long.
Longer lever arm = more torque from the same effort. That’s basic physics.
Pair it with a 6-point impact-rated socket, not a 12-point. A 12-point socket contacts only the corners of the nut. Under high torque, it shears those corners clean off. A 6-point socket grips the flat sides and holds far better under strain.
The Floor Jack Trick for Extra Leverage
If body weight on a breaker bar still isn’t enough, bring in a hydraulic floor jack. Place the breaker bar horizontally on the nut — handle pointing toward the rear of the car on the driver’s side, toward the front on the passenger’s side. Position the floor jack under the far end of the handle and pump slowly.
The hydraulic pressure applies smooth, massive rotational force without the jerking that causes sockets to slip. The rust bond either cracks loose with a loud snap, or the compromised stud shears — which at least lets you remove the wheel and deal with the stud properly.
Step 4: Escalate to an Impact Wrench
Smooth leverage didn’t work? Switch to kinetic force. An impact wrench doesn’t push continuously — it delivers thousands of rapid hammer blows to the output shaft per minute. Those sharp concussive shocks are exceptionally good at shattering brittle rust crystals that resist steady torque.
A useful technique: alternate directions rapidly. Hit the impact wrench forward (tightening) for a half-second, then immediately switch to reverse. This oscillating shockwave attacks rust on both thread faces simultaneously and often breaks it loose when straight-reverse fails.
If a standard half-inch drive impact gun isn’t cutting it, escalate to a 3/4-inch or 1-inch drive unit. These require a high-volume compressor but generate significantly more force.
When Human Force Isn’t Enough: Torque Multipliers
No air compressor available? A planetary gear torque multiplier transforms 50 foot-pounds of hand effort into over 3,500 foot-pounds of output torque through internal gear ratios as high as 1:64. You brace the reaction arm against an adjacent nut or the hub, then turn the input shaft with a standard ratchet. No power tools, no air lines — just serious mechanical advantage.
These tools are standard on commercial trucks but increasingly useful for badly seized passenger vehicle hardware.
Step 5: Try Heat — But Read This First
Heat works because metal expands when hot. The nut heats up faster than the stud, expands outward, and breaks the rust bond. Apply a torch directly to the nut, heat it consistently (you don’t need cherry-red), then immediately quench it with penetrating fluid or cold water. The rapid contraction shatters rust and pulls fresh penetrant deep into the threads. Then hit it immediately with the breaker bar.
The Serious Danger You Need to Know
Never apply heat to a lug nut while the tire is still inflated and mounted.
Heat transfers through the rim into the tire. Modern tires contain synthetic rubber compounds that begin breaking down at just 365°F through a process called tire pyrolysis. As the rubber decomposes, it releases volatile hydrocarbon gases inside the sealed tire. Those gases build pressure until the tire explodes — or auto-ignites.
The explosion can exceed 1,000 PSI internally. It launches steel rims hundreds of feet. It happens with zero external warning — no smoke, no hissing, no bulge. And it can detonate up to 24 hours after the heating event.
If a tire has been exposed to significant heat:
- Deflate it completely and unseat the bead before applying any torch
- If accidental exposure occurred, establish a 650-foot exclusion zone
- Leave the wheel alone for a full 24-hour quarantine period
- Re-inflate only inside a steel safety cage, using a remote clip-on chuck from at least 10 feet away
The Safer Alternative: Induction Heating
Magnetic induction heaters solve this problem cleanly. A coil placed over the nut generates eddy currents inside the ferrous steel nut only — heating it in under 20 seconds with no open flame, no radiant heat to the rim, and no pyrolysis risk. Professional shops increasingly use these tools as the default thermal extraction method.
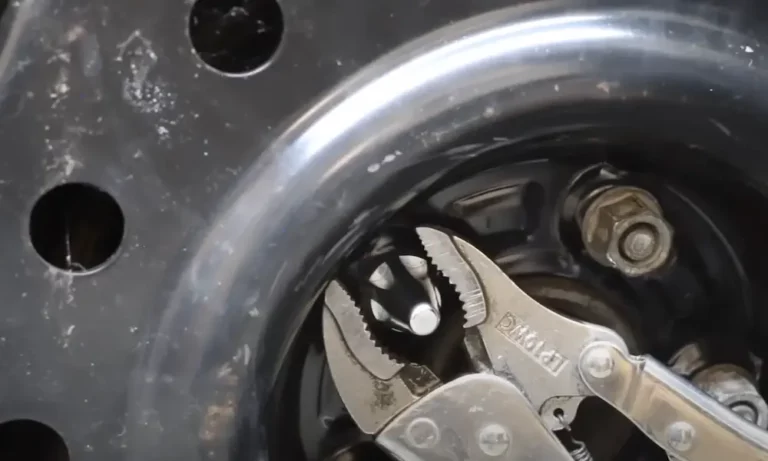
Step 6: Drill It Out (Last Resort)
If the nut is completely rounded, fused solid, or past all other methods, you drill it out. This destroys the stud — but you were replacing it anyway.
You can’t use standard drill bits. Wheel studs are case-hardened steel. A hardware-store HSS bit will just squeal and melt. You need cobalt or tungsten carbide drill bits.
Here’s the process:
- Grind the face of the stuck nut flat with an angle grinder — removes the hardest outer surface layer
- Strike a deep center punch mark exactly in the center of the stud face — stops the bit from wandering into your wheel rim
- Start with a small pilot bit and bore straight down the center axis
- Apply cutting fluid continuously to manage heat — an overheated cobalt bit loses its temper instantly
- Step up to progressively larger bits until the stud walls are paper thin
- Snap the remaining shell off with lateral force
Once the wheel is off, press the broken stud fragment out from the hub flange using a hydraulic shop press or stud puller, then press a fresh stud in. The repair is complete.
Reassembly: The Anti-Seize Debate
You’ve removed the stuck nut. Now — should you put anti-seize on the new studs to prevent it happening again?
The answer is complicated, and getting it wrong actually causes the exact problem you’re trying to prevent.
Why Manufacturers Say No
Factory torque specs assume dry threads. The spec isn’t measuring clamping force directly — it’s measuring the rotational friction required to turn the nut. On a lubricated thread, that friction drops dramatically. The nut turns much further before the wrench clicks, and far more of your torque converts into clamping force instead.
Applying anti-seize and then torquing to the standard spec can increase actual clamping force by up to 40%. That over-tensions the stud past its elastic limit, distorts the threads, and causes the stud to seize permanently — or snap at highway speed. General Motors service manuals explicitly warn against lubricant application for exactly this reason.
The Regional Workaround
In high-salt environments, dry-thread assembly often guarantees a seized nut by the next service. If you’re in a Rust Belt state or coastal area and choose to apply anti-seize, reduce your torque spec by 20–30% from the factory dry figure. That reduction compensates for the reduced friction and keeps your actual clamping force within safe engineering parameters.
Apply anti-seize sparingly — a light film on the threads only, nothing on the seat.
The Non-Negotiable Assembly Rules
Regardless of lubrication choice, these steps are mandatory every single time:
- Start every nut by hand for the first several threads — never socket-first with a power tool
- Tighten in a star pattern — alternating opposite nuts seats the wheel evenly
- Torque with a calibrated click-type torque wrench — impact guns for final installation destroy studs
- Look up your vehicle’s specific torque spec — most passenger cars fall between 70 and 150 foot-pounds
Follow this sequence, use the right tools for each phase, and you won’t be fighting another seized nut anytime soon.