Those white, crusty rings on your car windows aren’t just ugly — they can permanently etch into the glass if you ignore them. This guide covers every fix, from a $2 vinegar spray to machine polishing deep etches. Stick around to the end, because the prevention section alone will save you hours of scrubbing.
Why Water Marks Appear on Car Windows
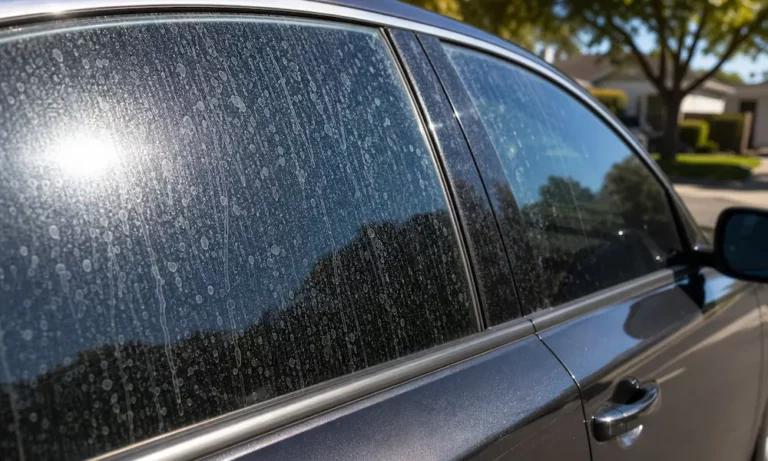
Water spots form when a water droplet evaporates and leaves its minerals behind. The sun bakes those minerals — mostly calcium, magnesium, and carbonates — into a crystalline crust on the glass.
Here’s the problem: automotive glass is primarily silicon dioxide. Those alkaline mineral deposits slowly react with the silica surface. Left long enough, they stop sitting on the glass and start chemically eroding into it. That’s called etching, and it’s a much bigger job to fix.
The source of your water matters too. Municipal tap water, sprinkler systems, groundwater, and even rain carrying industrial fallout all carry these dissolved minerals. Hot, sunny climates accelerate the bonding process significantly.
Know Your Enemy: The Three Stages of Water Spots
Not all water marks are equal. Matching your method to the severity saves you time and avoids damaging the glass.
| Stage | What It Looks Like | What It Means |
|---|---|---|
| Stage 1 | Dull, hazy rings; wipe off with effort | Mineral deposits sitting loose on the surface |
| Stage 2 | Hard, crusty white scale; resists washing | Sun-baked minerals chemically bonded to glass |
| Stage 3 | Faint ghost rings that survive all cleaning | Sub-surface etching — physical glass damage |
Start with the mildest method first. Work up only if needed.
How to Remove Water Marks on Car Windows with Household Products
White Vinegar Spray (Stage 1)
This is your first line of attack. Mix equal parts distilled white vinegar and distilled water in a spray bottle. Distilled water is non-negotiable here — tap water introduces new minerals right back onto the glass.
Here’s how to do it:
- Park in the shade and let the glass cool completely
- Spray the solution over the entire affected area
- Let it dwell for one to two minutes — re-spray if it starts drying
- For stubborn spots, soak paper towels in the solution and drape them over the glass for up to 15 minutes
- Scrub firmly with a rough microfiber cloth
- Rinse thoroughly with clean water and dry immediately
Important: Vinegar strips carnauba wax from surrounding painted panels. Mask off the paintwork first, then re-wax those sections after you’re done.
Lemon Juice (Stage 1)
Cut a lemon in half and rub the cut face directly onto the glass. The natural citric acid dissolves light mineral deposits quickly. Mop up the juice with a soft cloth, then spray standard glass cleaner and wipe down with crumpled newspaper. Newspaper works surprisingly well here — its dense paper fibers create just enough micro-abrasive friction to clear residual haze without scratching.
Baking Soda Paste (Stage 1–2)
Mix baking soda with a small amount of water into a thick paste. Apply it to a cloth and scrub firmly over the affected glass. The fine granules act as a mild abrasive and physically lift bonded mineral spots. Rinse thoroughly and finish with glass cleaner and newspaper.
Bar Keepers Friend (Stage 1–2)
Bar Keepers Friend contains oxalic acid, making it more aggressive than vinegar or lemon. Mix the powder with water, or work the liquid version directly onto the spots using a microfiber towel. Scrub in multiple directions, wipe off the residue, then buff with a dry microfiber cloth.
Commercial Water Spot Removers for Stubborn Stage 2 Marks
When household acids don’t cut through the mineral bond, it’s time to escalate to professional-grade products. These use stronger, chemically balanced acid packages that break down baked-on mineral salts fast.
The key advantage of gel-based removers is their thick consistency. They cling to vertical windows and curved windshields instead of running onto your paintwork or rubber trim.
How to Use These Products Safely
Always follow this pre-work checklist before opening any acidic remover:
- Work in shade on cool glass
- Wash and dry the car first to remove loose grit
- Wear nitrile gloves and eye protection
- Pre-wet surrounding painted panels and trim
CarPro Spotless 2.0: Don’t spray this directly on the glass. Apply it to a microfiber applicator pad, spread it over a 2×2 foot section, dwell for 30 to 60 seconds, then wipe off and rinse immediately. Never let it dry — concentrated acid will etch or stain the glass.
3D Eraser Gel: Shake well, wet down surrounding panels first, then apply to an applicator pad. Dwell for 30 seconds. For heavy contamination, light agitation with 0000 steel wool on the glass aids removal. Wash and rinse immediately after.
Chemical Guys Heavy Duty Water Spot Remover: Apply a small amount to a microfiber pad, rub in straight lines for up to 30 seconds over a 2×2 foot area, then flush immediately with water or a quick detailer. Don’t use this on mirrors, coated glass, or coated metal.
Meguiar’s Water Spot Remover (A3714): Apply manually in shade with moderate pressure using overlapping circular passes. Wipe off before it dries.
Pro tip: Many detailers avoid using acidic removers on front windshields entirely. These products can degrade rubber wiper blades and strip rain-repellent coatings. If your windshield is the problem, consider a glass stripper kit as an alternative physical approach.
Physical Methods for Heavy Deposits
Clay Bar Treatment (Stage 1–2)
A synthetic clay bar mechanically shears contaminants off the glass surface. Wash and dry the car completely first — any loose dirt under the clay will scratch.
Steps:
- Spray generous clay lubricant or soapy water over the glass
- Glide a fine-grade clay bar back and forth with gentle pressure
- Fold the clay to a clean face every few passes
- Rinse, wipe clean, and dry with a lint-free microfiber
0000 Steel Wool (Stage 2)
Super-fine 0000 steel wool is softer than silica glass, meaning it shaves away stubborn mineral scale without gouging the surface. Only use this grade — anything coarser will scratch the glass badly.
Rules you can’t skip:
- Never use it dry. Always use copious lubricant — glass cleaner, soapy water, or quick detailer
- Mask surrounding trim and paint. Steel fragments shed during use and rust rapidly on paintwork when they contact moisture
- Wash the car thoroughly immediately afterward
- Discard any microfiber towels that touched the steel wool residue
Razor Blade Scraping (Stage 2)
A brand-new, single-edge razor blade held flat against the glass — paired with a lubricant like rubbing alcohol mixed with distilled water — scrapes away thick mineral crusts before clay treatment. Only use a new blade. Dull or used blades drag and scratch.
Machine Polishing for Etched Glass (Stage 3)
If the water marks survived everything above, the damage is sub-surface. You can’t dissolve away glass that’s already been eroded. You need to physically level the surrounding glass to match the depth of the etched pits.
This requires a dual-action or rotary machine polisher with a cerium oxide glass polish. Standard paint polish doesn’t have the abrasive hardness to cut glass — don’t try to substitute it.
How to do it:
- Mask the window edges with automotive masking tape to protect trim and rubber seals
- Apply a small amount of specialized glass polish (McKee’s 37 High Performance Glass Restorer, Wolfgang Perfekt Vision, or Duragloss Nu-Glass work well) to a dense foam or rayon pad — rayon pads cut more aggressively
- Set the machine to low speed to prevent heat buildup — excessive heat can crack glass
- Work in a cross-hatch pattern: north-south passes, then east-west passes over the same section
- Mist the pad lightly with water to prevent the polish drying out
- Wipe residue with a damp microfiber, then inspect with standard glass cleaner
Stop Water Marks Coming Back
Removing water spots is pointless if the glass stays bare and vulnerable. Here’s how to lock in lasting protection.
Apply a Hydrophobic Barrier
Rain-X Original Glass Water Repellent creates a slick polymer barrier that repels water droplets before they can bead and dry. Apply using firm circular motions on cool, clean glass in temperatures above 40°F. Apply a second coat for full coverage. These sealants need reapplication every four to six weeks.
For longer-lasting protection, Rain-X Pro Cerami-X uses ceramic nanotechnology for up to six weeks of protection with a simple spray-on, wipe-off application.
Professional ceramic glass coatings chemically bond with the silica substrate at a molecular level. Once cured, they force water to bead into tight droplets that roll off at low speeds. They last up to a year, but require full prep: wash, clay bar, and an isopropyl alcohol wipe-down before application. After applying in a cross-hatch pattern, keep the vehicle completely dry for 24 hours.
Wash Smart
- Never wash in direct sunlight or on hot glass. Heat evaporates rinse water before you can dry it — baking fresh mineral deposits right back in
- Wash in shade, early morning, or late evening
- Never air-dry the car. Pat the glass dry immediately with a dedicated microfiber drying towel using light, straight-line sweeps
- Use an electric leaf blower to blast water out of window seals and trim crevices before it drips back down clean glass
- Apply a spray wax or drying aid during the drying step to reinforce your glass protection
Filter Your Rinse Water
An inline deionization or reverse osmosis rinse system removes 100% of dissolved calcium and magnesium from your wash water. Zero minerals in the water means zero water spots possible — the problem simply can’t happen.
Two More Easy Wins
- Avoid parking near lawn sprinklers. Groundwater used for irrigation is typically high in hard minerals and will undo all your work overnight
- Replace wiper blades every 6 to 12 months. Worn rubber traps mineral particles and drags them across the windshield, accelerating surface wear and creating new marks with every wipe cycle