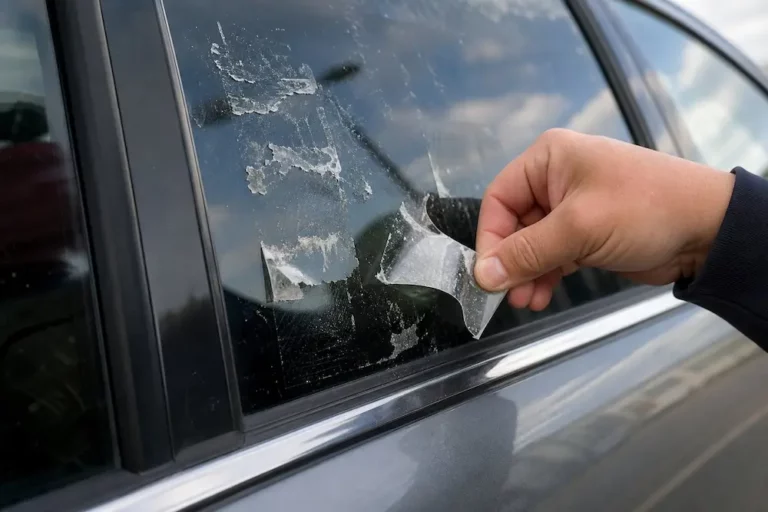
Got a stubborn badge, old body molding, or leftover foam residue stuck to your car? Removing automotive double sided tape without damaging the paint underneath is totally doable — if you know what you’re doing. This guide walks you through every step, from softening the bond to fixing that ghost outline left behind.
Why Automotive Double Sided Tape Is So Hard to Remove
This isn’t your average tape from the office supply store. Automotive acrylic foam tape is engineered to survive extreme heat, UV exposure, saltwater, and constant road vibration. It doesn’t weaken over time — it actually gets stronger. The polymer chains cross-link as they age, building a tighter bond the longer the tape sits on your car.
When you try to pull a badge or molding off, the foam core splits right down the middle. You end up with sticky residue glued firmly to your paint. That’s why you can’t just yank it off and call it done.
What You’re Actually Dealing With
Automotive tape is a three-layer system:
| Layer | Function | Why It’s Tricky |
|---|---|---|
| Component Adhesive | Bonds to the trim or badge | Cracks trim if you rush removal |
| Viscoelastic Foam Core | Absorbs road vibration | Splits on removal, leaves bulk residue |
| Substrate Adhesive | Bonds permanently to clear coat | Needs chemical solvents to dissolve fully |
What You’ll Need Before You Start
Gather everything before touching the car. You don’t want to improvise mid-job.
Tools:
- Hair dryer or heat gun (low setting)
- Heavy fishing line or unwaxed dental floss
- Plastic razor blade and scraper handle
- Soft microfiber towels (several)
Chemicals (pick based on what you have):
- Dedicated remover: 3M General Purpose Adhesive Remover
- Natural option: Goo Gone Automotive
- Budget option: WD-40 or isopropyl alcohol (70–90%)
Safety gear:
- Chemical-resistant gloves
- Safety glasses
- Work in a well-ventilated area
Never use acetone, nail polish remover, or lacquer thinner on car paint. These will strip your clear coat immediately — no fixing that without a full respray.
Step 1: Heat the Tape to Soften the Bond
Cold tape snaps and shreds. Warm tape peels cleanly. Start here every time.
Park the car in the shade. Direct sunlight heats the panel unevenly, which makes controlled heating harder. Then grab your heat source and get to work.
Choosing the Right Heat Tool
| Tool | Risk to Paint | Best For |
|---|---|---|
| Hair dryer | Very low | Badges, small emblems, delicate finishes |
| Heat gun (low setting) | High if misused | Thick moldings, cold weather jobs |
| Clothes steamer | Low | Brittle old tape, large decals |
Hold the tool 3–12 inches from the surface. Keep it moving constantly — never hold it in one spot. You’re aiming for a surface that feels hot to the touch but won’t burn your hand. That’s roughly 140–160°F, which is the sweet spot for softening acrylic adhesive without risking the clear coat.
Step 2: Cut Through the Tape With Fishing Line
Skip the screwdrivers. Metal tools will scratch your paint instantly.
Cut a 24-inch piece of heavy fishing line or strong dental floss. Wrap each end around your index fingers and pull it tight. Slide it behind the edge of the heated badge or molding, keeping the line flush against the panel.
Saw back and forth with steady, even pressure. The line cuts right through the foam core. If you feel heavy resistance, stop. That means the adhesive has cooled down. Reheat for 30–60 seconds, then continue. Repeat the heat-and-saw cycle until the piece comes completely free.
Step 3: Remove the Bulk Foam Residue
Once the badge is off, you’ll see a thick layer of sticky foam stuck to your paint. Don’t hit it with chemicals yet — there’s too much material for solvents to work efficiently on. Remove the bulk first.
Option A: Manual Rolling (Safest)
Press your thumb firmly into the residue and roll it away from the edges. The adhesive sticks to itself and balls up. Reheat occasionally to keep it pliable. It’s slow and your thumb will hate you, but it’s completely safe for the paint.
Option B: Plastic Razor Blade (Faster)
Reheat the residue, then hold a plastic razor blade at a nearly flat angle — almost parallel to the paint. Push it under the foam with short, controlled strokes. Wipe the blade clean often. A clogged blade just smears the residue around.
Never use a metal blade on painted panels, plastic bumpers, or carbon fiber. Ever.
Option C: Rotary Eraser Wheel (Fastest for Large Areas)
For long body moldings or thick vinyl stripes, the 3M Stripe Off Wheel is the industry standard. It’s a molded rubber disc that attaches to a drill and erases tape through friction — no abrasives involved. The rubber is softer than cured clear coat, so it won’t scratch metal panels.
Critical rules for using it safely:
- Never exceed 4,000 RPM. Optimal speed is 2,000–2,500 RPM.
- Keep the drill moving constantly. Holding it still for even two seconds can burn the clear coat.
- Use the outer edge of the wheel, not the flat face.
- Never use this on plastic bumpers or flexible trim. Plastic can’t dissipate friction heat — it will warp or melt within seconds.
Step 4: Dissolve the Remaining Adhesive Residue
After the bulk foam is gone, you’ll still have a thin, sticky film on the paint. This won’t come off with scraping. You need chemistry.
Which Solvent Should You Use?
| Solvent | Speed | Paint Safe? | Notes |
|---|---|---|---|
| 3M Adhesive Remover | Very fast | Yes | Strong fumes — work outdoors |
| Goo Gone Automotive | Moderate | Yes | Needs 5–15 min dwell time |
| WD-40 | Moderate | Yes | Must degrease thoroughly afterward |
| Isopropyl Alcohol | Fast | Yes | Best for final cleanup and surface prep |
| Vegetable oil / petroleum jelly | Slow | Yes | Needs long dwell + heavy soap cleanup |
| Acetone / nail polish remover | — | NO | Destroys clear coat immediately |
How to Apply Solvents Without Scratching the Paint
Technique matters as much as product choice. Follow this sequence:
- Saturate a clean microfiber towel with your chosen solvent, or spray directly onto the residue.
- Let it soak for the required dwell time. Don’t rush this step.
- Gently massage the area with a fresh damp microfiber using light circular motions. Let the chemical do the work — don’t scrub hard.
- Flip the towel frequently to a clean section. A saturated towel just pushes residue around.
- Wash the entire area with automotive shampoo and warm water to neutralize any leftover chemicals or oils.
Removing Tape From Delicate Surfaces
Standard metal panels with factory clear coat are forgiving. Other surfaces need a different approach.
Plastic Bumpers and Flexible Trim
No eraser wheels. No metal tools. Stick to citrus-based solvents or WD-40 with long dwell times. Use a soft plastic scraper or a detailing clay bar to lift loosened residue from textured surfaces without flattening the grain.
Carbon Fiber
Carbon fiber has an epoxy resin clear coat that’s softer and more brittle than standard automotive paint. Metal tools will gouge it immediately. Test any solvent on a hidden area first. Isopropyl alcohol on a microfiber cloth — pressed onto the residue for 30–45 seconds, then gently wiped away — is the safest method.
Matte and Satin Paint Finishes
This is the trickiest surface of all. You cannot polish matte paint. Any scraping or aggressive rubbing will create permanent shiny spots that can’t be reversed. Use WD-40 or a matte-safe adhesive remover with a long dwell time. Wipe with zero pressure using ultra-soft microfiber towels. Multiple gentle passes beat one aggressive wipe every time.
Paint Protection Film (PPF)
Don’t use petroleum-based solvents on PPF — they can stain or degrade the film. Mild citrus cleaners or WD-40 work safely. When wiping, always move from the center of the film outward toward the edges. Wiping back toward the seam forces solvent under the edge, lifting the film off the paint.
How to Fix Paint Ghosting After Removal
You’ve removed every trace of adhesive, but there’s still a faded outline of the badge on the paint. That’s ghosting — and it’s not leftover residue.
Why Ghosting Happens
The paint under the badge was shielded from UV rays, acid rain, and car wash chemicals for years. The surrounding paint wasn’t. The protected area retains its original depth and clarity, while the exposed paint around it has faded, oxidized, and collected microscopic scratches. When the badge comes off, that contrast is suddenly very visible.
Fixing It: The Paint Correction Process
| Step | Tool Needed | Goal |
|---|---|---|
| Decontamination | Clay bar + lubricant | Remove embedded fallout from paint pores |
| Compounding | Dual-action polisher + cutting pad | Level oxidized clear coat to blend the ghosting line |
| Polishing | Polisher + finishing pad + fine polish | Restore gloss and remove compounding haze |
| Wet sanding (if severe) | 3000-grit sandpaper + water | Level deep ghosting before compounding |
Work the compound over the affected area in overlapping cross-hatch passes with a dual-action orbital polisher. Be cautious on sharp body lines and panel edges — the clear coat is thinnest there and burns through easily. Follow up with a finishing polish to restore the full depth of gloss.
Preparing the Surface for New Tape
If you’re mounting a replacement badge or new trim, the surface must be completely clean. New tape bonded over oil residue or old adhesive will fail — sometimes at highway speed.
Here’s the prep sequence that ensures maximum bond strength:
- Wash the area with a stripping automotive detergent to remove all oil-based solvents.
- Wipe down with a 50/50 isopropyl alcohol and water solution. This removes fingerprints, polish residue, and any final contamination.
- Let the surface dry completely before applying new tape.
- Apply firm, even pressure across the entire tape surface to initiate the bond properly.
- If you’re not reattaching anything, seal the freshly cleaned paint with a wax, paint sealant, or ceramic coating to protect the bare clear coat from UV damage.
Pressure-sensitive adhesives need both a clean surface and physical force to bond correctly. Press firmly — the adhesive has to wet out and flow into the microscopic texture of the clear coat to form a strong connection.