Got an expired registration sticker that won’t budge? The wrong move can scratch your windshield, kill your rear defroster, or peel your paint. This guide walks you through every surface type so you can remove it cleanly and safely — stick around to the end for the theft-prevention trick most drivers skip.
Why Registration Stickers Are So Hard to Remove
Registration stickers aren’t designed for easy removal — they’re engineered to survive years of brutal conditions. Think scorching summer heat, ice storms, highway wind, and car washes.
The adhesive starts soft and pliable. Over time, UV exposure and thermal cycling cause the polymer chains to harden into something closer to cement. A sticker applied six months ago peels off easily. One that’s baked on for two years? It shatters, tears, and leaves a sticky mess behind.
Many states also engineer tamper-evident features directly into their stickers — brittle materials, scored lines, and holographic threads that cause the decal to fragment when you try to remove it. This stops theft but makes your annual sticker swap a genuine headache.
Know Your Surface Before You Touch Anything
This is the most important step most people skip. The right method for glass is wrong for paint. The right method for clear windshields is wrong for tinted windows.
Here’s a quick-reference breakdown:
| Surface | Biggest Risk | What to Avoid |
|---|---|---|
| Untinted windshield (AS1 glass) | Micro-scratches from dry scraping | Scraping without liquid lubricant |
| Tempered side/rear windows (AS2) | Surface debris causing deep scratches | Dry razor blades |
| Aftermarket window tint | Film tears and clouds instantly | Any metal scraper, abrasive pads |
| Rear defroster grid | Severing the conductive painted lines | Perpendicular scrubbing, metal tools |
| Painted body panels / clear coat | Gouging through the clear coat | Metal scrapers, acetone |
| Plastic bumpers | Melting, warping, crazing | Acetone, harsh solvents |
| Metal license plate | Adhesive residue buildup | Aggressive metal tools |
Check your window glass for an AS1 or AS2 marking etched into the corner. AS1 is laminated windshield glass. AS2 is typically tempered side or rear glass that needs extra care.
One more thing: factory privacy glass (dark glass from the factory) is safe to treat like regular clear glass. Aftermarket tint film — applied inside the window — is fragile and needs its own approach.
How to Remove a Registration Sticker from a Windshield
Method 1: Heat First (Best for Newer Stickers)
If your sticker is less than a year old, start here. Heat softens the adhesive without any scraping needed.
What you need: Hair dryer, plastic card or fingernail, microfiber cloth, isopropyl alcohol (90%+)
Steps:
- Hold your hair dryer 6–8 inches from the sticker on a medium-high setting
- Keep it moving in slow sweeps — never hold it in one spot or you risk thermal shock cracking the glass
- Heat for 2–3 minutes until the sticker feels warm
- Lift one corner with a fingernail or plastic card
- Pull slowly and steadily at a low angle — don’t yank
- Wipe any leftover residue with 90%+ isopropyl alcohol on a microfiber cloth
Don’t use a heat gun. A hair dryer gives you safe, controlled warmth. A heat gun generates extreme temperatures that can crack glass through thermal shock, especially if there are any tiny chips near the edges.
Method 2: Lubricated Razor Blade (For Old, Sun-Baked Stickers)
Old stickers that have already shattered need a different approach. This is the method auto glass professionals use, and it works — if you follow the rules exactly.
What you need: Brand-new single-edge razor blade in a handle, soapy water or foaming glass cleaner, clean microfiber cloths
Steps:
- Soak the sticker area generously with soapy water or glass cleaner
- Hold the blade at a 30–45 degree angle — flat against the glass
- Push the blade forward with steady pressure — always push, never pull backward
- Keep reapplying lubricant the moment the glass starts drying
- Wipe away the slurry of glue and water, then finish with glass cleaner
Critical rules:
- Use only a brand-new blade — old blades develop nicked edges that scratch glass
- Don’t use box cutter blades — their thick profile makes the right angle impossible to maintain
- Never scrape dry glass. The grit trapped on the surface will scratch your windshield under the blade
How to Remove a Registration Sticker from Tinted Windows
If your sticker is on an aftermarket-tinted window, put the razor blade down. The film tears instantly with any metal tool or abrasive material.
What you need: Hair dryer, 90%+ isopropyl alcohol, ultra-soft microfiber cloth
Steps:
- Use a hair dryer on low-to-medium heat, keeping it moving
- Soak a microfiber cloth with isopropyl alcohol
- Press the cloth gently against the sticker — let the solvent work for 1–2 minutes
- Rub softly in a circular motion to lift the sticker and residue
- Never scrub aggressively across the film surface
Isopropyl alcohol is generally safe for tint film when applied with a soft cloth. The key is applying it to the cloth first rather than spraying directly onto the film.
How to Remove a Registration Sticker Near Rear Defroster Lines
This is where people cause expensive, permanent damage. Those thin horizontal lines on your rear window aren’t wires buried inside the glass — they’re fragile conductive paint applied to the glass surface. One careless scrape severs the circuit and leaves a permanent foggy strip across your window.
What to do:
- Turn on your rear defroster to warm the glass from the inside
- Apply isopropyl alcohol to a microfiber cloth — don’t spray directly on the glass
- Press the cloth gently against the sticker and hold it for a minute or two
- Once the adhesive softens, wipe parallel to the defroster lines, never across them
- Use no tools except a soft, flexible plastic putty spreader if absolutely needed
If you suspect you’ve damaged a defroster line, test it with a voltmeter. Place the probes at each end of the line — it should read about 12 volts. Move one probe to the center. If it reads 6 volts, the line is intact. Zero volts at the center means there’s a break. Broken lines can be repaired with a conductive paint repair kit if you catch it early.
How to Remove a Registration Sticker from a License Plate
License plate stickers use retroreflective sheeting with extremely aggressive adhesive designed to survive years of highway conditions. They need patience and the right tools.
What you need: Plastic scraper or expired credit card, penetrating oil (WD-40), non-abrasive sponge
Steps:
- Use a plastic scraper to peel away the top reflective layer
- Spray the exposed adhesive pad with WD-40 or rubbing alcohol
- Let it soak for several minutes
- Scrub gently with a non-abrasive sponge
- Wipe dry with a paper towel
The surface must be wiped down with isopropyl alcohol and fully dried before applying your new sticker. Any leftover oil or residue will cause the new sticker to fail.
How to Remove a Registration Sticker from Painted Surfaces or Bumpers
California’s Clean Air Vehicle decals go directly on painted panels or plastic bumpers — and removing them without damage is entirely possible if you skip metal tools and harsh solvents.
Steps:
- Clean the area with mild automotive soap to remove road grit
- Apply heat with a hair dryer, keeping it moving
- Lift the sticker edge with a plastic card — never metal
- Pull slowly, reapplying heat if resistance increases
- Apply WD-40 or a citrus-based solvent (like Goo Gone) to a microfiber cloth for residue
- Wash the area with soap and water immediately after
- Reapply automotive wax — solvents strip your protective coating
Never Use Acetone on Your Car
Acetone is tempting because it dissolves adhesives fast. It also strips your clear coat, melts plastic bumpers, and causes a reaction called “crazing” in polycarbonate trim — a network of hairline cracks that destroys optical clarity permanently.
Here’s how the common solvents stack up:
| Solvent | Adhesive Power | Paint Risk | Plastic Risk | Best Use |
|---|---|---|---|---|
| Soapy water | Low | None | None | Paper stickers, glass lubrication |
| Isopropyl alcohol (90%+) | High | Low | Low | Glass, tinted film, residue cleanup |
| WD-40 / penetrating oil | Very high | Low | Low | Stubborn dried glue |
| Goo Gone (citrus) | Very high | Moderate | Low | Heavy adhesive pads |
| Acetone | Extreme | Extreme | Extreme | Never use on vehicles |
How to Protect Your New Sticker from Theft
Registration sticker theft is a real and growing problem. A thief peels your valid sticker and puts it on their unregistered vehicle. Simple fix: the cross-cut method.
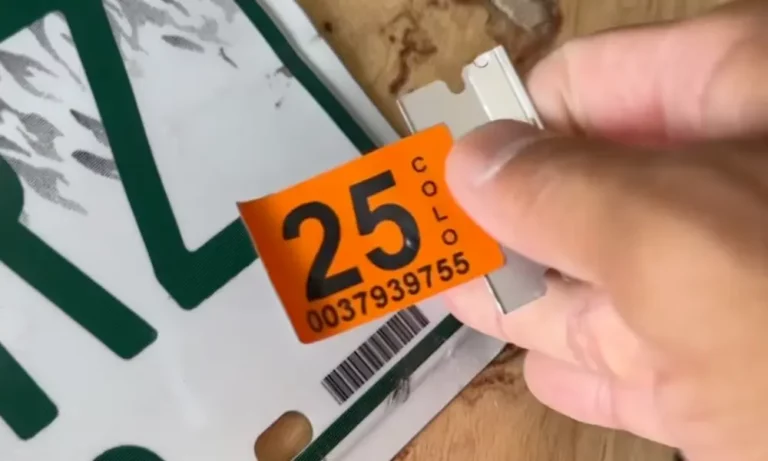
After pressing your new sticker firmly onto the plate, score diagonal lines across it with a razor blade to create an X pattern. This is sometimes called the “pizza cut.” The sticker still looks fine and reads clearly to traffic cameras and police. But if someone tries to peel it, it shatters into worthless fragments along the scored lines.
For extra protection, install security plate screws with a Torx or pin-center drive. Standard screwdrivers can’t remove them, so thieves can’t just take the whole plate.
State-Specific Situations Worth Knowing
- Texas: Eliminated windshield inspection stickers in 2015, but electronic toll tags like TxTag leave behind thick adhesive pads that need heavy solvent treatment
- New York: The NY DMV requires all stickers to be completely removed and destroyed before surrendering plates
- California: Clean Air Vehicle decals go on painted bumpers — many drivers attach them to a magnetic base first to avoid adhesive contact with paint
- Washington, D.C.: Frequent sticker rotations mean residents keep a dedicated toolkit on hand year-round — isopropyl alcohol and a plastic scraper cover most situations