Got a fresh scuff on your car and no idea where to start? You’re in the right place. This guide walks you through exactly how to remove scuff marks on car paint — from quick DIY fixes to deeper repair jobs. Stick around to the end, because the wrong move here can make things worse.
First, Figure Out What You’re Actually Dealing With
Not every scuff mark is the same. Some sit on top of your paint. Others cut into it. Treating them the same way is how you turn a $10 fix into a $500 body shop bill.
Paint Transfer vs. an Actual Scratch
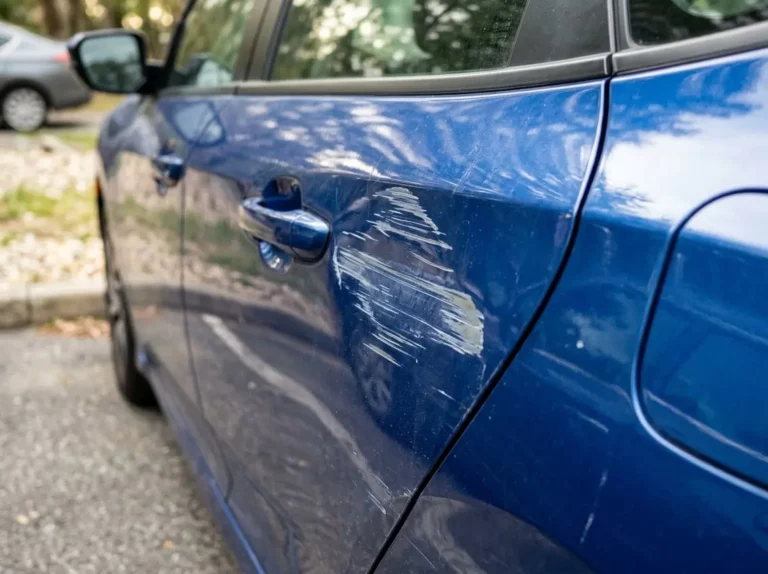
Paint transfer happens when your car rubs against something softer — a rubber bumper, a painted pole, another car’s door. The foreign material bonds to your clear coat. It looks like a big ugly scuff, but here’s the good news: it’s sitting on your paint, not in it.
A real scratch physically removes material from your paint layers. That’s a different problem with a different solution.
The Fingernail Test: Do This Before Anything Else
This simple test tells you exactly how deep the damage goes — and which repair method to use.
Run a clean fingernail across the scuff mark. Here’s what the feedback means:
- Nail glides right over it → Surface-level scuff or paint transfer. You can fix this at home with chemicals or light polish.
- Nail catches slightly → The scratch lives in the upper clear coat. Polishing can fix it, but it’ll cost you some clear coat thickness.
- Nail catches hard or stops → The scratch hits the base coat or deeper. Polish won’t help. You need touch-up paint.
The Water Trick
Still not sure? Mist the scuff with water. If it disappears when wet and comes back as it dries, the damage is in the clear coat — and polishing will work. If it stays visible while wet, the color layer is gone. Time for touch-up paint.
Always Wash First — No Exceptions
Skipping the wash is the number one beginner mistake. Dust, grit, and road debris sit on your paint like tiny razor blades. Rub a pad over unwashed paint and you’ll grind all that grit into the clear coat, turning one scuff into hundreds of swirl marks.
Wash with a pH-neutral automotive shampoo and a soft microfiber mitt. Rinse. Dry with a clean microfiber towel. Now you’re ready.
How to Remove Scuff Marks Caused by Paint Transfer
Most scuff marks you’ll find in parking lots are paint transfer. Here’s how to tackle them properly.
Step 1: Try a Clay Bar First
A synthetic clay bar is your safest first move for paint transfer. It lifts bonded surface contamination without touching or thinning your clear coat. It doesn’t polish — it decontaminates. Those are two very different things.
How to use it:
- Spray the area heavily with clay lubricant
- Flatten the clay into a flat disc
- Glide it back and forth with light pressure
- Fold the clay constantly to reveal a fresh, clean face
- Keep adding lubricant the moment you feel any drag
Golden rules:
- Drop the clay bar on the ground? Throw it away immediately. Gravel sticks to it permanently.
- Never run out of lubricant. Dry clay drags and scratches.
- Never compound a car without claying first — you’ll grind surface grit into the paint.
Quick check before claying: Place your hand in a thin plastic bag and run your fingers over the washed paint. If it feels rough or gritty, clay is needed. If it feels smooth, you can skip straight to polishing.
Step 2: Try a Chemical Solvent
When the clay bar isn’t cutting it, a chemical solvent can break down stubborn paint transfer. But not all solvents are created equal. Some will save your paint. Others will destroy it in minutes.
| Chemical | What It Does | Safe to Use? | Key Rule |
|---|---|---|---|
| Isopropyl Alcohol (10–15% dilution) | Dissolves paint transfer and adhesives | ✅ Yes, when diluted | Never use at full strength — it strips your wax and can soften the clear coat |
| WD-40 | Loosens and lifts paint transfer | ✅ Yes, temporarily | Wash it off immediately — the oily residue attracts dirt and degrades wax |
| Citrus-based removers (d-Limonene) | Removes heavy transfer and sap | ✅ Yes, on cured clear coat | Apply to a towel first, rinse immediately after |
| Acetone / Goof Off | Industrial adhesive removal | ❌ Never | Melts clear coat instantly — permanent damage |
| Brake fluid (DOT 3/4) | Hydraulic braking | ❌ Never | Acts as paint stripper — causes blistering within 5–15 minutes |
Using Isopropyl Alcohol Safely
Dilute IPA to 10–15% with distilled water. Spray it onto a microfiber towel — not directly on the paint. Dab it on the scuff, let it sit for a minute, then wipe away. Rinse the area with water right after.
Full-strength IPA (sold at 70–91%) can chemically soften the clear coat if left on too long. Diluted, it’s one of the safest and most effective options out there.
Using WD-40 for Heavy Scuffs
WD-40 works surprisingly well on stubborn paint transfer. The mineral spirits dissolve the foreign paint. The lubricating oils let you wipe it off without scratching.
But it does nothing to fix an actual scratch — it just fills the groove with oil temporarily. Once it washes away, the scratch is back. Always wash the treated area with automotive shampoo immediately after. Never use it on a hot panel or in direct sunlight.
How to Remove Scuff Marks That Are True Clear Coat Scratches
If your fingernail caught slightly but the scratch is still in the clear coat, you need abrasive polishing. This physically levels the clear coat around the scratch until the surface is flat again.
Choose the Right Product
| Product Type | What It Does | Best For |
|---|---|---|
| Rubbing/cutting compound | Aggressive material removal | Deep clear coat scratches, oxidation |
| Finishing polish | Refines and restores gloss | Light swirls, haze left by compound |
| Diminishing abrasive products (e.g., Meguiar’s ScratchX, Turtle Wax Scratch Repair) | Cuts then self-refines in one step | Minor to moderate clear coat scuffs |
Diminishing abrasive products are the most beginner-friendly option. The abrasive particles start large and aggressive, then break down into a fine polish as you work. One product does two jobs. Some options like Turtle Wax Hybrid Solutions combine cutting, polishing, and protection all in one.
Hand vs. Machine Application
For a single isolated scuff, hand application with a foam applicator or microfiber works fine. Work the compound into the scratch with firm overlapping strokes. Stop when the product turns clear.
For larger areas, a dual-action orbital polisher gives better results with less effort. It distributes heat evenly, reducing the risk of burning through the clear coat — something that’s much easier to do with a high-speed rotary buffer.
Always work in the shade. Direct sunlight bakes the polish dry before you can work it in, leaving behind an abrasive crust that scratches the paint.
What Not to Use — Household Myths Debunked
Toothpaste: Barely Works, But Won’t Hurt
Toothpaste contains mild silica abrasives — similar in concept to a very light finishing polish. Whitening toothpaste has slightly more grit. It can reduce the appearance of the lightest surface scuffs. It will not touch anything that catches a fingernail. If you use it, rinse it off completely — dried toothpaste cements itself into trim gaps.
Baking Soda: High Risk, Low Reward
The crystalline structure of baking soda is inconsistent and uncontrolled. Unlike engineered automotive compounds, you can’t predict how aggressively it’ll cut. It routinely leaves micro-marring and dull hazing. Its high alkalinity can also interfere with wax adhesion afterward. Skip it.
Magic Erasers: Don’t Touch Your Car With These
This one gets repeated constantly and it’s genuinely destructive. Melamine foam feels soft, but under a microscope it’s a rigid web of glass-like fibers. On car paint, it acts like 3,000–4,000 grit sandpaper. It removes the scuff — and a big hazy patch of clear coat with it. Never use a magic eraser on glossy automotive paint.
Fixing Deep Scratches That Hit the Base Coat or Metal
If your nail stops cold on the scratch, you’ve lost clear coat and color. Polishing will only destroy the surrounding clear coat. You need to add paint back.
Find Your Paint Code
Check the sticker in your driver’s door jamb for your factory paint code. Match it exactly — even slight color differences show up in sunlight.
The Touch-Up Process
- Clean the scratch with diluted IPA or a prep spray. Remove all wax, oil, and loose paint flakes.
- Treat rust if you see bare metal with any orange tinge. Use a chemical rust converter or gentle spot sanding before priming.
- Apply primer into the scratch groove using a micro-applicator or fine brush — not a spray can from two feet away.
- Build color in thin layers. Never apply one thick coat. Thick paint skins over the top and traps wet solvent underneath, which shrinks and craters as it cures.
- Top with clear coat until the repair sits just slightly above the surrounding paint.
Wet Sanding the Repair Flush
Once the repair cures, the raised edge needs leveling. Wet sanding with ultra-fine paper — soaked in water — gently knocks the ridge down. Work through progressively finer grits:
| Grit Range | Purpose |
|---|---|
| 1500–2000 | Knock down the high spot of the clear coat repair |
| 2500–3000 | Refine sanding marks before machine polishing |
The water lubricates the paper and floats away debris. Without it, you’re dragging paint chunks across the surface. After wet sanding, the area will look dull and hazy — that’s normal. Follow up with compound and polish to restore the gloss.
Protect the Repair — Don’t Skip This
Every chemical and abrasive process used to remove scuff marks on car paint strips away your protective layers. A freshly polished panel with no protection degrades fast. UV rays, bird droppings, and water spots will attack it immediately.
Apply a wax or synthetic sealant to lock in the correction and rebuild your sacrificial barrier:
| Product Type | Durability | Best For |
|---|---|---|
| Carnauba paste wax | Weeks to a few months | Deep warm gloss, show cars |
| Liquid synthetic sealant | Up to 6 months | Daily drivers, easy application |
| Ceramic spray | Variable | Fast protection after quick repairs |
Apply thin and even in the shade. Let it haze. Buff it off with a clean microfiber towel.
Going forward, wash regularly using the two-bucket method, reapply protection every few months, and park away from tight spaces when you can. Learning how to remove scuff marks on car paint is useful — but preventing them in the first place is even better.