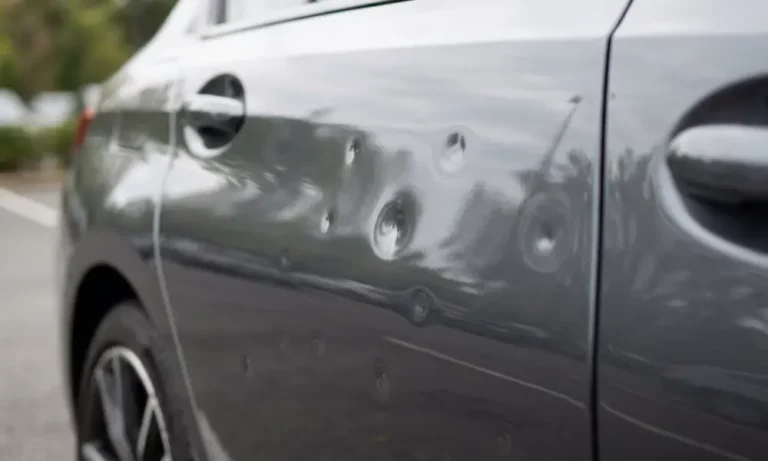
Got a fresh ding on your door panel? Before you panic or call a body shop, there are several ways to remove small dents from your car at home — some using tools you already own. This guide breaks down exactly what works, what doesn’t, and when each method makes sense. Stick around, because the wrong move could make a $50 fix into an $800 nightmare.
First, Know What You’re Working With
Not every dent responds the same way. Before you grab a plunger or heat gun, check these four things:
- Panel material: Steel, aluminum, or plastic bumper cover?
- Paint condition: Any chips, cracks, or previous repaints?
- Dent depth: Shallow and round, or creased and sharp?
- Location: Flat panel surface, or sitting on a body line?
If your dent is shallow, round, at least 3 inches wide, and the factory paint is fully intact — you’re in good shape to try DIY. If it’s deep, creased, or on an aluminum panel (common on newer trucks and luxury cars), skip the DIY section and call a professional paintless dent repair technician.
Method 1: Hair Dryer and Compressed Air (Thermal Shock)
This is the most popular DIY method for how to remove small dents from car panels — and it actually works on the right dents.
How it works: Heat expands the metal, making it more flexible. A blast of cold from an inverted compressed air can causes rapid contraction, which can pop the dented area back to its original shape.
Step-by-step:
- Wash the panel with non-wax car soap. Dirt insulates the metal and scratches the clear coat.
- Hold a hair dryer 5–7 inches from the surface on a medium heat setting.
- Move it continuously over the dent and a 3–5 inch surrounding area for 3–5 minutes.
- Put on heavy rubber gloves. Shake the compressed air can, then invert it completely.
- Spray the liquid (not gas) directly onto the center of the dent for 30–50 seconds until white frost forms.
- As the frost melts, lightly tap your fist around the outer perimeter of the dent to release tension.
- Wipe with a clean microfiber cloth once the frost disappears.
Dry ice variation: Warm the dent for 2 minutes with a hair dryer, then tape a sheet of heavy-duty aluminum foil over it. Press a block of dry ice to the foil in tight circular motions for 30–60 seconds. The foil protects your clear coat from direct cryogenic contact, which can crack or blister paint. Dry ice hits around -109°F — significantly colder than inverted compressed air at -60°F.
| Cooling Agent | Operating Temp | Best For | Paint Barrier Needed? |
|---|---|---|---|
| Inverted Compressed Air | ~-60°F | Thin-gauge sheet steel | No |
| Dry Ice | ~-109°F | Sheet steel panels | Yes — aluminum foil |
Reality check: Consumer testing shows thermal shock methods are inconsistent. They work best on very shallow, round dings on thin steel. Forget using this on creased dents, reinforced panels, or aluminum.
Method 2: Glue Pulling (DIY Paintless Dent Repair)
This is the closest you’ll get to professional paintless dent repair (PDR) without special training. A PDR glue pulling kit uses polymer tabs and high-tensile hot-melt adhesive to slowly pull the dent outward from the front of the panel — no backside access needed.
Before you start — clean thoroughly:
Wax, grease, and ceramic coatings kill adhesive bond strength. Wash with non-wax soap, dry completely, then wipe the dent area with 91% isopropyl alcohol. This is the industry-standard release agent for PDR work — it cleans the surface and later helps release the tab without damaging the clear coat.
One thing to avoid completely: denatured alcohol. It contains methanol, which can cause blindness, coma, or death through skin absorption. Stick to 91% isopropyl or pure ethanol.
| Release Agent | Paint Risk | Safety |
|---|---|---|
| 91% Isopropyl Alcohol | Negligible | Low risk |
| 100% Isopropyl Alcohol | Low (can cause temporary rings) | Low risk, flammable |
| Denatured Alcohol | Low | Extremely high — contains methanol |
| Pure Ethanol | Negligible | Safe, non-toxic |
Step-by-step:
- Soak pulling tabs in 91% isopropyl alcohol, then dry them completely.
- Heat your PDR glue gun for 10–15 minutes. Don’t use craft store glue sticks — they lack the tensile strength needed to pull automotive sheet metal.
- Choose a tab slightly smaller than the flat base of the dent.
- Apply a pea-sized drop of glue to small tabs, a dime-sized bead to larger ones.
- Press the tab onto the dent center — don’t push hard. Excess pressure squeezes the glue too thin and it’ll fail under tension.
- Let the adhesive cure for 2–5 minutes. Work in shade at 60–80°F. Direct sunlight prevents proper setting.
- Attach your slide hammer or hand-lifter and pull slowly and steadily outward.
- If the tab releases and leaves glue residue on the car, spray 91% isopropyl along the edges, wait a moment, then peel it off with a plastic scraper.
- If you overcorrect and create a raised high spot, place a plastic knockdown tool over it and tap lightly with a blending hammer.
Know the limits: Glue pulling loses grip above 86°F and carries real risk of pulling paint off panels that have been repainted. If your car has had any aftermarket body work, skip this method entirely.
Method 3: Plunger Pull (Best for Broad, Flat Dents)
The humble plunger is surprisingly effective for broad, shallow dents on flat panels like doors and hoods. It works using atmospheric pressure — the suction cup creates a vacuum that pulls the metal outward.
What you need: A flat-bottomed cup plunger. Not a toilet plunger — the narrow flange can’t form a seal on sheet metal.
Step-by-step:
- Wash the dented area with warm, soapy water.
- While the surface is wet, coat the rubber rim of the plunger with soapy water.
- Press the cup firmly over the dent center to create a vacuum seal.
- Pull straight outward — perpendicular to the panel. Don’t pull at an angle (breaks the seal) and don’t push inward (increases air pressure and worsens the dent).
- If small high spots remain after the dent pops out, place a soft wooden dowel over the ridge and tap gently with a hammer to flatten.
For larger shallow dents where a standard suction cup can’t get a grip, you can build a simple vacuum rig using a plastic bucket and a household vacuum. Drill a hole matching your vacuum hose diameter in the bucket bottom, seal the rim with soapy water, press it over the dent, and turn on the vacuum. The distributed suction across a larger area pulls broad depressions out effectively.
Method 4: Fix a Dented Bumper with Boiling Water
Bumper covers on most modern cars are made from polypropylene — a thermoplastic that has excellent shape memory when heated. This is one of the most reliable DIY fixes available, provided your bumper is polypropylene.
Important caveat: Older steel bumpers coated in urethane, and certain models from Dodge, Mercedes, and Chevrolet with polyurethane bumper covers, don’t respond well. High heat can warp or crack them.
Boiling water method:
- Put on waterproof, heat-resistant gloves.
- Bring a large kettle to a rolling boil.
- Pour the boiling water slowly over the entire dent and surrounding area to heat the plastic through.
- Reach behind the bumper — through the inner fender liner or from underneath — and press the dent outward from behind.
- Work from the outer edges of the dent inward (“first in, last out”).
- Once the shape is restored, pour cold water over the exterior immediately to lock the bumper back into its factory shape.
Heat gun method (more precise):
- Keep a digital heat gun moving in circular motions 4–6 inches from the bumper surface.
- Heat for about one minute until the plastic feels warm and flexible.
- Press the dent outward from behind using a gloved hand, wooden rod, or the blunt end of a screwdriver handle.
- Hold a cool, damp microfiber towel flat against the exterior to quench and set the correction.
Never hold the heat gun still — you’ll bubble the clear coat or melt the plastic.
The 90/10 Rule: Why DIY Has a Ceiling
Here’s something the $30 dent puller kit ads won’t tell you. Professional PDR technicians follow what’s known as the 90/10 Rule: roughly 80–90% of a dent comes out with moderate effort. The last 10–20% — the part that makes the repair truly invisible — requires specialized line board lighting, precision micro-tapping, and years of trained hands-on experience.
Most DIY attempts stall out in that final refinement stage, leaving “high spots,” wavy reflections, or overstretched metal. Once sheet metal is stretched past its elastic limit, the crystalline structure is permanently deformed. At that point, you need body filler, paint work, and a much bigger bill.
| Factor | DIY Kit | Professional PDR |
|---|---|---|
| Upfront cost | $20–$50 | $150–$500 |
| Success rate | 15–20% on complex dents | 95–98% on eligible damage |
| Botched repair cost | $300–$800 | Covered by warranty |
| Time | 4–6 hours | 1–2 hours |
| Resale value impact | Negative (visible flaws) | Neutral/positive (preserves factory paint) |
| Insurance compatibility | May void coverage | Approved under comprehensive policies |
Choosing the Right Method at a Glance
Here’s your quick decision guide for how to remove small dents from your car based on the damage in front of you:
- Shallow, round ding on a flat steel panel with intact factory paint → Thermal shock or glue pulling
- Broad, shallow depression on a door or hood → Plunger pull
- Dented polypropylene bumper cover with no cracks or broken tabs → Boiling water or heat gun method
- Panel has prior aftermarket repaint → Skip DIY adhesive pulling entirely
- Dent on an aluminum panel (many newer trucks and luxury cars) → Call a professional PDR tech. Aluminum lacks the natural elastic memory of steel and is far more rigid — amateur attempts cause permanent warping
- Dent is deep, creased, on a body line, or smaller than a quarter → Professional PDR is the right call every time
Knowing how to remove small dents from your car is genuinely useful — and for the right kind of damage, these methods work. But knowing when a dent is beyond a weekend fix protects your paint, your panel, and your car’s resale value far more than any $40 kit ever could.