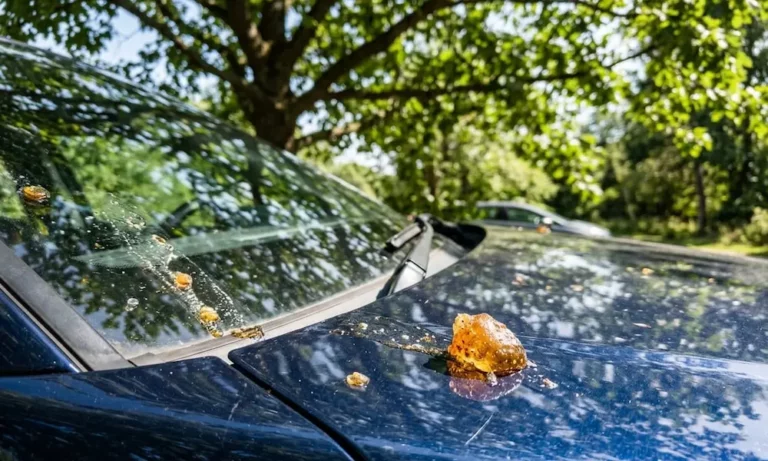
Tree sap on your car isn’t just annoying — it’s actively eating your paint right now. The good news? You’ve got options, and most of them involve stuff you already own. This guide walks you through every method, from fresh drips to baked-on amber blobs, so you can tackle it safely and confidently. Stick around — the method you choose really does matter.
Why Tree Sap Is Such a Big Deal for Your Car
Most people think tree sap is just a sticky mess. It’s actually a chemically aggressive resin packed with organic acids, terpenes, and sugars that bond hard to your clear coat.
Here’s where it gets worse. On a hot summer day, your car’s panels can hit 150°F. That heat softens the clear coat and lets the sap’s acids penetrate deeper into the paint matrix. Then at night, the sap cools and contracts. Repeat that cycle daily, and you get micro-cracks in your clear coat — permanent ones.
It’s not just drips from pine trees either. Aphids and scale insects drop sticky honeydew from tree canopies. Artillery fungus (yes, that’s real) fires tiny black spores from mulch directly onto your paint. Pollen hardens into microscopic abrasive crystals. Parking under trees is basically a slow-motion chemical attack on your car.
The 3 Stages of Sap Damage
Knowing what you’re dealing with changes how you treat it.
| Stage | What It Looks Like | What’s Happening | What to Do |
|---|---|---|---|
| Stage 1 – Fresh | Glossy, tacky, clear | Surface contact only — hasn’t bonded yet | Warm soapy water + polymer sealant |
| Stage 2 – Hardened | Dull, amber, rigid, dirty | Fully bonded; thermal cycles creating micro-fractures | Rubbing alcohol or commercial solvent + clay bar |
| Stage 3 – Etched | Crystalline or baked-on ring stain | Clear coat breached; acid has eaten into the paint | Machine polishing, compounding, or touch-up pen |
The earlier you catch it, the easier the fix. A fresh drip takes 30 seconds. A baked-on spot from last summer takes a whole afternoon.
What to Use (And What to Skip)
Before you grab anything under your kitchen sink, know what’s actually safe on car paint.
Products That Work Well
Isopropyl alcohol (70%–91%) is the go-to for most detailers. It dissolves sap fast, it’s cheap, and it’s safe if you don’t let it sit more than 30–60 seconds. You can grab it at any pharmacy.
Hand sanitizer works on the same principle. The gel consistency keeps it from evaporating instantly, which gives it a bit more dwell time on the spot. Keep a travel bottle in your glovebox.
Stoner Tarminator is the professional’s pick. Its microactive solvent formula breaks down complex hydrocarbons and it’s completely safe on factory clear coats. Available at AutoZone, Lowe’s, and Walmart.
Goo Gone Automotive uses a citrus-and-petroleum gel that clings to vertical panels. It’s safe on clear coats, chrome, and coated wheels — just wash it off thoroughly with soapy water after.
WD-40 is a surprisingly solid option. The low-viscosity petroleum blend penetrates under the sap and lifts it. Follow up with a concentrated car soap wash since it leaves a greasy residue.
Cooking oils, coconut oil, or even mayonnaise sound ridiculous but work well on sensitive or classic paint finishes. Zero chemical risk. Just wash the grease off properly afterward or it’ll attract dirt.
Products to Be Careful With
Distilled white vinegar dissolves fresh sap nicely on glass, but its acidic nature can dull clear coats if it dries on paint. Rinse it off fast.
Pure acetone will melt baked-on pine sap in seconds. It’ll also rapidly dissolve your clear coat if you’re not wiping it off immediately. High risk, fast hands required.
Baking soda paste is physically abrasive. It can scratch fine clear coats if you scrub hard. It’s better suited for glass.
Industrial lacquer thinner or paint thinner — just don’t. Collision repair experts are unanimous here: these will swell and haze your clear coat permanently.
How to Remove Tree Sap from Car Paint: Step-by-Step
Always work in a cool, shaded spot on a freshly washed car. Never treat hot panels.
Method 1: Hot Water and Car Shampoo (Best for Fresh Sap)
This is your first-line attack. Thermal softening breaks down fresh or lightly hardened sap without any chemicals.
- Heat water to about 140–160°F — hot but not boiling.
- Add two ounces of pH-neutral car shampoo and stir.
- Soak a microfiber wash mitt in the mixture for five minutes.
- Press it directly over the sap spot. Let it sit for five minutes without rubbing.
- Gently rub in circular motions with zero downward pressure.
- Rinse with cool water and dry with a clean microfiber towel.
Method 2: Isopropyl Alcohol (Best for Moderately Hardened Sap)
Rubbing alcohol is the most popular DIY method for a reason — it’s effective and forgiving.
- Soak a small section of microfiber cloth with 70%–91% rubbing alcohol. A cotton ball works too.
- Press it firmly on the sap spot. Don’t rub yet — let it dwell for 30 seconds.
- If the sap hasn’t softened, add more alcohol and wait another 30 seconds. Don’t exceed two minutes total.
- Dab or “roll” the softened sap off. Don’t scrub sideways — you’ll spread it.
- Wash the area with car shampoo, rinse, and dry.
- Re-wax the panel — alcohol strips wax protection.
Method 3: Commercial Solvent Like Tarminator (Best for Stubborn, Baked-On Sap)
- Make sure the panels are cool and shaded.
- Spray Tarminator onto your microfiber cloth, not directly on the panel. This keeps it off rubber trim and decals.
- Press the cloth onto the sap. Dwell for 30–60 seconds maximum.
- Wipe the dissolved sap away gently.
- Rinse with water, wash with car shampoo, and apply fresh wax or sealant.
Method 4: Clay Bar (Best for Leftover Residue and Rough Texture)
After chemical treatment, a clay bar physically lifts embedded particles that solvents alone can’t fully remove.
- Flatten an automotive clay bar into a 3-inch disc.
- Spray clay lubricant or soapy water generously over the area.
- Glide the clay in straight back-and-forth motions — not circular ones.
- Fold and knead the clay regularly to expose a clean surface.
- Wipe residue away, rinse, and dry.
- Apply fresh wax. Claying strips all existing wax from the paint.
Method 5: The Painter’s Tape Lift and Ice Glide (Best for Fresh, Sticky Spots)
Two clever low-impact options worth knowing:
- Painter’s tape lift: Press high-tack blue painter’s tape firmly over a fresh sticky spot. Pull it away quickly to lift the sap clean off without any solvents.
- Ice glide method: Apply soapy water to the panel, then glide a melting ice cube over the sap. The cold freezes and contracts the sap, making it pop off with minimal friction. Great for delicate areas near roof seams.
How to Remove Tree Sap from Your Windshield and Windows
Glass can handle more aggressive treatment than paint — but technique still matters.
The Lubricated Razor Blade Method
This is the fastest method for hardened sap on glass.
- Clean the glass with glass cleaner first.
- Spray a generous layer of glass cleaner or soapy water over the sap. Never scrape dry glass.
- Hold a brand-new single-edge stainless steel razor blade flat against the glass at a 45-degree angle.
- Slide it forward with light, steady pressure. It shaves the sap cleanly off.
- Don’t tilt the blade on its corners — that’s how you gouge the glass.
- Wipe residue away, then clean with ammonia-free glass cleaner like Stoner Invisible Glass.
One hard rule: Never use a razor blade on painted panels. It’ll gouge the clear coat instantly.
On the steel wool debate: Some detailers swear by 0000 steel wool on glass. But premium glass specialists warn it creates microscopic scratches that scatter headlight beams and create dangerous nighttime glare. Stick with a razor blade or synthetic clay instead.
The White Vinegar Soak
Distilled white vinegar works great on glass — the organic acid dissolves sugars in the sap without any scratch risk.
- Fill a spray bottle with pure distilled white vinegar.
- Spray it generously over the sap spots. Let it sit for 5–10 minutes.
- Wipe the softened sap away with a clean microfiber cloth.
- Wash with hot soapy water, rinse, and dry.
The Ice Method for Thick Sap Blobs
For thick, gummy chunks on glass, freeze them first.
- Hold an ice cube over the spot for a few minutes until the sap hardens and turns brittle.
- Use a plastic putty knife or plastic ice scraper to chip the sap off.
- Follow up with glass cleaner and a microfiber cloth.
Fixing the Damage Sap Leaves Behind
Getting the sap off is only half the job. The real question is what it left behind.
How to Fix Etching Rings
Even after full sap removal, you might see a cloudy or discolored ring where the acids ate into the clear coat. Here’s how to address it:
- Shallow etching: Use a dual-action machine polisher with a soft foam pad and a fine polish like Meguiar’s Ultimate Polish. Light pressure levels the surrounding clear coat and removes the haze.
- Deeper etching (still within clear coat): Two-step paint correction — a cutting compound first, then a finishing polish to restore gloss.
- Etching through the clear coat: Apply a touch-up paint pen and clear coat pen to seal the bare spot against rust.
- Extensive clear coat failure: You’re looking at wet sanding or a professional respray at a body shop.
Protecting Your Car Going Forward
Removing sap is a fix. Prevention is smarter.
- Wax every 3–4 months. A good carnauba wax or polymer paint sealant creates a slick barrier. Sap can’t bond easily to a waxed surface, so it washes off with warm water instead of baking on.
- Ceramic or graphene coatings give you the highest chemical resistance available for a DIY product. They create a hard, hydrophobic surface that keeps sap from bonding — protection lasting up to six months or longer.
- Paint Protection Film (PPF) is the ultimate option if you regularly park under trees. It’s a physical sacrificial layer that takes the hit so your factory paint doesn’t have to.
- Act fast. The single best thing you can do is remove sap the same day it lands. A 30-second wipe with a damp cloth today saves you two hours of polishing next month.