Wondering how to replace an AC compressor but don’t know where to start? This guide breaks down every critical step — from diagnosing the failure to recharging the system. Whether you’re a homeowner trying to understand the process or a technician brushing up on protocol, you’ll find what you need here. Stick around — skipping any step here can cost you thousands.
What Does an AC Compressor Actually Do?
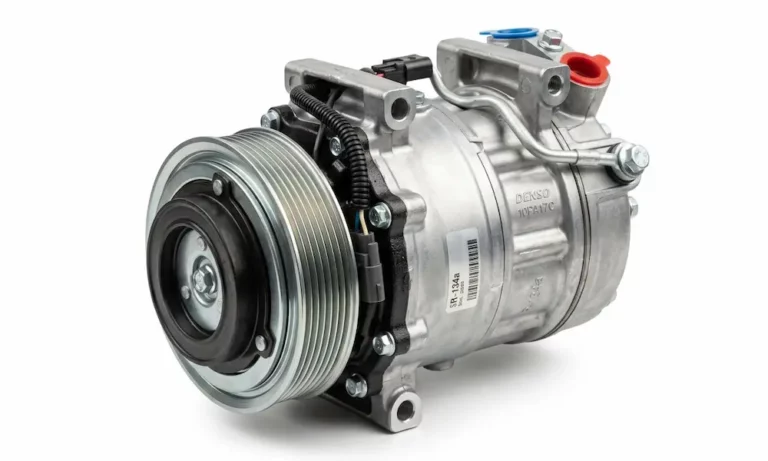
The compressor is the heart of your air conditioning system. It pressurizes the refrigerant gas, which kicks off the entire cooling cycle. When it fails, nothing else in the system works properly.
Compressors fail for several reasons:
- Electrical winding burnout from power surges or age
- Lack of lubrication from low oil levels
- Liquid slugging when refrigerant floods the compressor
- Contaminated refrigerant from a previous failed component
- Capacitor failure that mimics compressor problems
Before you learn how to replace an AC compressor, you must confirm the compressor is actually the problem — not a $25 capacitor.
Diagnose Before You Replace
Test the Electrical Windings First
Most single-phase residential compressors have three terminals: Common (C), Start (S), and Run (R). Use a digital multimeter to measure resistance across all three pairs.
Here’s the rule: S-R resistance = C-S + C-R resistance combined. If any reading shows infinite resistance (open circuit), the winding is broken. If you get continuity between a terminal and the copper housing, the motor has a ground fault. Both conditions mean you need a new compressor immediately.
Check the Run Capacitor Before Anything Else
A dead capacitor causes a compressor to hum loudly and shut off on thermal overload. This gets misdiagnosed as compressor failure constantly.
To test it safely:
- Disconnect power to the unit
- Discharge the capacitor using a 20,000-ohm, 5-watt resistor held with insulated pliers — never short it with a screwdriver
- Measure capacitance with a multimeter
- Compare your reading to the label — it must fall within ±6% of the rated microfarads
If it’s out of range, replace the capacitor first. You might just save yourself a full compressor replacement.
Understand the Legal Requirements
This section isn’t optional reading. Replacing an AC compressor involves federally regulated refrigerants, and handling them incorrectly carries serious civil penalties.
EPA Section 608 (Home and Commercial Systems)
Under Section 608 of the Clean Air Act, intentionally venting refrigerant is illegal. Technicians must hold EPA certifications divided into four categories:
| Certification Type | What It Covers |
|---|---|
| Type I | Small appliances with 5 lbs of refrigerant or less |
| Type II | High-pressure systems including residential AC |
| Type III | Low-pressure industrial chillers |
| Universal | All of the above |
For commercial systems holding 50+ lbs of refrigerant, leak repair must happen within 30 days of discovery.
EPA Section 609 (Automotive AC)
Car AC systems fall under a separate rule. Section 609 of the Clean Air Act requires technicians to be certified by an EPA-approved organization. Service shops must document where recovered refrigerant goes, and small refrigerant containers (under 20 lbs) can only be sold to certified technicians.
The 2025–2026 Refrigerant Transition
This is a big deal right now. The American Innovation and Manufacturing Act mandates an 85% phasedown of high-GWP refrigerants like R-410A (GWP: 2,088). New systems now use low-GWP alternatives like R-32 and R-454B, which are mildly flammable (A2L classification).
What this means practically:
- Old systems can’t be retrofitted to use new refrigerants
- New systems have built-in leak detection and mitigation boards that shut the compressor down if refrigerant concentration hits 25% of the lower flammability limit
- Technicians now need spark-resistant vacuum pumps and left-hand thread recovery cylinders for A2L refrigerants
Recover the Refrigerant — No Exceptions
Before you touch any physical components, you must recover all refrigerant from the system. This applies to both home AC units and vehicles.
Connect a manifold gauge set to the service ports and route the hoses to a certified recovery machine. The machine pumps the refrigerant into a Department of Transportation-approved recovery cylinder. Never fill recovery cylinders beyond 80% capacity — liquid refrigerant expands with heat, and an overfilled cylinder can rupture.
If the compressor burned out, the recovered refrigerant is contaminated with acids and metal debris. It can’t be recycled. It goes to an EPA-approved reclamation facility for processing or destruction.
Remove the Failed Compressor
Automotive Compressor Removal
Automotive compressors connect to the engine via a serpentine belt. Follow these steps:
- Disconnect the negative battery terminal first
- Release belt tension and slip the belt off the clutch pulley
- Unplug the clutch coil and pressure switch connectors
- Unbolt the refrigerant lines (suction and discharge)
- Cap the open lines immediately to block moisture from entering
- Remove mounting bolts and extract the compressor
Note any spacers or alignment brackets — you’ll need them for reinstallation.
Home/Commercial Compressor Removal
Residential compressors are hermetically sealed inside the outdoor condensing unit. Cut all high-voltage power at the disconnect box before doing anything.
Unlike automotive systems with threaded fittings, stationary compressors use brazed copper connections. You’ll need an oxy-acetylene torch to melt the silver braze and free the suction and discharge lines. Once the lines are clear, remove the vibration-dampening mounting bolts and lift the compressor out.
Always Replace These Components at the Same Time
This is non-negotiable. Installing a new compressor without replacing these parts will void your warranty and likely destroy the new unit.
Filter Drier or Accumulator: The desiccant core inside these components absorbs moisture. Once the system is opened to air, the desiccant saturates immediately. If the old compressor failed mechanically, the drier is also packed with metallic debris. Major manufacturers require documented proof that the drier was replaced to honor warranty claims.
Metering Device (TXV or Orifice Tube): Debris from a failed compressor travels through the refrigerant lines and lodges in the microscopic orifices of expansion valves. Fixed orifice tubes must be replaced entirely since they double as debris screens. TXVs need thorough inspection and often replacement.
Condenser (If Applicable): Modern parallel-flow condensers have micro-channels too small to flush effectively. If debris from a burnout circulated through the system, the entire condenser may need replacement.
Clean Up a Burnout Before Installing Anything New
If the compressor failed from an electrical short or severe overheating, the system has a burnout on its hands. The heat breaks down refrigerant and oil into carbon sludge and corrosive acids.
Installing a new compressor into an acidic system guarantees a second burnout — usually within weeks. Here’s the cleanup process:
- Test an oil sample with a chemical acid test kit
- Flush the evaporator and condenser coils with an approved solvent pushed by pressurized dry nitrogen
- Install an oversized acid-removal liquid-line drier (activated alumina core)
- Install a temporary suction-line drier upstream of the new compressor intake
- Run the system and monitor pressure drop across the suction drier
- Replace the suction drier as many times as needed until it runs clean
- After 48 hours of operation, retest an oil sample — if the acid test returns negative, the cleanup is done
Braze the New Compressor In (Stationary Systems)
Brazing requires heat exceeding 1,000°F. Done wrong, it destroys the system from the inside.
Nitrogen Purging Is Mandatory
Without a dry nitrogen purge flowing through the copper pipes during brazing, oxygen reacts with the heated copper to form black cupric oxide scale. This scale flakes off, travels with the refrigerant, and clogs the expansion valve — killing the new compressor quickly.
Flow dry nitrogen at 2–3 cubic feet per hour through the pipe interior while heating and while the joint cools. Don’t stop the purge until the copper returns to ambient temperature.
| Brazing Practice | What Happens If You Skip It | Fix |
|---|---|---|
| Nitrogen purge | Black oxide scale clogs metering devices | Flow nitrogen at 2–3 CFH throughout entire process |
| Heat blocking putty | Damages TXVs, nylon seals, compressor wiring | Wrap sensitive components before applying torch |
| Clean pipe preparation | Weak bond, refrigerant leaks | Sand to bare metal, ream pipe ends before heating |
Balance the Oil Charge Correctly
Oil balancing is one of the most overlooked steps when learning how to replace an AC compressor. Too little oil burns bearings. Too much coats the heat exchangers and kills efficiency.
The math is straightforward:
- Drain the old compressor into a graduated cylinder — note the exact volume
- Drain the new compressor completely of its factory shipping oil
- Add fresh oil equal to the volume you drained from the old unit
- Add extra oil for each replaced component (driers, condensers) based on manufacturer specs
For example: old compressor held 3 oz, new drier requires 2 oz → add 5 oz total to the new compressor.
Automotive systems use Polyalkylene Glycol (PAG) oil — extremely moisture-sensitive, so keep containers sealed. Residential/commercial systems use Polyolester (POE) oil — its solvent properties make internal cleanliness even more critical.
Before powering up, rotate the compressor’s clutch hub or drive shaft by hand 10–15 times. This pre-lubricates dry bearings and prevents hydraulic lock on startup.
Pull a Deep Vacuum and Verify It Holds
Atmospheric air contains moisture and non-condensable gases. Left in the system, they cause pressure spikes, reduce cooling capacity, and react with the oil to form hydrofluoric or hydrochloric acid.
Connect a dual-stage vacuum pump using large-diameter hoses. The goal isn’t just removing air — it’s lowering internal pressure until moisture boils off and gets extracted.
Target depth: 500 microns or lower. Systems with POE oil: 250 microns.
Use a digital micron gauge placed far from the pump to read true system pressure. Once you hit target, close the manifold valves, shut the pump off, and watch the decay test:
| Micron Gauge Behavior During Decay Test | What It Means | What to Do |
|---|---|---|
| Rises slightly, holds below 1,000 microns | System is dry and tight | Proceed to refrigerant charging |
| Rises rapidly, plateaus around 20,000–25,000 microns | Moisture is still outgassing | Resume pumping; consider nitrogen sweep |
| Rises continuously toward atmospheric pressure | Physical leak present | Pressurize with nitrogen, find and fix the leak, restart evacuation |
For heavily contaminated or burned-out systems, use the triple evacuation method — pull vacuum, break with dry nitrogen, repeat three times, finish with a final deep pull.
Charge the System by Weight
Guessing the refrigerant charge damages the new compressor. Too much refrigerant floods it with incompressible liquid. Too little starves the motor of the vapor it needs for cooling.
Place the refrigerant cylinder on an electronic scale. Charge to the exact weight stamped on the unit’s data plate. For split systems with long line sets, calculate additional refrigerant based on pipe length and diameter.
Important: Blended refrigerants must be charged as liquid only. Charging them as vapor causes fractionation — the chemical components separate and the refrigerant’s composition, safety profile, and performance all change permanently.
Once charged, monitor superheat and subcooling with digital manifolds:
- Superheat confirms only vapor enters the compressor — no liquid slugging
- Subcooling confirms a solid column of liquid reaches the expansion valve
Scan all brazed joints and fittings with an electronic leak detector or UV light as a final check.
Protect Your Warranty With Proper Documentation
The compressor is the most expensive component in the system, and manufacturers take warranty compliance seriously. Most warranties extend from 5 years (unregistered) to 10 years or more when properly registered.
Actions that void the warranty immediately:
- No documented proof the filter drier was replaced
- Skipping metering device replacement
- No evidence of system flush after a burnout failure
- Wrong oil type or viscosity
- Work performed by an uncertified individual
Your service invoice must document the specific parts replaced, micron levels achieved during evacuation, oil volume added, refrigerant weight charged, and technician certification. This protects both the warranty and satisfies EPA recordkeeping requirements under Section 609.
Knowing how to replace an AC compressor correctly means following every step in sequence — no shortcuts, no skipped components. The process is demanding, but a properly executed replacement means a system that runs efficiently for years.