Struggling to get Android Auto working? Whether it’s a blank screen, a dropped connection, or you’ve never set it up before, this guide walks you through everything. From wired and wireless setup to voice commands and fixing common errors — it’s all here. Read to the end and you’ll have it running smoothly.
What Is Android Auto (And What Does It Actually Do)?
Android Auto mirrors compatible apps from your Android phone onto your car’s built-in display. Think Google Maps, Spotify, and text messages — all on your dashboard in a clean, easy-to-read layout.
Google built it specifically to cut down on distracted driving. Instead of squinting at your phone, you get a big, simplified interface designed for quick glances and voice control.
Does Your Phone and Car Support It?
Before you touch a USB cable, check these requirements.
For wired Android Auto:
- Android 9.0 (Pie) or higher
- A compatible car display or certified aftermarket head unit
- An active data plan
For wireless Android Auto:
- Android 11.0 or higher (some Android 10 Samsung/Google devices also work)
- A phone with a 5GHz Wi-Fi radio
- Bluetooth enabled on your phone
Most cars sold in the US since 2016 include built-in support. If your car is older, you can add an aftermarket head unit from brands like Pioneer or Kenwood.
Here’s a quick comparison of both connection types:
| Connection Mode | Minimum Android Version | What You Need |
|---|---|---|
| Wired | Android 9.0+ | USB data cable under 3 feet, compatible car display |
| Wireless | Android 11.0+ (exceptions apply) | Bluetooth + 5GHz Wi-Fi, wireless-enabled head unit |
How to Set Up Android Auto With a USB Cable
This is the most reliable way to connect, especially for first-time setup.
Step 1: Park the car, put it in Park (P), and turn on the ignition and infotainment system fully.
Step 2: Plug one end of a quality USB data cable into your car’s USB port. Look for the port closest to the main display — it’s often marked with a small smartphone icon.
Step 3: Connect the other end to your phone.
Step 4: Your phone will show on-screen setup prompts. If it asks you to update Android Auto first, do that through the Google Play Store.
Step 5: Accept the prompts on both your phone and car screen. Android Auto will launch automatically.
If the interface doesn’t appear right away, tap the Android Auto icon in your car’s app menu manually.
Fix the “Charging Only” USB Problem
If your phone keeps connecting in charging mode instead of data mode, here’s the fix:
- Open Settings → About Phone
- Tap Build Number seven to ten times to unlock Developer Mode
- Go back to Settings → System → Developer Options
- Find Default USB Configuration under the Networking section
- Select File Transfer / MTP
This tells your phone to default to data transfer every time you plug in, so you won’t have to change it manually again.
How to Set Up Wireless Android Auto
Wireless Android Auto uses Bluetooth for the initial handshake, then switches to a 5GHz Wi-Fi connection for screen projection. Here’s how to get it running.
Step 1: On your phone, make sure Bluetooth, Wi-Fi, and Location Services are all turned on.
Step 2: On your car’s infotainment screen, activate Bluetooth discovery mode. This is usually found under “Add Phone” or by holding the voice command button on the steering wheel.
Step 3: When your phone detects your car’s Bluetooth, start pairing. Confirm the matching numerical codes on both screens.
Step 4: Accept all permissions on your phone. These let your car display your contacts, read messages, and run media apps.
Step 5: The system automatically uses the Bluetooth connection to hand off your Wi-Fi credentials. Your phone then connects to the car’s 5GHz local Wi-Fi network.
Step 6: Android Auto launches on your dashboard within seconds.
After the first setup, your phone reconnects automatically every time you start the car — as long as Bluetooth and Wi-Fi stay on.
Heads up on battery drain: Wireless projection puts heavy demands on your phone. On long trips, plug your phone into a charging cradle or wireless pad to avoid a dead battery mid-route.
Setting Up a Wireless Adapter for Older Cars
Your car only has a wired USB port but you want wireless? Third-party adapters like AAWireless solve that problem.
- Start your car and let the head unit fully load
- Plug the adapter into your car’s USB port
- Enable Wi-Fi on your phone — don’t connect to anything yet
- Go to Bluetooth settings on your phone and pair with the adapter
- Your phone will prompt you to “Use Android Auto” — tap confirm
- The adapter transfers Wi-Fi credentials and establishes a persistent direct connection
One limitation: while using one of these adapters, your phone’s Wi-Fi stays dedicated to the projection feed. You won’t be able to connect to other Wi-Fi networks at the same time.
Understanding the Android Auto Interface
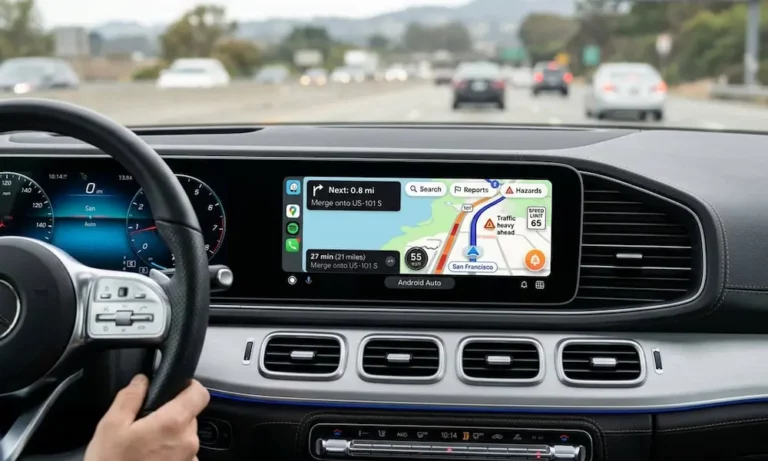
Once connected, the screen is divided into a few key zones:
- Primary App Display — the main area showing your nav map or media player
- Dynamic Taskbar — sits at the bottom or side for quick app switching
- Status Area — shows the time, signal strength, and battery level
- Notification Circle — shows unread messages and missed calls at a glance
Split-Screen vs. Taskbar Widgets
Android Auto gives you two ways to multitask without taking your eyes off the road.
Split-screen view divides your dashboard into tiles. Navigation takes the largest area, while a smaller tile shows your media player. A third pane can display notifications or suggestions.
Taskbar Widgets keep navigation full-screen while compressing your media controls into a small bar at the bottom. To turn this on, go to:
Settings → Connected Devices → Connection Preferences → Android Auto → Taskbar Widgets
The Android Police team found this feature completely changes the driving experience — navigation stays front and center while you still control your music with a single tap.
The New Material 3 Interface
Google’s latest update brings a redesigned interface that adapts to unusual screen shapes — including circular and ultra-wide displays. Key changes include:
- Edge-to-edge layouts with no letterboxing
- Bolder, more legible fonts with smoother animations
- Enhanced 3D Google Maps with lane-level guidance
- A widget pane you can swipe to access
If your car’s parked at an EV charging station, you can also stream YouTube and other video apps in full HD at 60fps. The moment you start moving, the video cuts automatically while audio keeps playing.
Android Auto Voice Commands That Actually Save Time
Voice control is the safest way to use Android Auto while driving. You trigger it three ways:
- Say “Hey Google” or “Ok Google”
- Press the voice button on your steering wheel
- Tap the microphone icon on the taskbar
Here’s a breakdown of the most useful commands, including the newer Gemini AI options:
| Category | Standard Commands | Gemini AI (Conversational) |
|---|---|---|
| Navigation | “Navigate to [address]” / “Find nearest gas station” | “Get me home but skip the toll roads today” |
| Traffic | “What’s my ETA?” / “Show alternate routes” | “Report a pothole on the highway” |
| Calls & Texts | “Call [name]” / “Read my messages” | “Tell [name] I’m stuck in traffic and running late” |
| Music | “Play my Workout playlist on Spotify” / “Next song” | “Put on something upbeat for a road trip” |
| Brainstorming | “What’s the weather in Chicago?” | “Hey Google, let’s talk live” + full back-and-forth conversation |
Gemini Live is the standout feature here. Say “Hey Google, let’s talk live” and you can have a real back-and-forth conversation — planning a road trip, drafting a message, or brainstorming ideas — without re-triggering the assistant each time.
The physical keyboard locks out while you’re moving, so voice dictation is how you type destinations and messages on the go. If you need finer control, Voice Access lets you say things like “Show grid” to interact with any element on screen by number.
Fixing Android Auto When It Won’t Connect
Most problems fall into a few predictable categories. Work through these in order.
Check Your Cable First
A bad cable causes more problems than anything else. Use a data-capable USB cable that’s under 3 feet long — ideally the one that came with your phone. Skip extension cables and USB hubs entirely.
Also, clean out your phone’s USB port. Lint buildup stops pins from making clean contact. If your car has multiple USB ports, try the one closest to the screen.
Clear the App Cache
Corrupted temporary files often cause freezes and failed launches.
- Go to Settings → Apps → Android Auto
- Tap Storage & Cache
- Hit Clear Cache
If that doesn’t fix it, tap Clear Storage to fully reset the app. You’ll need to redo the pairing process, but it often solves persistent issues.
Fix Multi-Car Pairing Conflicts
Using your phone with more than one car? Old pairing data can block new connections.
- Unplug your phone and turn off the vehicle
- Go to Settings → Connected Devices → Connection Preferences → Android Auto → Previously Connected Cars
- Tap the three-dot menu and select “Forget All Cars”
- Reconnect and start fresh
Check for App Restrictions
Some phones block Android Auto through parental controls or screen time settings. Check Settings → Digital Wellbeing / Screen Time → Content & Privacy Restrictions → Allowed Apps and make sure Android Auto is enabled.
Fix Android 16 Connection Issues
If you updated to Android 16 and Android Auto stopped connecting, there’s a software patch available through Superlink/EveLink:
- Disconnect your phone from Android Auto and close your car’s Bluetooth menu
- Open the Superlink app on your car’s touchscreen
- Download EveLink from the Play Store on your phone
- In the app, go to Device → Add → WiFi Direct and select your car’s network
- A dialog box reading “Android 16 Auto Connect Problem fixed” will appear — tap OK
- Switch back to Android Auto mode and reconnect via Bluetooth
If the software patch doesn’t work, an external AAWireless adapter bypasses the issue at the hardware level by letting you manually change the 5GHz Wi-Fi channel through its companion app.
Hard Reset Your Infotainment System
If everything else fails and your car’s screen is frozen or not detecting any device, you need a full power cycle.
For Chevrolet vehicles with OnStar:
- Turn off the engine completely
- Power off your phone
- Open and close the driver’s door
- Watch the OnStar LED on the overhead console — wait for it to go out completely (5–15 minutes)
- Open and close the door again
- Turn your phone back on, start the car, let it idle for 15–20 seconds, then reconnect
For other vehicles, access System Settings on the infotainment screen and run a Master Reset to clear the vehicle’s configuration. Re-pair from scratch after the reset completes.