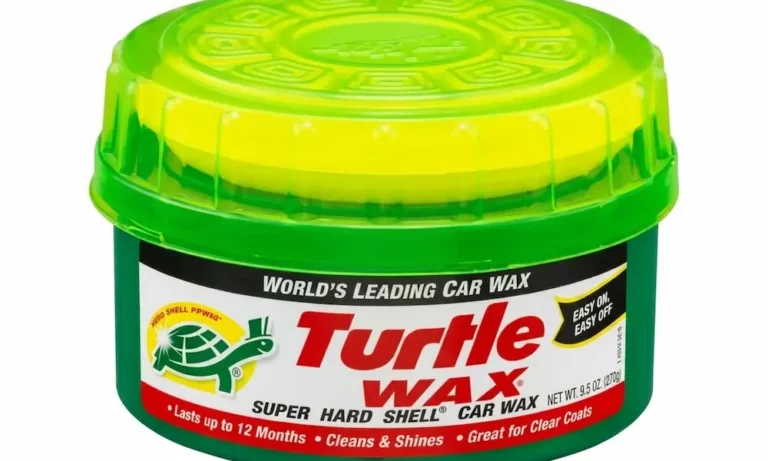
Cloudy headlights aren’t just ugly — they’re a genuine safety hazard. The good news? You don’t need a pro or a $300 replacement. This guide walks you through exactly how to use Turtle Wax headlight lens restorer to get clear, bright headlights again. Stick around to the end — the sealing step is where most people go wrong.
Why Your Headlights Turn Yellow in the First Place
Your headlights aren’t glass. They’re polycarbonate plastic, and from the factory, they come with a UV-protective clear coat baked right on.
Over time, that coating breaks down from:
- UV radiation — the biggest culprit
- Heat cycling from your bulbs
- Road debris and sand scratching the surface
- Bug splatter and acid rain eating through the coating
Once the coating fails, bare plastic hits the air and oxidizes fast. The result? A yellowed, foggy lens that scatters light instead of projecting it.
Here’s the kicker: degraded headlights reduce light output dramatically, cutting your visibility at night and creating glare for oncoming drivers. That’s not a cosmetic problem — it’s a safety one.
Which Turtle Wax Kit Should You Buy?
Turtle Wax makes three main headlight restoration kits. Here’s a quick breakdown:
| Kit | Best For | Sealing Tech | How Long It Lasts |
|---|---|---|---|
| Standard Kit (T-240KT) | Heavy oxidation | Acrylic resin wipes | 4–6 months |
| Hybrid Solutions Kit | Moderate to heavy oxidation | Ceramic-infused resin | Up to 12 months |
| Speed Kit | Any oxidation level | Ceramic acrylic (Heal & Seal) | Up to 12 months |
If your lenses are deeply yellowed and rough to the touch, the Standard Kit’s four-stage sanding block gives you the most control. If you want longer-lasting protection with less fuss, the Hybrid Solutions or Speed Kit are worth the extra few dollars.
What You Need Before You Start
Grab these before you begin:
- The Turtle Wax headlight lens restorer kit
- Automotive shampoo or car wash soap
- Clean microfiber towels (at least three)
- Automotive masking tape
- Nitrile gloves (the kit includes one glove, but wear them throughout)
- Safety glasses
- A spray bottle with clean water (for extra lubrication)
Step 1: Check the Weather and Find Shade
This matters more than people think.
Work in shade with an ambient temperature between 70°F and 85°F. The lens must be cool to the touch. If you apply the sealant in direct sunlight or on a hot lens, the chemicals flash too fast. You’ll end up with streaks, uneven coverage, and a sealant that won’t bond properly.
Also, if you’re using the ceramic acrylic wipes from the Hybrid Solutions or Speed Kit, skip the job if humidity is above 80%. Moisture in the air prevents the ceramic resin from curing correctly.
Step 2: Clean and Mask the Headlights
Wash the headlamps and the surrounding painted panels with automotive shampoo. You’re removing grit, bug residue, and road film. Any debris left on the lens will get dragged under your sanding pad and create deep gouges.
Dry everything completely with a clean microfiber towel.
Next, apply automotive masking tape around the entire border of each headlamp. Cover every painted panel, rubber seal, and trim piece right up to the lens edge. On modern cars with tight body lines, use two or three overlapping layers of tape for extra protection. The abrasive pads will destroy your paint if your hand slips even slightly.
Step 3: Test Your Headlights First (This Step Matters)
Before you grab a sanding pad, run a quick test. It could save you 20 minutes of unnecessary work.
- Put a small amount of the Lens Clarifying Compound on a clean microfiber cloth
- Rub it firmly onto a cloudy section of the lens for about a minute
- Buff off the residue and look closely
What you see tells you what to do next:
- Lens turns completely clear → You’ve got light oxidation. Skip the sanding pads entirely and go straight to polishing the whole lens with the compound, then seal it.
- Lens stays cloudy, yellow, or rough → You’ve got heavy oxidation. You need the full multi-stage sanding process below.
This test also confirms whether the damage is on the outside of the lens or the inside. Internal cloudiness — from moisture trapped inside the housing or a burnt bulb — won’t respond to any external restoration kit. If wiping the outside does nothing at all, the damage is internal, and the lens needs professional attention or full replacement.
Step 4: The Multi-Stage Wet Sanding Process
This is the heavy lifting. Every stage depends on keeping the lens and the pad thoroughly wet throughout. Dry sanding generates friction heat that can melt or warp the polycarbonate. Don’t let that happen.
Spray the lens and the pad generously with the provided lubricant (or clean water) before each stage, and keep re-spraying as you work.
Pad 1 — Heavy Removal (2400 Grit, Green Pad)
Apply firm, consistent pressure and scrub the lens using strictly horizontal strokes. Keep everything soaked.
You’ll see a milky yellow-brown slurry appear — that’s the oxidized plastic coming off. Keep going until the whole lens has a uniform, frosty white appearance with zero remaining yellow patches. This is your target. Wipe the lens clean and inspect it.
Pad 2 — First Cross-Hatch (3200 Grit, Tan Pad)
Flip to the tan side of the pad and re-lubricate everything. Switch to strictly vertical strokes — perpendicular to what you just did.
This cross-hatch technique is how you confirm the previous scratches are fully leveled. You’re replacing coarser marks with finer ones. Work for about a minute and wipe clean.
Pad 3 — Pre-Polishing Refinement (Teal Pad)
Flip to the teal pad. Switch back to horizontal strokes and re-lubricate. Moderate pressure, one full minute, covering every part of the lens including the edges and curves.
The lens will start to feel smooth and slick. The heavy frostiness will begin to lighten into a translucent haze.
Pad 4 — Final Micro-Abrasion (8000 Grit, Purple Pad)
Flip to the purple pad. Switch to vertical strokes one final time. Keep the lubrication heavy — this ultra-fine grit needs the fluid to float the particles across the surface.
After one minute, wash the lens with clean water and dry it completely. You should see a fine, even micro-haze with no distinct directional scratches. If you still see deep scratches, go back and repeat pads 3 and 4. Don’t skip ahead.
Step 5: Polish with the Clarifying Compound
The sanding is done, but the lens is still dull. Now you polish out those micro-scratches to restore full optical clarity.
Apply a generous dollop of Lens Clarifying Compound to a clean microfiber cloth. Press firmly and scrub the lens using overlapping circular motions or vigorous back-and-forth strokes. Keep at it for one to two minutes — the frosty haze will visibly disappear as you work.
Let the compound dry to a light, powdery haze, then buff it off with a fresh, dry microfiber cloth. The lens should now look close to factory-new clarity — clear enough to see the reflectors inside without distortion.
If any dull spots remain, apply a second round of compound and keep polishing those areas before moving on.
Using a machine polisher? Apply the compound to a foam pad at 1,000–1,500 RPM and work in slow, overlapping passes. Keep the pad moving constantly — stopping in one spot will burn the plastic.
Step 6: Apply the Sealant (Don’t Skip This)
This is the most critical step. You just stripped away every trace of the original UV-protective coating along with the oxidation. If you leave the lens bare, it’ll yellow again within weeks.
The sealant creates a new protective barrier. The process depends slightly on which kit you’re using.
Standard Kit — Two-Part Acrylic Sealant
Finish polishing both headlights completely before opening any sealant packets. The wipes start curing the moment you open them, so you need to move fast.
- Put on your glove — skin oils on the lens will ruin the bond
- Open the Lens Base Coat Wipe and sweep it across the first lens in overlapping horizontal or vertical strokes, then immediately move to the second lens using the same wipe
- Let both lenses flash dry for a few minutes
- Open the Lens Sealing Wipe and repeat the same process on both lenses
Then step back and don’t touch them. The sealant needs a full 24 hours to cure. No washing, no wiping, no rain. If moisture hits the lens before it’s cured, you’ll get white spots and streaking that you’ll have to polish off and redo.
Hybrid Solutions or Speed Kit — Ceramic Acrylic Wipe
These kits use a single ceramic wipe instead of the two-part system. Open the wipe and apply it to both lenses in quick, overlapping strokes. It’ll feel dry to the touch within 3–10 minutes, but give it the full 24-hour cure before any water contact.
Want extra protection? These kits typically include a second ceramic wipe. After the first coat has cured for 24 hours, apply the second wipe as a top coat. This layering approach pushes the protection well beyond the 12-month mark in most climates.
Once both lenses have had a few minutes to dry, carefully peel off the masking tape. Wipe any compound splatter off the painted panels with a damp microfiber cloth before it has a chance to dry.
Quick Troubleshooting Guide
| Problem | Cause | Fix |
|---|---|---|
| Deep scratches still visible after polishing | Finer grit pads weren’t used long enough | Repeat pads 3 and 4, then re-polish with compound |
| Lens still yellow after compounding | Pad 1 didn’t remove all the oxidation | Restart sanding from Pad 1 with more pressure and time |
| Sealant streaks while applying | Applied in sun or heat — solvents flashed too fast | Work in shade at 70–85°F; if dry streaks appear, polish off and reapply after 24 hours |
| Sealant stays tacky or turns milky | Humidity too high or lens got wet during cure | Move to a dry garage; protect from dew and rain for 24 hours |
| No improvement at all despite heavy sanding | Damage is internal, not external | External restoration won’t work — lens needs internal cleaning or full replacement |
How to Keep Your Headlights Clear Longer
The restoration won’t last forever — no wipe-on sealant matches a factory-baked clear coat. But you can extend it significantly.
- Wash regularly with pH-neutral car shampoo. Bug splatter and road salt eat through the sealant fast.
- Add a spray wax or ceramic detailing spray over the headlights after each wash. It acts as a sacrificial layer that takes the UV damage before the sealant does.
- Catch re-oxidation early. When a light haze starts returning months later, don’t wait. A quick pass with the Clarifying Compound on a microfiber cloth removes superficial oxidation in minutes — no sanding required.
Keep up with those simple habits and your headlights will stay clear for far longer than the kit’s stated lifespan.