
Picking the wrong hitch class is a costly mistake — and a dangerous one. Whether you’re hauling a boat, a camper, or heavy equipment, the difference between a Class 3 and Class 4 hitch matters more than most people think. This guide breaks down everything you need to know so you can tow with confidence and stop second-guessing yourself at the hitch aisle.
What Makes a Hitch “Class 3” or “Class 4”?
Both classes fall under SAE J684, the engineering standard that governs trailer hitch design and testing in the U.S. This isn’t just a label slapped on a piece of steel. Every rated hitch goes through fatigue testing — think hundreds of thousands of stress cycles simulating potholes, hard braking, and constant load tension — before it earns its class rating.
The class tells you two things:
- How much the trailer can weigh (Gross Trailer Weight or GTW)
- How much downward force the tongue can push (Tongue Weight or TW)
Both numbers matter. Ignore either one and you’re asking for trouble.
Class 3 vs Class 4 Hitch: The Core Numbers
Here’s where most people start — and honestly, where most decisions get made:
| Hitch Metric | Class 3 | Class 4 |
|---|---|---|
| Max Gross Trailer Weight | 3,500 – 8,000 lbs | 5,000 – 12,000 lbs |
| Max Tongue Weight | 300 – 800 lbs | 500 – 1,200 lbs |
| Receiver Opening | 2″ x 2″ | 2″ x 2″ |
| Standard Hitch Pin | 5/8″ | 5/8″ |
| Typical Vehicle | Midsize SUVs, half-ton trucks | Full-size trucks, HD SUVs |
Notice something? Both classes share the same 2-inch receiver opening. That’s the detail that trips people up. Just because an accessory fits doesn’t mean it’s rated for the load.
What Is Tongue Weight and Why Should You Care?
Tongue weight is the downward force your trailer’s coupler pushes onto the hitch ball. The sweet spot is 10–15% of your total trailer weight.
Here’s why it matters:
- Too little tongue weight → trailer sways side to side like a pendulum. That’s terrifying at highway speeds.
- Too much tongue weight → the rear of your vehicle sags, the front lifts, and your steering gets sloppy.
A Class 3 hitch handles up to 800 lbs of tongue weight. A Class 4 handles up to 1,200 lbs. If your trailer is pushing more than that onto the ball, you’re in dangerous territory — no matter what the hitch label says.
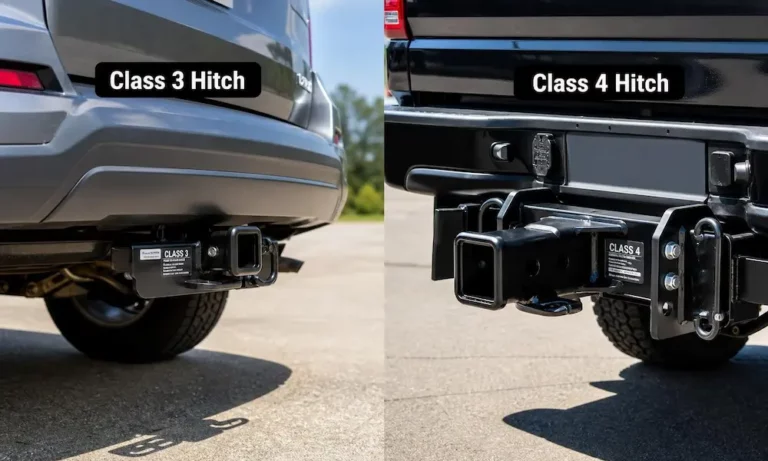
How Class 3 and Class 4 Hitches Are Built Differently
They look nearly identical from the outside. The real differences live inside the steel.
Class 3 Hitch Construction
A Class 3 hitch uses square or round steel tubing for the main body, welded to contoured side plates that bolt to your vehicle’s frame. The receiver opening has a reinforced collar to resist deformation under a heavy ball mount. It’s light enough to handle easily during installation, but strong enough for several tons of load.
Class 3 hitches typically use 4–6 frame mounting points. That’s plenty for the loads they’re designed to carry.
Class 4 Hitch Construction
A Class 4 hitch uses thicker-walled steel, sometimes with forged components in high-stress areas. The side plates are longer and attach to 6–8 frame mounting points to spread the load across more of the vehicle’s structure.
That extra material is what keeps a 10,000-pound trailer from bending your hitch on the first bridge expansion joint you hit.
The Bottom Line on Build Quality
| Feature | Class 3 | Class 4 |
|---|---|---|
| Frame Mounts | 4–6 points | 6–8 points |
| Steel Thickness | Standard | Reinforced/Thicker |
| Receiver Collar | Reinforced | Heavily Reinforced |
| Weight Distribution Ready | Yes | Yes |
| Common Ball Size | 2″ | 2″ or 2-5/16″ |
| Electrical Connector | 4-pin or 7-pin | Almost always 7-pin |
Which Vehicles Use Class 3 vs Class 4?
This is where the rubber meets the road — literally.
Class 3 Vehicles
Class 3 hitches work with the vehicles most Americans actually drive:
- Ford Explorer, Chevrolet Tahoe, Jeep Grand Cherokee
- Half-ton pickups (F-150, Ram 1500, Silverado 1500)
- Most minivans and larger crossovers
These vehicles often come with a factory tow package that includes the hitch, wiring, and sometimes a transmission cooler. For the majority of towing tasks — utility trailers, personal watercraft, mid-size campers — a Class 3 is all you need.
Class 4 Vehicles
Class 4 hitches need body-on-frame vehicles with serious structural backbone:
- Three-quarter-ton and one-ton trucks (F-250, Ram 2500, Silverado 2500HD)
- Full-size heavy-duty SUVs (Suburban, Expedition Max)
Here’s the critical part: you can’t just bolt a Class 4 hitch to any vehicle and expect it to work. If your vehicle’s frame isn’t built for it, you risk frame distortion or catastrophic mounting failure. A stronger hitch doesn’t fix a weak frame.
The Weight Distribution Factor
Weight distribution (WD) is the game-changer in the Class 3 hitch vs Class 4 conversation.
A WD system uses spring bars to redistribute tongue weight across all axles — front and rear — instead of dumping it all on the hitch ball. This does two things:
- Levels out the vehicle so headlights point at the road, not oncoming drivers
- Restores proper steering and braking feel
The result? Both classes get a significant capacity boost when you add a WD system:
| Setup | Class 3 GTW | Class 4 GTW |
|---|---|---|
| Weight Carrying (standard) | 5,000 – 6,000 lbs | 10,000 lbs |
| Weight Distributing (with WD) | 8,000 – 10,000 lbs | 12,000 – 14,000 lbs |
A Class 3 hitch with a quality WD system can handle what a basic Class 4 setup manages without one. That’s worth knowing before you spend more money than necessary.
Ball Mounts, Hitch Pins, and Hitch Balls: Don’t Mix Classes
Here’s where people get into trouble. Because both classes share a 2-inch receiver, it’s tempting to mix and match accessories. Don’t.
Ball Mounts
Class 3 and Class 4 ball mounts look similar but differ in steel thickness. Using a Class 3 ball mount in a Class 4 setup with a 10,000-pound trailer is genuinely dangerous — the mount can shear or bend under load.
Hitch Balls
- Class 3 towing → 2-inch ball (rated to ~8,000 lbs)
- Class 4 towing → often requires a 2-5/16 inch ball for heavy-duty trailer couplers
A coupler and ball mismatch — like running a 2-5/16″ coupler on a 2″ ball — means your trailer can separate from your vehicle while moving. That’s not a risk worth taking.
Hitch Pins
Both classes use a standard 5/8-inch hitch pin. However, some Class 4 hitches have thicker outer plates, which means you’ll need a longer pin to get through cleanly. Always check usable length before buying.
Safety Chains, Brake Controllers, and Wiring
As load weight climbs from Class 3 into Class 4, you need more safety equipment — not less.
Wiring Connectors
- Light Class 3 loads (under 3,500 lbs): a 4-pin harness handles lights only
- Heavier Class 3 and all Class 4 loads: you need a 7-pin harness and an electric brake controller
The brake controller lets you adjust how aggressively the trailer brakes respond relative to the vehicle. Without it, a 10,000-pound trailer will push your truck right through an intersection.
Safety Chains
Every receiver hitch has safety chain attachment points. Cross the chains under the coupler in an X pattern. If the coupler fails, the chains catch the trailer before it hits the ground or another vehicle.
Breakaway Switch
Heavy trailers with electric brakes include a breakaway switch — a small cable clipped to your vehicle. If the trailer separates, the cable pulls out and activates the trailer’s onboard battery to lock its brakes. It’s a mandatory backup for Class 4 loads.
Your Vehicle’s Towing Rating Comes First
This is the most common mistake people make: buying a Class 4 hitch thinking it upgrades their vehicle’s capacity. It doesn’t.
Your vehicle has a maximum towing rating set by the manufacturer. That number accounts for the engine, transmission cooling, brakes, axle ratio, and frame strength. Installing a higher-class hitch doesn’t change any of that.
If your vehicle is rated for 5,000 lbs, a Class 4 hitch still won’t let you safely tow 10,000 lbs. Your transmission and brakes will still struggle — and potentially fail.
Always check your vehicle’s towing capacity first. Then pick the hitch class that matches it.
Hitch Maintenance: Don’t Skip This
A hitch that looks fine on the outside can have hidden fatigue damage. Here’s how to keep yours in shape:
- Clean the receiver tube regularly and coat it lightly with grease or a rust inhibitor. Without it, ball mounts seize inside the tube — especially in states that use road salt.
- Check mounting bolt torque periodically. Towing vibrations loosen bolts over time.
- Inspect welds and paint for cracking or rust weeping from seams. These signal stress fractures underneath.
- Replace a hitch after any overload event — hitting a curb at speed, bottoming out, or a collision. Internal fatigue damage isn’t always visible.
Most Class 3 and Class 4 hitches use a multi-stage powder coat finish for corrosion resistance. It’s durable, but not permanent. Treat it like a tool that needs upkeep.
Class 3 Hitch vs Class 4: Quick Decision Guide
Still not sure which one fits your situation? Here’s a simple way to think about it:
Choose Class 3 if you:
- Drive a crossover, minivan, or half-ton truck
- Tow boats, utility trailers, or travel trailers under 8,000 lbs
- Want the widest selection of compatible accessories
Choose Class 4 if you:
- Drive a three-quarter-ton or one-ton truck
- Regularly haul large boats, equipment trailers, or toy haulers over 8,000 lbs
- Need maximum tongue weight capacity for heavy, unbalanced loads
If you’re on the fence between the two, a Class 3 hitch with a quality weight distribution system often gets the job done at a lower cost — and with less complexity — than jumping straight to Class 4.
The engineering standards exist for good reason. Stay within your hitch’s rated capacity, match every component to the right class, and you’ll have a towing setup that’s safe, stable, and built to last.

