Dealing with a stuck control arm bolt can turn a simple suspension repair into an all-day wrestling match with your vehicle. If you’ve ever found yourself underneath your car, covered in rust flakes and muttering curses at an immovable piece of metal, you’re not alone. This guide will walk you through proven methods to free that stubborn bolt without breaking it (or your spirit) in the process.
Why Control Arm Bolts Get Stuck in the First Place
The Perfect Storm of Corrosion
Control arm bolts live in possibly the worst environment on your vehicle. They’re constantly exposed to water, road salt, and debris while holding critical suspension components together. This creates the perfect conditions for seized bolts.
The main culprits behind stuck bolts include:
- Rust and corrosion: The most common reason bolts seize, especially in areas where road salt is used
- Galvanic corrosion: Occurs between dissimilar metals, essentially “welding” the bolt in place
- Over-torquing: When bolts were tightened too much during previous service
- Age and exposure: Years of environmental abuse takes its toll
A study of oxidation effects on suspension components shows that corrosion can increase the required breakaway torque by up to 500% compared to when the bolt was originally installed.
The Bushing Complication
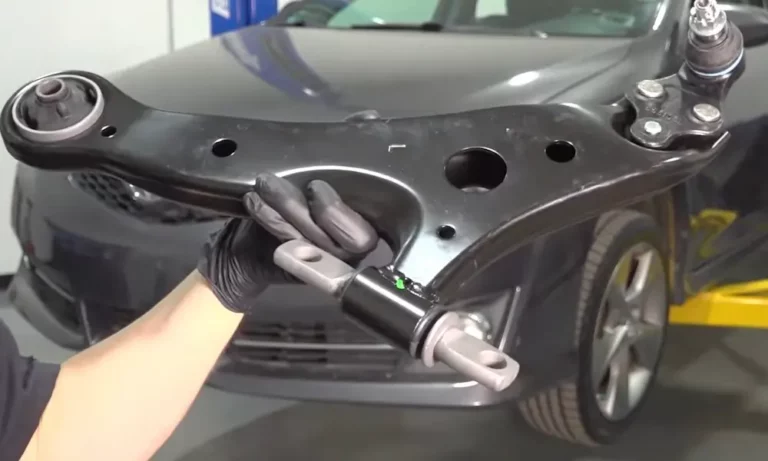
Control arm bolts often pass through rubber bushings with metal sleeves inside. When corrosion forms between the bolt and this metal sleeve, you’ve got a particularly tough situation. The bolt isn’t just stuck in threads—it’s fused to the sleeve itself.
This creates what mechanics call “bushing seizure,” where the entire assembly becomes one corroded unit. You can’t just turn harder; you need to break the chemical bonds that have formed between the metals.
Essential Tools for Removing Stuck Control Arm Bolts
Before attempting removal, gather these tools:
| Tool Category | Essential Items | Optional but Helpful |
|---|---|---|
| Basic Tools | Socket set, breaker bar, torque wrench | Impact wrench, extension bars |
| Penetrants | PB Blaster, Kroil, or ATF/acetone mix | Specialized rust dissolvers |
| Heat Sources | Propane torch, MAP gas torch | Induction heater |
| Cutting Tools | Reciprocating saw with metal blades | Angle grinder, cut-off wheel |
| Safety Gear | Safety glasses, gloves, fire extinguisher | Face shield, respirator |
Method 1: Penetrating Oil – Your First Line of Attack
How to Apply It Properly
Penetrating oil is your first and least destructive option. For maximum effectiveness, follow this process:
- Clean the bolt area as thoroughly as possible
- Apply the penetrant generously to all accessible areas of the bolt
- Tap the bolt head with a hammer to help the oil vibrate into the threads
- Wait at least 30 minutes (overnight is better)
- Reapply and repeat the process 2-3 times
The key is patience. Many DIYers give up after 10 minutes, but professional mechanics know that penetrants need time to work.
The Secret Penetrating Oil Formula
While commercial products work well, many mechanics swear by a homemade mixture: 50% automatic transmission fluid and 50% acetone. Testing has shown this mixture can reduce the required breakout force to as little as 50 foot-pounds compared to 516 foot-pounds for untreated bolts.
Apply this mixture using a small squeeze bottle with a precision tip to target the threads exactly where needed.
Method 2: Heat Application – Breaking the Corrosion Bond
The Science Behind Heat Expansion
When penetrating oil doesn’t work, heat becomes your next option. The science is simple: different metals expand at different rates when heated. This differential expansion breaks the corrosion bonds holding your bolt in place.
For control arm bolts, follow this heating technique:
- Ensure the area is free from flammable materials and fuel lines
- Apply heat directly to the bolt head and surrounding area
- Heat until the bolt turns dull red (approximately 800°F)
- Immediately try to loosen the bolt while it’s still hot
- Apply penetrating oil while cooling for added effectiveness
The hot metal will contract as it cools, often breaking the corrosion bond in the process.
Safety First: Critical Precautions
When using heat on control arm bolts, safety is non-negotiable:
- Keep a fire extinguisher within reach
- Protect surrounding rubber and plastic components with heat shields or wet rags
- Ensure proper ventilation to avoid inhaling toxic fumes
- Never heat near fuel lines, brake lines, or electrical components
- Allow metal to cool completely before touching
Remember that excessive heat can damage bushing materials or alter the bolt’s metallurgical properties, so use just enough heat to free the bolt.
Method 3: Impact and Leverage – Mechanical Persuasion
Using Impact Wrenches Effectively
Impact wrenches deliver rapid rotational impacts that can break through corrosion without snapping the bolt. The hammering action works differently than steady pressure, often succeeding where brute force fails.
- Use the correct size impact socket (never use chrome sockets with impact tools)
- Set the impact wrench to its highest torque setting
- Apply short bursts rather than continuous operation
- Alternate between forward and reverse directions to “rock” the bolt
- Combine with penetrating oil between attempts
Many mechanics recommend electric impact wrenches for control arm bolts as they provide consistent torque without the need for an air compressor.
Breaker Bar Techniques
If you don’t have an impact wrench, a breaker bar with pipe extension can provide the necessary leverage. The key difference is that you’ll need to apply steady, controlled force rather than impact.
For breaker bar success:
- Use the longest breaker bar that fits in your working space
- Add a pipe extension for additional leverage (2-3 feet is ideal)
- Position yourself to apply force using your body weight, not just arm strength
- Apply pressure in short, increasing increments
- Be prepared to catch yourself if the bolt suddenly breaks free
The longer your leverage, the less force you need to apply, reducing the risk of bolt breakage.
Method 4: Cutting and Drilling – When All Else Fails
Strategic Cutting Approaches
When conventional methods fail, you may need to cut the bolt out. This is especially common with control arm bolts that pass through bushings.
The most effective cutting strategy involves:
- Identifying the precise location of the bolt within the assembly
- Using a reciprocating saw with a bi-metal blade to cut through the bolt
- Making strategic cuts that allow the bolt to be removed in sections
- Protecting surrounding components from damage
- Working slowly and methodically to avoid creating additional problems
Some mechanics prefer to cut the control arm bushing around the bolt, then replace the entire control arm. While more expensive, this approach can save significant time and frustration.
Drilling Out Broken Bolts
If a bolt breaks during removal attempts, drilling may be your only option. This requires precision and patience:
- Center-punch the exact middle of the broken bolt
- Start with a small pilot hole (1/8″)
- Gradually increase drill bit size
- Use left-handed drill bits that might catch and extract the bolt as they drill
- If necessary, use a bolt extractor after drilling
Drilling is time-consuming and risks damaging threads, so consider it a last resort before seeking professional help.
Professional vs. DIY: Making the Right Choice
When to Tackle It Yourself
DIY removal makes sense when:
- You have access to proper tools and safety equipment
- The vehicle can remain out of commission for several days if needed
- You have experience with suspension work
- The bolt is accessible and in relatively good condition
- Cost savings is your primary concern
Most DIY attempts cost between $20-50 in supplies if you already have basic tools, compared to $160-350 for professional service.
When to Call It and Seek Professional Help
Know when to wave the white flag. Consider professional help when:
- The bolt has broken during your removal attempts
- You’ve exhausted all available methods without success
- The surrounding components are showing signs of damage
- You don’t have access to specialized tools like torches or impact wrenches
- Time constraints make extended repair sessions impractical
Professional shops have specialized equipment like induction heaters, hydraulic presses, and air hammers that make quick work of even the most stubborn bolts.
Preventing Future Stuck Bolts
Anti-Seize Compounds and Proper Installation
The best way to deal with stuck control arm bolts is to prevent them from seizing in the first place:
- Clean threads thoroughly before installation
- Apply a high-quality anti-seize compound designed for suspension components
- Torque bolts to manufacturer specifications (never over-tighten)
- Consider using stainless steel hardware in corrosion-prone areas
- Re-check torque specifications after 500-1000 miles
Anti-seize compounds create a barrier between metals that prevents galvanic corrosion, making future removal much easier.
Maintenance Practices for Suspension Components
Regular maintenance significantly reduces the likelihood of seized bolts:
- Wash your vehicle’s undercarriage regularly, especially after winter driving
- Apply rust inhibitor to exposed suspension components annually
- Inspect control arms and bolts during routine maintenance
- Address any signs of corrosion immediately
- Consider protective undercoating in harsh climates
These preventive measures not only prevent stuck bolts but also extend the life of your entire suspension system.
The Complete Process: Step-by-Step Removal Guide
Preparation and Assessment
- Safely raise and support the vehicle on jack stands
- Assess the condition of the bolt and surrounding area
- Take photos for reference during reassembly
- Clean the area thoroughly to remove dirt and debris
- Spray the bolt with penetrating oil and let it soak while gathering tools
Execution: From Least to Most Invasive
Follow this progression, moving to the next method only if the previous one fails:
- Apply penetrating oil, wait, then attempt removal with a socket and breaker bar
- Use an impact wrench in short bursts, alternating directions
- Apply heat to the bolt, then immediately attempt removal while hot
- If still stuck, cool the bolt and apply more penetrating oil
- For severely seized bolts, consider cutting methods or professional help
Reassembly Best Practices
After successfully removing the stuck bolt:
- Clean all threads and mating surfaces
- Apply anti-seize compound to new hardware
- Install new bolts/nuts of the same grade or better
- Torque to manufacturer specifications using a torque wrench
- Mark the bolt with paint to monitor for loosening
Real-World Examples and Success Stories
Case Study: 15-Year-Old SUV in the Rust Belt
A 2008 Ford Explorer with severely corroded control arm bolts serves as a perfect example. After penetrating oil failed, the owner applied heat using a propane torch, focusing on the bolt head until it glowed red. While still hot, a 24-inch breaker bar with a 3-foot pipe extension provided enough leverage to break the bolt free without damage.
The key factor was patience—heat was applied in three separate 5-minute sessions before the bolt finally yielded. Total cost: under $30 for supplies versus the $275 quote from a local shop.
Mechanic’s Trick: The Candle Wax Method
One unconventional but effective technique involves applying paraffin candle wax to hot bolts. The process works because:
- Heat the bolt until very hot but not glowing
- Apply candle wax directly to the threads
- The hot metal melts the wax, which gets pulled into microscopic spaces
- The wax acts as both lubricant and penetrant
- The bolt often comes free with surprisingly little effort
Professional mechanics report this method works when even premium penetrating oils fail.
Common Mistakes to Avoid
Don’t fall prey to these common errors when dealing with stuck control arm bolts:
- Rushing the process: Patience is your greatest ally
- Using chrome sockets with impact tools: They can shatter and cause injury
- Applying too much force too quickly: This leads to broken bolts
- Ignoring safety precautions with heat: Fire and burn risks are serious
- Continuing to force a bolt that won’t budge: Know when to change tactics
- Failing to support the vehicle properly: Suspension work requires stable support
Avoiding these mistakes will save you time, money, and potential injury.
Remember, a stuck control arm bolt is a battle of chemistry and physics—approach it methodically, use the right tools, and you’ll eventually emerge victorious. Your knuckles (and wallet) will thank you.