Ever replaced your crankshaft position sensor only to find your check engine light glaring back at you? You’re probably missing one crucial step—the relearn procedure. This calibration process syncs your engine’s computer with the new sensor, and skipping it can leave you with rough running, poor performance, or that annoying P1336 code. Let’s walk through everything you need to know to get it right the first time.
What’s a Crankshaft Position Sensor Relearn and Why Should You Care?
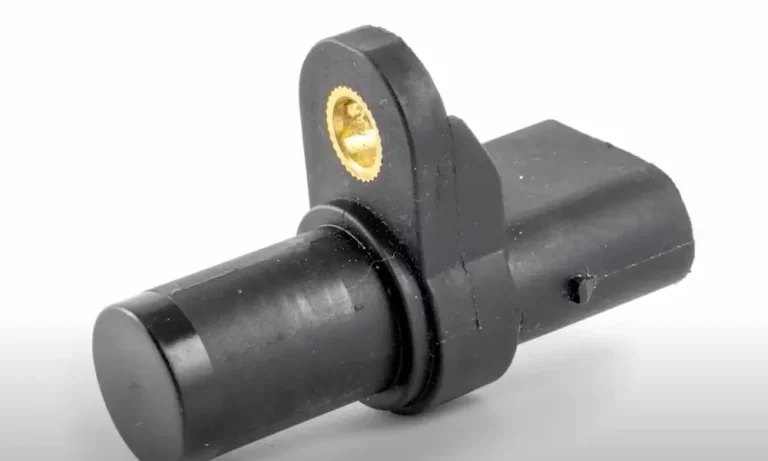
How Your Crankshaft Sensor Actually Works
Your crankshaft position sensor tracks where your crankshaft sits and how fast it’s spinning. Think of it as your engine’s master timekeeper. It watches a toothed wheel (called a reluctor wheel) attached to your crankshaft, counting teeth as they pass by.
Here’s the clever part: that wheel has one or more missing teeth. When the sensor detects these gaps, it creates a unique signal pattern that tells your engine computer exactly where each piston sits. This info controls when your spark plugs fire, when fuel gets injected, and even helps detect misfires.
Your engine computer doesn’t just read this data—it learns it. Over time, it adapts to tiny variations in your specific engine’s setup. Manufacturing tolerances mean no two engines are exactly alike, and your computer compensates for these differences.
When You Absolutely Need to Do a Relearn
You’ll need a crankshaft position sensor relearn after certain repairs or replacements. Don’t skip this step if you’ve done any of these jobs:
- Replaced the crankshaft position sensor itself
- Installed a new or reprogrammed engine computer (ECM/PCM)
- Rebuilt the engine or done major internal work
- Changed timing chains, timing belts, or harmonic balancers
- Swapped the flywheel or flexplate
- Installed a new clutch
Any work that messes with the relationship between your sensor and that reluctor wheel requires relearning. Modern vehicles (1996 and newer with OBD-II) especially need this procedure because federal regulations require continuous misfire monitoring.
What Happens If You Skip the Relearn
Skip this procedure and you’re asking for trouble. Your check engine light will pop on, usually with codes like P1336 or P0315. These codes scream “Crankshaft Position System Variation Not Learned.”
But the problems go deeper than just a warning light:
Misfire detection goes haywire. Your computer might blame the wrong cylinder for misfires, sending you chasing phantom problems. Or it might not catch misfires at all.
Performance takes a hit. You might notice reduced power, especially under load. Some engines even drop into limp mode when you punch the throttle.
Emissions testing becomes a gamble. Without proper misfire monitoring, your vehicle might flunk its emissions test.
Manufacturer-Specific Relearn Procedures: They’re All Different
GM’s Crankshaft Variation Learn Process
General Motors keeps things pretty consistent across their lineup. Their relearn procedure needs a professional scan tool that can talk to your engine computer and command it through test sequences.
Here’s how GM does it:
First, get your engine fully warmed up. Block your wheels, set the parking brake hard, and put the transmission in park (or neutral for manuals). Your scan tool needs to support GM’s special functions—basic code readers won’t cut it.
Navigate to the “Crankshaft Position System Variation Learn” function. When you hit start, you’ll need to rev the engine to a specific RPM:
- V8 engines: 4,000 RPM
- V6 engines: 5,150 RPM
Hold that RPM steady until your engine computer cuts the fuel. This happens fast—usually within 10-30 seconds. The second fuel cuts off, release the throttle immediately. Your scan tool will confirm success.
Some folks try manual drive cycle methods involving specific speeds and cruise times, but they’re unreliable. Traffic, hills, temperature—everything affects success rates. Stick with the scan tool method.
Ford’s Misfire Monitor Correction Protocol
Ford calls their version “Misfire Monitor Neutral Profile Correction.” It works differently than GM’s approach and takes longer to complete.
You’ll need Ford IDS equipment or a compatible scan tool with Ford-specific capabilities. Some techs use FORScan software with the right interface, though dealer tools work best.
Ford’s process demands patience:
Warm up your engine completely—Ford systems need higher temps than other brands. Find the service functions menu and locate the misfire monitor correction procedure.
Once started, you’ll hold engine speed between 3,400 and 4,000 RPM. Unlike GM’s quick 30-second process, Ford’s system might take several minutes while it calculates new baseline parameters.
This procedure matters especially after flywheel, clutch, or timing work since Ford mounts sensors near the flywheel at the engine’s rear.
Chrysler, Dodge, and Jeep: The Easy Route
Chrysler products offer the simplest relearn procedures. Many models handle it automatically—just let the engine idle for 2-5 minutes after sensor replacement.
The engine computer establishes timing relationships on its own without scan tool help. That said, scan tools still provide better reliability and let you verify success.
When using a scan tool, look for “Cam Crank Relearn” under special procedures. Chrysler’s process involves less complex RPM games than other brands. Often you’ll just need steady idle or gentle throttle inputs.
Some Jeep Wrangler owners report success with simple idle procedures, though scan tool verification prevents comebacks.
Honda and Acura: Temperature Matters
Honda’s relearn procedure gets picky about operating temperature. Your engine needs to reach at least 167°F before the computer will accept a relearn.
Connect a Honda-compatible scan tool and watch the coolant temperature display. Don’t rush this—hitting the minimum temp isn’t enough. Let it stabilize.
Honda’s procedure involves specific RPM targets hit within precise timing windows. You might need multiple acceleration and deceleration cycles. The system will clearly tell you if it worked or failed.
Manual methods don’t work for Honda. You need the right scan tool with Honda-specific capabilities, whether that’s dealer equipment or a quality aftermarket tool.
What Tools You’ll Actually Need
Professional Scan Tools: The Gold Standard
Quality scan tools make this job straightforward. Professional equipment like Snap-On, Mac Tools, or GM’s Tech2 system offer direct access to manufacturer special functions. These tools command your engine computer through exact test sequences.
But you don’t need to drop thousands on top-tier equipment. Mid-range tools from Autel, Launch, and similar brands often include relearn functions at reasonable prices.
Key features to look for:
- Bidirectional communication (not just code reading)
- Manufacturer-specific software for your vehicle brand
- Special functions or service procedures menu
- Regular software updates
Tools like the CGSULIT SC530 or Autel MaxiCom series support multiple manufacturers. Just verify compatibility with your specific vehicle before buying.
Budget-Friendly Options That Actually Work
PC-based solutions offer professional capabilities at DIY prices. Software like Tech2Win with J2534-compatible interfaces can perform dealer-level procedures for much less money.
You’ll need a laptop and the right interface hardware, but you’ll gain access to functions that basic scan tools can’t touch.
Budget tool comparison:
| Tool Type | Price Range | Pros | Cons |
|---|---|---|---|
| Professional (Snap-On, Tech2) | $2,000-$5,000+ | All functions, reliable, regular updates | Expensive, often brand-specific |
| Mid-range (Autel, Launch) | $300-$1,500 | Multi-brand support, most functions | May lack some specialized procedures |
| PC-based (Tech2Win, etc.) | $100-$500 | Dealer functions, affordable | Requires laptop, setup complexity |
| Phone apps | $20-$100 | Cheap, portable | Unreliable for relearns, limited control |
Smartphone OBD-II apps claim relearn capabilities, but they’re hit-or-miss. For critical procedures, invest in proven equipment.
The Manual Method Reality Check
Manual drive cycle procedures exist, especially for GM vehicles. You’ll drive specific patterns—accelerate to set speeds, cruise for exact times, decelerate without brakes.
Sounds simple, but reality bites. You need perfect conditions: flat roads, no traffic, stable weather. Even then, success takes 15-20 minutes of precise driving.
What kills manual relearns:
- Stop-and-go traffic
- Hilly terrain
- Temperature extremes
- Performance modifications
- Multiple trouble codes
Troubleshooting Failed Relearns
Common Diagnostic Codes You’ll See
P1336 and P0315 are your main relearn codes. P1336 shows up mostly in GM vehicles, while P0315 is more universal.
Secondary codes often appear too:
- P0335: Crankshaft Position Sensor Circuit problem
- P0336: Sensor Range/Performance issue
- P0300-P0308: Misfire codes from improper calibration
These secondary codes often clear after successful relearn. If they stick around, you’ve got real sensor or wiring problems.
Why Relearns Fail and How to Fix Them
Temperature issues kill more relearns than anything else. Your engine must reach full operating temp—no shortcuts. Cold relearns simply won’t work.
Throttle control trips up DIYers. You need smooth, precise inputs. Jerky throttle movements confuse the learning process. Some vehicles with electronic throttle control are especially sensitive.
Electrical gremlins cause mysterious failures. Check:
- Crankshaft sensor connector for corrosion
- Wiring harness for damage or chafing
- Ground connections (often overlooked)
- Battery voltage during procedure
Vehicle modifications create complications. Aftermarket ECM tunes, performance parts, or non-OEM sensors might prevent standard procedures from working. You’ll need specialized equipment or modified approaches.
Advanced Diagnostic Approaches
When standard methods fail repeatedly, dig deeper. Oscilloscope testing reveals signal problems invisible to basic scan tools. You’re looking for:
- Clean signal patterns without glitches
- Proper voltage amplitude (usually 0-5V or 0-12V depending on sensor type)
- Consistent gap timing between pulses
Mechanical inspection catches physical problems. Pull the sensor and check:
- Reluctor wheel teeth for damage or debris
- Sensor tip for metal shavings (indicates bearing failure)
- Air gap between sensor and reluctor wheel (usually 0.020″-0.050″)
Computer problems are rare but nasty. Corrupted memory or failed input circuits prevent relearn even when everything else checks out. These situations need ECM replacement or professional reprogramming.
Real-World Scenarios and Solutions
The “I Already Replaced the Sensor Twice” Situation
You’ve swapped sensors multiple times but codes keep returning. Stop replacing parts and start diagnosing. This pattern screams underlying problems, not failed sensors.
Check wiring harness routing. Harnesses rubbing against engine parts develop intermittent shorts. Look for melted insulation, especially near exhaust components.
Reluctor wheel damage creates impossible situations. One missing or damaged tooth throws off the entire pattern. You’ll need to inspect or replace the reluctor wheel—a bigger job than just sensor replacement.
The “Scan Tool Says It Worked But Codes Return” Problem
Successful completion on the scan tool doesn’t guarantee proper operation. Codes returning within minutes indicate the computer couldn’t maintain learned values.
This often points to:
- Intermittent sensor operation (check connector and wiring)
- ECM memory problems (needs reprogramming or replacement)
- Mechanical issues like bearing noise interfering with signals
Drive the vehicle through its full operating range. Some problems only appear under load or at specific RPM ranges. Monitor live data during test drives to catch intermittent issues.
The “Different Scan Tools Give Different Results” Mystery
Tool compatibility matters more than you’d think. Some aftermarket scan tools can’t fully command manufacturer-specific procedures.
Borrow or rent known-good equipment to verify results. A successful relearn with dealer tools confirms your original equipment lacks proper functionality.
Update your scan tool software before blaming the vehicle. Manufacturers regularly release updates adding support for newer procedures or fixing bugs in existing functions.
The Bottom Line on Crankshaft Position Sensor Relearn
Getting your crankshaft position sensor relearn right the first time saves hours of frustration and repeat repairs. Whether you’re a DIYer with the right scan tool or a professional tech, understanding manufacturer-specific procedures makes all the difference.
Don’t skip relearn after sensor replacement—those few extra minutes prevent weeks of chasing phantom problems. Invest in proper equipment for your vehicle brand, follow procedures exactly, and verify success before calling the job done.
The technology keeps evolving, but the fundamentals remain constant: proper temperature, correct procedure, quality parts, and verification testing. Master these basics and you’ll handle crankshaft position sensor relearn procedures confidently across any vehicle that rolls into your garage.