Your AC stopped blowing cold air, and you’re staring at that spinning pulley wondering what went wrong. The AC compressor clutch is usually the culprit — but figuring out why it’s failing takes more than a quick look. This guide walks you through every test, from listening for weird sounds to measuring voltage with a multimeter. Stick around — the fix might be simpler than you think.
What Does the AC Compressor Clutch Actually Do?
Before you start testing, it helps to know what you’re dealing with.
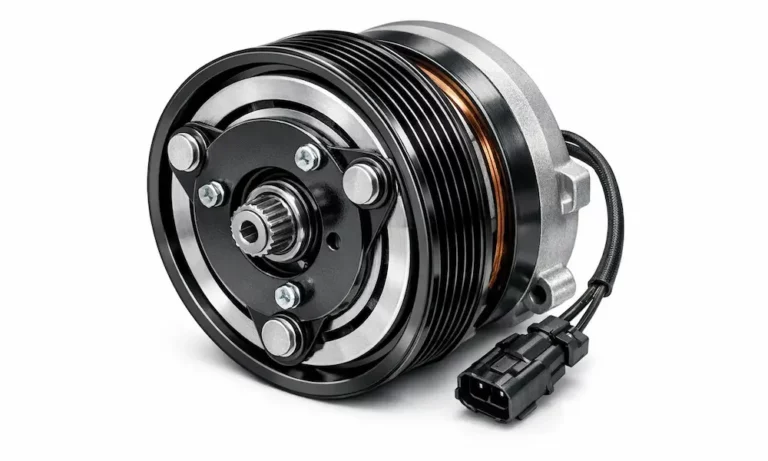
The clutch sits on the front of your AC compressor. It has three main parts:
- The pulley — spins constantly whenever the engine runs
- The field coil — an electromagnet that creates a magnetic pull when you switch on the AC
- The armature plate — snaps onto the spinning pulley when the magnet engages
When you hit the AC button, electricity flows through the field coil, the magnetic field pulls the armature plate into contact with the pulley, and the compressor starts pumping refrigerant. Simple concept — but a lot of things can break that chain.
Step 1 — Listen Before You Touch Anything
Your ears give you the first clues. Start the engine, leave the AC off, and just listen near the compressor.
What You Hear With the AC Off
The pulley should spin quietly. If you hear a continuous whine, chirping, or grinding, the pulley bearing is likely failing. That sound stays constant whether the AC is on or off — it doesn’t care about your dashboard switch.
Don’t ignore a grinding bearing. A seized pulley can snap your serpentine belt, which means your power steering and alternator stop working too.
What You Hear When You Switch the AC On
A healthy clutch makes one sharp metallic click when it engages, then goes quiet. Here’s what different sounds mean:
| Sound Pattern | What It Tells You |
|---|---|
| Sharp click + quiet operation | Clutch is engaging normally |
| Prolonged screech on engagement | Slipping armature — oil contamination or weak magnetic field |
| Rapid chattering or clicking | Intermittent power — bad relay or poor ground |
| Metallic rattling while AC runs | Internal compressor damage |
| No click, no rotation | Open field coil or blown fuse |
Step 2 — Do a Visual Inspection
Now look at the clutch face with the engine off. Use a flashlight and get close.
Orange Dust and Blued Metal
A fine orange or brownish powder around the clutch plate is called “dusting.” It’s oxidized metal — basically the clutch wearing itself to death through slippage. If you see it, the clutch is near the end of its life.
Rainbow-colored “bluing” on the steel surfaces means those parts got dangerously hot. That heat usually comes from a slipping clutch or a dying bearing transferring heat to the metal nearby.
Oil Contamination
Oily residue on the clutch face is bad news. AC oil mixed with refrigerant leaks out when the compressor shaft seal fails. That oil lands on your friction surfaces and causes the clutch to slip even when the magnetic field is strong. Use a UV light and dye to confirm a shaft seal leak if you suspect it.
Belt Condition
A glazed, cracked, or worn serpentine belt can prevent the compressor from spinning at the right speed even if the clutch is perfect. Check the belt grooves for debris buildup and look at the back side for glossy spots from heat exposure.
Step 3 — Check the Fuse and Relay
If the clutch isn’t engaging at all, start with the easy electrical stuff first.
Find and Test the Fuse
The AC compressor clutch pulls high current, so it gets its own fuse in the engine compartment fuse box. Don’t just eyeball it — use a multimeter set to continuity or resistance. Hairline fractures in the fuse element are almost invisible to the naked eye.
A blown fuse isn’t always random. It often means the coil has an internal short or a wire is rubbing against the chassis and creating a short circuit. Replace the fuse, but also look for why it blew.
Do the Relay Swap Test
The AC relay switches high current to the clutch based on a signal from your engine control module. Relays fail in several ways — burnt contacts, a broken internal coil, or contacts that weld shut.
The fastest test? Find an identical relay in your fuse box — horn, wipers, or fuel pump relays often match — and swap it into the AC slot. If the AC suddenly works, your old relay is toast.
If swapping doesn’t help, check the relay socket itself with a test light. You need battery voltage at the load pin and a proper control signal from the ECM at the trigger pins.
| Relay Failure Type | What You’ll Notice |
|---|---|
| Open internal coil | No click when AC turns on |
| Pitted contact points | Relay clicks but clutch gets no power |
| Welded contacts | Clutch stays on even with AC off |
| Corroded socket terminals | Intermittent AC or heat near fuse box |
Step 4 — Test the Field Coil With a Multimeter
The relay works, the fuse is good, but the clutch still won’t engage? Time to test the field coil directly.
Resistance Test (Ohms)
Disconnect the electrical connector at the compressor. Set your multimeter to ohms and probe both terminals of the coil.
Standard spec for a 12V clutch coil: 3.0 to 5.0 ohms
- Below 2.0 ohms → internal short — the coil is pulling too much current and will blow fuses
- “OL” or infinite resistance → open circuit — the wire inside the coil is broken
- Within range → coil looks healthy electrically
One important note: copper wire resistance changes with temperature. A coil that reads 3.5 ohms cold might read 4.8 ohms after running for an hour. Some coils develop what’s called an “intermittent open,” where heat causes a tiny break in the wire to spread apart just enough to kill the circuit. This is why your AC might work fine for ten minutes, then quit until the car cools down.
Voltage Drop Test (Live Test)
Reconnect the harness. Start the engine and turn the AC on. Use a multimeter to back-probe the connector and check the voltage reaching the coil while it’s powered.
You want 13.5 to 14.2 volts — close to your charging system voltage. If you’re seeing 10 or 11 volts, the magnetic field will be too weak to pull the armature firmly, and the clutch will slip and overheat.
Low voltage means resistance somewhere in the wiring. Do a voltage drop test by placing the positive probe on the battery positive post and the negative probe on the clutch connector’s positive terminal with the circuit live. More than 1.0 volt of drop means you’ve got a corroded connector or damaged wire that’s stealing power.
Step 5 — Measure the Air Gap
Here’s one most people skip — and it explains a lot of “mystery” clutch failures.
The air gap is the physical space between the pulley face and the armature plate when the clutch is off. Magnetic fields weaken fast with distance. Too wide a gap, and even a perfect coil with full voltage can’t pull that plate in.
How to Check It
Use a set of feeler gauges. Slide them into the gap between the pulley and armature at several points around the circumference.
Standard acceptable range: 0.35 mm to 0.60 mm (0.014″ to 0.024″)
If you’re above 0.80 mm, especially on a hot engine, the clutch will struggle or fail to engage entirely.
| Compressor Type | Air Gap Spec (mm) | Adjustment Method |
|---|---|---|
| Sanden SD Series | 0.40 – 0.80 mm | Shaft shims |
| Frigidaire V5 / R4 | 0.38 – 0.64 mm | Press-fit hub |
| Ford FS10 / FX15 | 0.45 – 0.85 mm | Shaft shims |
| Chrysler C171 | 0.50 – 0.90 mm | Shaft shims |
| York / T-CCI Style | No adjustment | Full replacement |
The air gap widens naturally as the friction material wears down — same idea as brake pads thinning over time. The good news? On most compressors, you can remove the armature plate and pull out one shim from the shaft to bring the plate closer to the pulley. That often fixes the problem without replacing a single electrical component.
Step 6 — Check for Computer-Driven Inhibits
Modern vehicles don’t let the dash switch directly control the clutch. The AC request goes to a control module first, and the module decides whether to allow engagement.
Refrigerant Pressure Switches
Low refrigerant pressure triggers the low-pressure switch, and the module shuts off the clutch to protect the compressor from running without lubrication oil. High pressure from a blocked condenser or failed cooling fan triggers the high-pressure switch for the opposite reason — to prevent a hose rupture.
Test a simple two-wire switch with a continuity check. For a three-wire pressure transducer, measure the signal voltage and verify it falls within the “safe” operating band for your specific vehicle.
Engine Load and Overheating Protections
Flooring the throttle? The ECM temporarily cuts the clutch to free up engine power. Engine coolant temp too high? Same thing — the computer kills the AC to reduce heat load at the radiator.
You need a scan tool with live data to catch these inhibits. Look for an “AC Request Denied” status and check what condition is triggering it. Without a scan tool, you’re guessing.
Step 7 — Perform a Bypass Test (Carefully)
When you’ve tested everything and still aren’t sure if the fault is in the clutch or the control circuit, a bypass test cuts through the confusion.
Remove the AC relay and use a fused jumper wire (10–15 amp fuse inline) to bridge the battery power pin to the clutch feed pin in the relay socket. If the clutch clicks and engages, the problem is in the control side — relay, fuse, or module inhibit. If nothing happens, the fault is in the wiring to the compressor or the coil itself.
Critical warning: Never run a bypassed compressor on a system with no refrigerant. Without refrigerant, there’s no oil circulating to lubricate the compressor internals. Running it dry causes internal seizure in minutes. A bypass test is a quick check only — a few seconds to confirm movement. Not a way to run the system.
How to Bench Test a Compressor Clutch
Installing a salvaged or new compressor? Test it before it goes on the car.
Connect a 12-volt source with a 10–15 amp inline fuse. Touch the negative lead to the compressor housing and the positive lead to the coil terminal. The armature plate should snap forward firmly and quickly. A slow, lazy engagement means a weak coil or incorrect air gap.
With the clutch engaged, try turning the compressor shaft by hand. It should rotate with moderate resistance — pistons moving inside — but no grinding or hard stops. A shaft that won’t budge means a seized compressor. With the clutch released, the pulley should spin freely and silently. Any roughness means the pulley bearing is damaged and needs replacing before installation.
The Diagnostic Checklist at a Glance
Work through these in order — this sequence saves you from replacing the wrong part:
- ✅ Listen for bearing noise with AC off
- ✅ Listen for click and slippage noise when AC turns on
- ✅ Visually check for dusting, bluing, and oil contamination
- ✅ Test the fuse with a multimeter (not just your eyes)
- ✅ Swap-test the relay with an identical unit from the fuse box
- ✅ Measure field coil resistance (3.0–5.0 ohms typical)
- ✅ Check live voltage at the coil connector (13.5–14.2V target)
- ✅ Measure the air gap with feeler gauges (0.35–0.60 mm typical)
- ✅ Use a scan tool to check for ECM inhibit conditions
- ✅ Perform a relay bypass test only if needed — and only briefly
Knowing how to test an AC compressor clutch properly means you’re not throwing parts at the problem and hoping. A $12 relay swap or a simple shim adjustment fixes a lot of cases that would otherwise look like a full compressor replacement. Start systematic, follow the evidence, and your AC will be back to making you comfortable on the hottest days of the year.