Got a rough idle, a stumble off the line, or a bog when you floor it? Your Edelbrock carburetor probably just needs a proper tune. The good news? These carbs are designed to be tuned without special tools or a degree in engineering. Read to the end — every symptom has a fix, and it’s simpler than you think.
Before You Touch Anything: Check These First
Here’s the thing most people miss. A “bad carburetor” is often a bad diagnosis. Before you start adjusting anything, verify these basics:
- Fuel pressure: It must sit between 5.5 and 6.0 psi. Anything over 6.5 psi forces fuel past the needle and seat, flooding the engine. If your pump runs hot, add an Edelbrock #8190 regulator to hold a steady supply.
- Ignition timing: Retarded timing mimics a rich carburetor almost perfectly. Set timing first.
- Vacuum leaks: A leaking intake gasket throws every circuit off. Spray carburetor cleaner around the base while the engine idles. If RPM jumps, you’ve found your real problem.
- Spark plugs: Wrong heat range plugs give you false readings when you’re trying to read the fuel mixture.
Fix these before you touch a single screw. You’ll save yourself hours of chasing ghosts.
How to Install an Edelbrock Carburetor Correctly
If you’re starting fresh, installation matters more than most people realize.
- Clean the manifold surface completely. No old gasket material, no debris.
- Never use RTV or gasket cement on the carb gasket. It migrates into the idle air bleeds and permanently offsets your calibration.
- Use 5/16-inch flat washers under the mounting nuts, especially on EnduraShine™ units.
- Tighten the nuts in a cross-diagonal pattern — hand tight with a short wrench only. Overtightening cracks the aluminum base and creates a vacuum leak that’s impossible to fix.
| Component | Specification | Notes |
|---|---|---|
| Mounting torque | Hand-tight, cross-diagonal | Overtightening cracks the base |
| Fuel pressure | 5.5–6.0 psi (max 6.5) | Use a regulator if needed |
| Vacuum port (timed) | Spark port | No vacuum at idle for emission distributors |
| Vacuum port (manifold) | Full vacuum | For non-emission distributors or accessories |
How to Tune an Edelbrock Carburetor Idle Mixture
This is the adjustment most people reach for first — and it’s the one that makes the biggest difference in daily drivability.
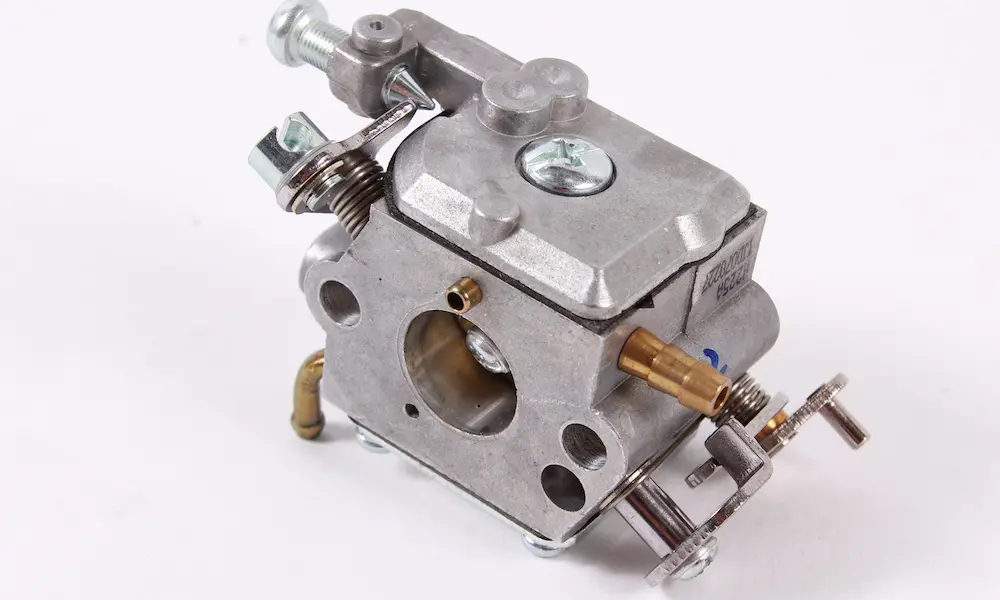
The two idle mixture screws (IMS) sit at the lower front of the carburetor base. They control how much pre-emulsified fuel enters the engine at idle. Here’s the right way to set them:
Step-by-Step Idle Mixture Adjustment
- Warm the engine fully. The choke must be completely open (vertical plate). Cold tuning gives you wrong numbers.
- Reset both screws to baseline. Turn them clockwise until they lightly seat — don’t force them. Back out exactly 1.5 turns. This is your starting point.
- Connect a vacuum gauge to a manifold vacuum port. Higher vacuum = more efficient combustion.
- Adjust one screw at a time in 1/8-turn increments. Turn it out (counter-clockwise) and watch the vacuum gauge climb. Keep going until vacuum peaks.
- Apply the lean-best rule. Once you hit peak vacuum, turn the screw clockwise just enough to drop RPM by 20. This lean-best idle setting prevents carbon buildup on plug insulators and keeps combustion clean.
- Repeat on the second screw.
If the screws have zero effect even when you turn them out past 3 turns, your idle fuel restrictors (IFR) may be too small. More on that later.
Fixing the Off-Idle Stumble: Transition Circuit Tuning
That hesitation right off idle — the brief stumble before the engine picks up — almost always traces back to the transition circuit or a misadjusted idle speed.
Here’s the trap: people set idle speed too high (via the throttle stop screw) to keep a lumpy cam from stalling. That over-exposes the transition slot (T-slot), and the engine pulls fuel from the wrong circuit at idle. When you tip into the throttle, that fuel is already gone. The result? A bog right off idle.
The fix: keep T-slot exposure to 0.030–0.060 inches at idle. If you need more air to support a big cam, drill small 1/16-inch holes in the throttle plates instead of opening the butterflies further. This keeps the T-slot relationship correct and preserves off-idle response.
Accelerator Pump: Curing the Tip-In Bog
The accelerator pump delivers an instant shot of fuel when you snap the throttle open. Without it, the engine leans out briefly and bogs. The Edelbrock pump arm has three holes that change the stroke length and volume:
| Hole Position | Pump Volume | Best For |
|---|---|---|
| Top (closest to pivot) | Highest / longest | Heavy vehicles, low-vacuum engines |
| Middle (standard) | Moderate | Most street performance engines |
| Bottom (furthest) | Lowest / shortest | Light vehicles, manual transmissions |
- Bog on initial throttle snap? Move the linkage to the top hole for more fuel.
- Smoky or sluggish under acceleration? Move to the bottom hole — you’re getting too much fuel.
Start in the middle position and work from there. One hole at a time, test drive between changes.
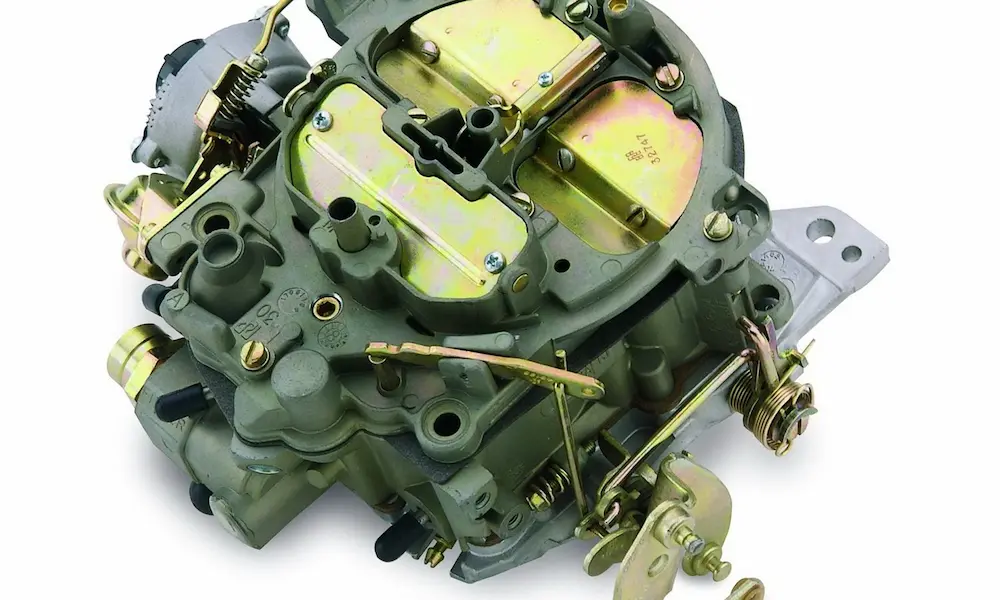
Primary Metering: Metering Rods, Jets, and Step-Up Springs
This is where you fine-tune the fuel curve across cruise and power conditions. The Edelbrock system uses a metering rod that slides inside the primary jet, controlled by a vacuum piston and a step-up spring.
- Cruise step (large diameter): Rod seated in the jet → restricts flow → lean mixture for economy
- Power step (small diameter): Rod lifted out → more fuel flows → rich mixture for acceleration
The step-up spring controls when the rod lifts. It’s the most important part of primary tuning.
Step-Up Spring Selection Chart
| Spring Color | Vacuum Rating | When It Transitions to Power Mode |
|---|---|---|
| Blue | 3″ Hg | Very late — stays lean longest |
| Yellow | 4″ Hg | Good for engines with 8–10″ Hg idle vacuum |
| Orange | 5″ Hg | Factory standard on most models |
| Pink | 7″ Hg | Earlier transition — good for heavier cars |
| Silver | 8″ Hg | Earliest transition — fixes mid-throttle sags |
If your car surges at steady cruise, the cruise step is too large (too lean). If it stumbles during moderate acceleration before the secondaries open, swap to a stiffer step-up spring. A higher inHg rating triggers the power step sooner — exactly what a heavy car or a performance cam needs.
Using the Calibration Reference Chart
Edelbrock provides model-specific calibration charts for the 1405, 1406, 1906, and other models. These charts use a grid to help you pick the right rod-and-jet combination based on how lean or rich you need to go in cruise vs. power mode.
For the #1406 (600 CFM Performer), stock Reference #1 is:
- Main jet: .098″ (P/N 1427)
- Metering rod: .075″ × .047″ (P/N 1459)
- Step-up spring: Yellow (4″ Hg)
A common street performance upgrade is Reference #17:
- Main jet: .098″ (unchanged)
- Metering rod: .071″ × .047″ (P/N 1453) — richer cruise profile
Read spark plugs or use an AFR gauge to confirm you’re moving in the right direction.
Secondary Air Valve Tuning (AVS and AVS2)
The secondary barrels open based on air velocity demand, not just throttle position. A velocity-sensitive air valve prevents a massive air dump that would kill the engine’s vacuum signal.
Performer Series (1400s) vs. AVS/AVS2 (1800s and 1900s)
The Performer Series uses a counterweighted air valve — fixed opening rate, no adjustment. If it bogs on secondary opening in a lighter vehicle, advanced tuners add small magnets to slow the valve or drill the weights to speed it up.
The AVS and AVS2 feature an adjustable spring-loaded valve. This is far easier to tune:
| Adjustment | Action | Result |
|---|---|---|
| Eliminate bog | Tighten screw 1/8 turn clockwise | Slower secondary opening |
| Add top-end power | Loosen screw 1/8 turn counter-clockwise | Faster secondary opening |
Make changes in 1/8-turn increments and test between each adjustment. If secondary WOT performance still reads lean, increase secondary jet diameter in .003-inch increments.
The AVS2 Advantage: Annular Boosters
The AVS2 series uses annular boosters — multiple small fuel discharge orifices arranged in a ring rather than a single downleg. This creates a finer fuel mist, which means:
- Better throttle response in the mid-range
- Fewer flat spots
- Improved part-throttle fuel economy
AVS2 carbs often need less overall enrichment to hit the same drivability targets as a Performer series carb. The fuel just mixes more thoroughly.
Float Level: The Foundation of Every Circuit
Get the float wrong and every other adjustment fights you. The float controls the fuel level in the bowl, which creates head pressure at the main jets.
- Too high: Rich across the board, fuel spills during hard braking
- Too low: Lean under hard acceleration, potential engine damage
Float Adjustment Specs
| Measurement | Target | How to Adjust |
|---|---|---|
| Float height | 7/16 inch | Bend the small tab at the needle hinge |
| Float drop | 15/16 to 1-1/4 inch | Bend the outboard tab to limit travel |
Always use needle-nose pliers on the tabs. Pushing directly on the needle scores the Viton tip — and a scored needle floods permanently. Float drop matters too: it keeps the needle from cocking sideways when the bowl empties during high-demand events.
Electric Choke Adjustment
The electric choke uses a bimetallic coil heated by a 12V element. As it warms up, it relaxes and opens the choke plate from horizontal (closed) to vertical (open).
- Rotate the cap clockwise → choke stays closed longer → richer cold start
- Rotate counter-clockwise → opens sooner → leaner cold start
- Fast idle cam should keep RPM between 1,500 and 1,800 RPM during warm-up
Connect the choke to a switched 12V source only — not a constant-hot wire. If it stays on a constant-hot, the coil pre-heats before startup and the choke opens immediately, leaving you with a cold, hard-to-start engine.
A choke that won’t open fully fouls plugs fast. If the engine runs rough and rich after 5 minutes of driving, check that the choke plate is fully vertical once warm.
Advanced Fixes: IFR Resizing and Heat Soak
Idle Fuel Restrictors (IFR)
If your idle mixture screws do nothing even at 3.5 turns out, the idle fuel restrictors inside the primary boosters are too small. Enlarge them with numbered drill bits — go from .030″ to .033″ in one step. This increases baseline fuel volume to the idle and transition circuits.
You can also restrict the idle air bleeds (IAB) with fine wire to pull more fuel at a given throttle opening. It’s reversible and helps sharpen off-idle response on low-vacuum engines.
Heat Soak and Vapor Lock
Ethanol in modern pump gas lowers fuel boiling point. After a hot shutdown, fuel percolates into the intake manifold — and the car won’t restart for 20 minutes.
Two simple fixes:
- Install a phenolic spacer (like Edelbrock #9266) between the carb and manifold. It creates a thermal break.
- Route fuel lines away from exhaust headers and sleeve them with heat-reflective material.
Your Edelbrock Tuning Sequence (Follow This Order)
Skipping steps wastes time. Work through this hierarchy and you’ll solve 90% of problems efficiently:
- Verify system integrity — fuel pressure at 5.5 psi, no vacuum leaks, timing set
- Set float level — 7/16″ height, 15/16″ drop
- Calibrate idle mixture — use a vacuum gauge, aim for peak vacuum then back off 20 RPM
- Fix transition stumble — check T-slot exposure, adjust idle speed method if needed
- Tune the accelerator pump — match hole position to vehicle weight and response
- Select primary metering — use calibration charts to pick the right rod/jet/spring combo
- Dial in the secondaries — adjust air valve spring (AVS/AVS2) and secondary jet if needed
Work through it once, systematically, and you’ll end up with a carburetor that runs cleaner and crisper than most fuel injection setups you’ll find on a classic build.